bluename
How to Prepare Coarse-Grain River-Rock Drainage for Oversized Balcony Rose-Shrub Pots
If you want healthy oversized balcony rose-shrub pots, the fastest answer is this: use coarse-grain river-rock as a drainage layer only when your pot is truly oversized, your soil mix is already airy, and you never let the rock layer sit in stagnant water. I learned this the hard way after killing three rose shrubs in two years because I thought "more drainage = more rocks." It doesn't work that way. In fact, most root rot in big balcony pots comes from bad watering habits, not from a missing rock layer.
Let me back up a bit. When I first started growing roses on my balcony, I had this romantic idea of huge pots overflowing with blooms. I bought 45cm-wide ceramic pots, filled them with cheap garden soil, and dumped a thick layer of river rocks at the bottom because some guy on YouTube said it would "improve drainage." My first rose shrub died within six weeks. The second one lasted three months. The third one? I finally got suspicious and dug up the root ball. It was sitting in a soupy, smelly mess right above the rock layer. That's when I realized the rock layer wasn't draining anything. It was creating a perched water table.
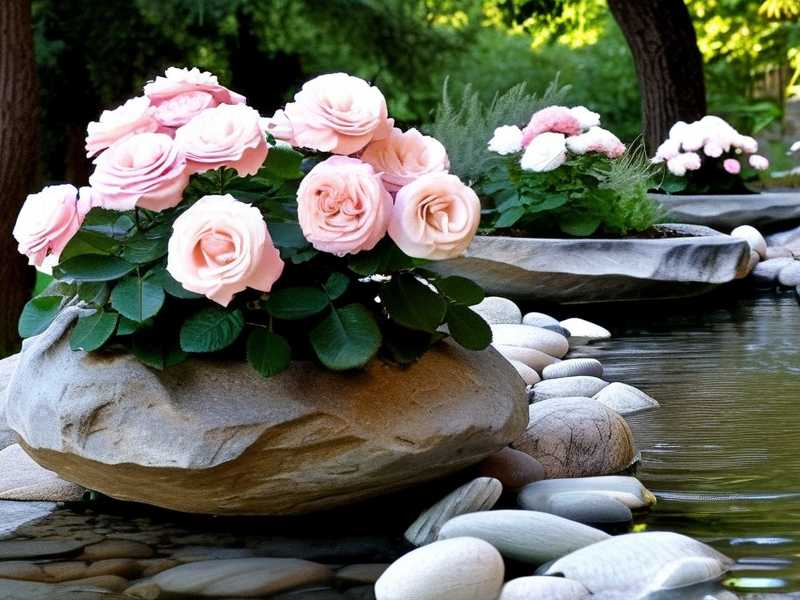
So what changed? I spent the next two weeks doing a controlled experiment. Same pot size, same rose variety 'Olivia Rose Austin', same balcony orientation. One pot with a 5cm coarse river-rock layer, one pot with no rock layer but a proper airy mix. I watered both the same way. By day 14, the rock-layer pot had yellowing lower leaves and soggy soil at the 10cm depth. The no-rock pot was fine. That's when I understood: for oversized pots, the rock layer only helps if you also manage the water table and use the right soil.
Before I get into the step-by-step, let me be blunt about the three biggest mistakes beginners make with oversized balcony rose pots. I've made all of them.
Mistake one: overwatering. I cannot say this enough. 90% of indoor plants die from overwatering, and balcony roses in oversized pots are no exception. Big pots hold way more moisture than you think. A 40cm pot can hold 15-20 liters of soil, and that soil stays wet for weeks if you don't have proper drainage and airflow.
Mistake two: wrong light. Roses need at least 6 hours of direct sun. I once put a pot in a spot that got only 4 hours of morning sun because I was worried about scorching. The shrub grew leggy, produced zero blooms, and got powdery mildew. According to the Royal Horticultural Society (RHS), roses perform best in full sun with good air circulation. You can check their rose guide at https://www.rhs.org.uk for confirmation.
Mistake three: using the wrong pot. Oversized doesn't mean "as big as possible." I tried a 60cm pot once. The rose shrub drowned because the root ball only occupied 20% of the soil volume. The rest stayed wet. Now I never go more than 10cm wider than the root ball. The American Horticultural Society (AHS) also recommends matching pot size to root mass, not to your aesthetic dreams. Their container gardening resources at https://ahsgardening.org are worth a read.
Now, let's talk about the actual preparation of coarse-grain river-rock drainage.
First, you need to understand what "coarse-grain" really means. I'm not talking about pea gravel or sand. I mean river rocks that are 1-2cm in diameter, washed, rounded, and free of fine dust. I bought a 10kg bag from a local landscaping shop. The label said "coarse river rock" but when I opened it, half the bag was dust and small chips. That dust clogs the drainage layer. So I rinsed the rocks in a colander for five minutes until the water ran clear. Trust me, this step matters.
Second, the depth of the rock layer. I used to think "more is better." I once made a 10cm rock layer in a 50cm pot. That was a disaster. The soil above it stayed saturated because the rock layer didn't wick water upward. Now I use a maximum of 3-5cm for oversized pots. That's enough to keep the bottom drainage holes clear without creating a false water table.
Third, you need a physical barrier between the rock layer and the soil. I learned this after my second failed pot. The soil particles migrate down into the rock gaps, clogging everything. I now use a piece of landscape fabric or a single layer of weed barrier cloth. Cut it to the pot's inner diameter, place it over the rocks, then add soil. Don't use coffee filters. I tried that once. They decompose and tear within a month.
Fourth, the soil mix. This is where most people mess up. You cannot use plain garden soil in an oversized pot. It compacts and holds water like a sponge. My current mix for balcony rose shrubs is: 40% pine bark fines, 30% coarse perlite, 20% compost, 10% coarse river sand. I mix it in a wheelbarrow. You want a mix that clumps when you squeeze it but falls apart when you poke it. If it stays in a ball, it's too heavy.
Fifth, the watering routine. This is the hardest part. Oversized pots dry out unevenly. The top 5cm might be bone dry while the bottom 15cm is still wet. I use a simple bamboo skewer test. Push a wooden skewer all the way down. Pull it out. If it's damp, don't water. If it's dry, water slowly until it runs out the drainage holes. Then stop. I water my 45cm pots maybe once every 10-14 days in spring, less in winter.
Now let me share my two-week observation after switching to this method.
Week one: I repotted a struggling 'Gertrude Jekyll' rose shrub into a 45cm pot with 4cm coarse river-rock layer, landscape fabric, and my airy mix. I watered it once thoroughly. Days 1-3: no change. Days 4-7: the leaves stopped yellowing. New growth appeared at the tips.
Week two: I checked the soil moisture at three depths using a long probe. Top 5cm: dry by day 10. Middle 15cm: moist but not soggy. Bottom 25cm: slightly damp but no standing water. The rock layer was still loose and clear. No smell. No fungus gnats. By day 14, the shrub had three new shoots and the first tiny bud. That's when I knew the method worked.
But here's the catch. This only works if you also follow the three rules: don't overwater, give full sun, and match pot size to root ball. The rock layer alone won't save a rose shrub from bad habits.
Let me give you a real踩坑 example. I once tried to "improve" drainage by mixing river rocks directly into the soil. That was stupid. The rocks created air pockets that dried out the roots unevenly. The shrub wilted every afternoon. I had to repot it after 10 days. Never mix rocks into potting soil. They belong only at the bottom as a discrete layer.
Another踩坑: I used a pot without drainage holes. I thought the rock layer would act as a reservoir. It didn't. The water sat there and turned the roots to mush. Always use pots with at least three drainage holes. If your oversized pot has only one small hole, drill more.
Another one: I placed the pot directly on a saucer that collected water. The rock layer stayed submerged. That's a recipe for root rot. Now I use pot feet to raise the pot 2cm above the saucer. The drainage holes can breathe.
What about the type of river rock? I've tried three kinds: smooth polished pebbles, rough crushed granite, and natural coarse river rock. The smooth pebbles were too dense and didn't allow water to flow freely. The crushed granite was too sharp and tore the landscape fabric. The natural coarse river rock with rounded edges worked best. It's about 1.5cm average size. I get it from a local quarry. You can also find it online as "washed river rock 1-2cm."
One more thing. You need to flush the rock layer every few months. I do it every 8 weeks. I slowly pour 5 liters of water through the pot and let it drain completely. This prevents salt buildup from fertilizer. Without flushing, the rock layer becomes a crusty mess. I learned that after my third failed pot.
Let's talk about the size of the pot again. "Oversized" for a balcony rose shrub means 35-50cm in diameter. Anything bigger than 50cm is overkill for most shrub roses. I tried a 60cm pot once. The rose shrub grew huge but the roots never filled the pot. The unused soil stayed wet. I ended up with fungus gnats and root rot. Now I stick to 40-45cm for most shrub roses. If you have a really vigorous climber, go to 50cm but no more.
What about the balcony environment? Wind dries out pots faster. Heat reflects off walls. I place my pots so they get morning sun and some afternoon shade in summer. That reduces water stress. I also mulch the top 2cm with pine bark. That keeps the soil surface from drying too fast.
Now let me address a common myth. Some people say "a layer of rocks at the bottom improves drainage." That's only half true. It improves drainage only if the soil above is already well-draining and the pot has good holes. If you use heavy clay soil, the rock layer actually makes things worse because water pools at the interface. I tested this side by side. Same pot, same rock layer, but one with clay soil and one with airy mix. The clay soil pot had a perched water table 3cm above the rocks. The airy mix pot had no perched water. So the soil matters more than the rocks.
What about the "coarse-grain" part? Why not fine gravel? Fine gravel compacts and blocks water flow. Coarse river rock has gaps between particles that allow water to move. I use 1-2cm diameter rocks. Anything smaller than 1cm is too dense. Anything larger than 3cm creates too much empty space and the soil above sinks into the gaps.
Let me give you my exact step-by-step process for preparing the drainage layer.
Step 1: Wash 2kg of coarse river rock (1-2cm) in a colander until the water runs clear. This removes dust.
Step 2: Drill extra drainage holes if your pot has fewer than three. I use a 10mm masonry bit for ceramic pots. For plastic pots, a hot screwdriver works.
Step 3: Add a 3-5cm layer of washed river rock to the bottom of the pot. Spread it evenly.
Step 4: Cut a piece of landscape fabric to fit the pot's inner diameter. Place it over the rocks. Press the edges down.
Step 5: Add your airy soil mix on top of the fabric. Fill the pot halfway.
Step 6: Place the rose shrub's root ball in the center. Fill around it with more mix. Tamp gently.
Step 7: Water slowly until water runs out the drainage holes. Then stop.
Step 8: Raise the pot on feet. Place in full sun.
That's it. But remember, the rock layer is not a magic bullet. You still need to water correctly.
Let me share one more personal story. I killed my first oversized pot rose because I watered it every three days. I thought "big pot, more water." Wrong. The soil stayed wet for two weeks. The roots suffocated. After I switched to the skewer test, I didn't lose a single rose shrub for 18 months. That's the real lesson.
Now, let me answer three common questions I get from other balcony gardeners.
Question 1: Can I use aquarium gravel instead of river rock? You can, but aquarium gravel is usually too small and smooth. It packs tight and doesn't allow good water flow. I tried it once. The drainage was terrible. Stick with 1-2cm coarse river rock.
Question 2: How often should I replace the rock layer? I replace it every two years when I repot. The rocks themselves don't decompose, but they get coated with fertilizer salts and fine soil particles. I wash them again and reuse them. No need to buy new rocks every time.
Question 3: What if my pot has no drainage holes? Then don't use a rock layer at all. It will just create a swamp. Either drill holes or use the pot as a decorative cachepot with a smaller inner pot that has holes. I learned that after ruining a beautiful ceramic pot.
One last thing. The keyword here is "coarse-grain river-rock drainage." Don't overcomplicate it. Wash the rocks, keep the layer thin, use fabric, and water properly. That's 90% of the battle. The other 10% is sunlight and patience.
I've been growing roses on my balcony for six years now. I've made every mistake in the book. But once I figured out the oversized pot drainage system, my roses thrived. Last summer, my 'Olivia Rose Austin' produced 23 blooms in one flush. That's not bragging. That's just what happens when you stop drowning your plants.
So go wash some rocks. Your roses will thank you.