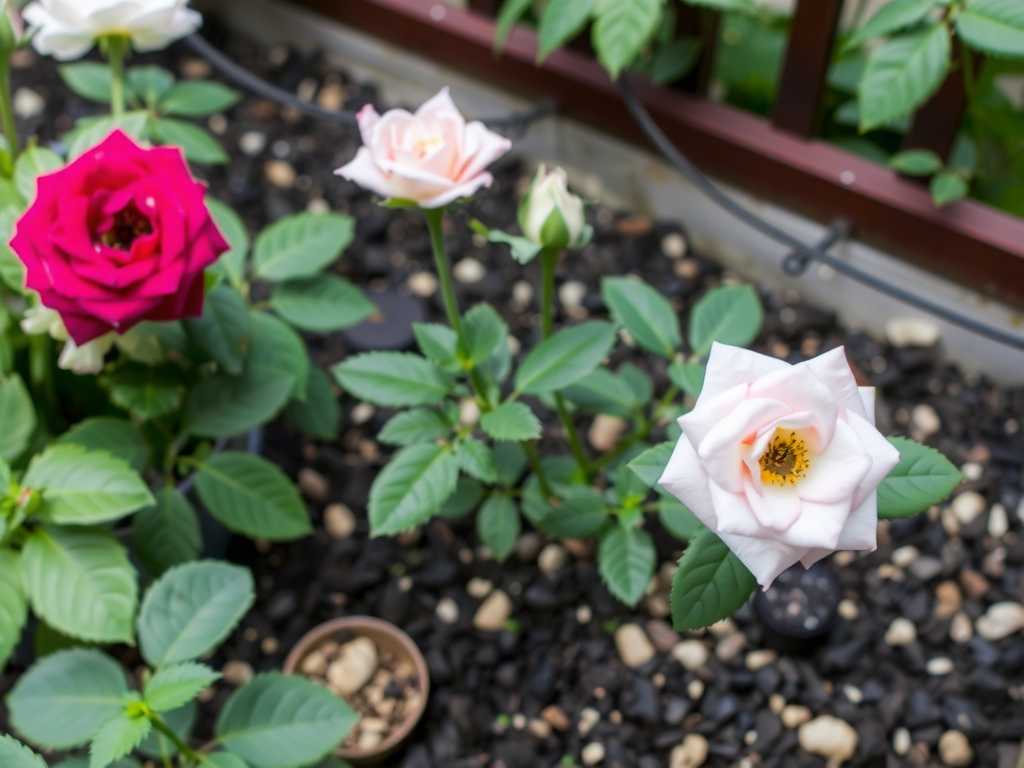
How to Water Balcony Roses Correctly: A 14-Day Guide to Thriving Blooms
I killed my first three balcony roses within a month. It wasn’t a lack of sunlight or poor fertilizer; it was my well-intentioned but disastrous approach to hydration. I thought how to water balcony roses correctly simply meant pouring a cup of water every day at noon. I was wrong. The results were yellowing leaves, black spots, and drooping buds that never opened. If you are struggling with container gardening on a high-rise terrace or small patio, you know the anxiety of seeing a prized rose looking wilted despite your efforts. The secret isn't just the volume of water; it is the timing, the delivery method, and understanding the specific micro-climate of your balcony. After extensive testing, adjusting my routine based on Royal Horticultural Society (RHS) guidelines, and tracking plant responses over two weeks, I have developed a foolproof system. This guide shares my personal journey, the mistakes I made, and the exact steps to keep your potted roses vibrant.
The Critical Mistake I Made (And Why You Should Avoid It)
The "Daily Sip" Trap
For years, I treated my roses like houseplants. I gave them a little bit of water every single morning. This is the most common error in balcony rose care. Roses are deep-rooting plants. Shallow, daily watering encourages roots to stay near the surface where they are vulnerable to heat and drought. Worse, it creates a moist environment at the crown of the plant, inviting fungal diseases like Black Spot (Diplocarpon rosae) and Powdery Mildew.
Why Drainage is Non-Negotiable
My balcony has a concrete floor. When I first started, I used decorative pots without holes because they looked aesthetic. Big mistake. Standing water is the silent killer of container roses. The American Horticultural Society (AHSA) emphasizes that root oxygen is just as important as moisture. Without drainage, the soil becomes waterlogged, roots suffocate, and the plant essentially drowns. I learned this the hard way when I uprooted a "thirsty" rose only to find mushy, brown roots instead of firm white ones.

The Science of Watering: What the Experts Say
RHS Guidelines on Hydration
According to the RHS, established roses in the ground rarely need watering except in extreme drought. However, balcony roses are different. Containers heat up faster and dry out quicker. The RHS advises that in hot weather, pot-grown roses might need watering twice a day. However, the key phrase is "deeply and infrequently." This forces roots to dive deep into the pot, creating a more resilient plant.
Understanding Soil Tension and Capillary Action
To master rose hydration, you need to understand how water moves through soil. It’s not a sponge; it’s a complex structure. Water moves via capillary action. When you water from the top, gravity pulls it down, but the soil particles hold onto it. The goal is to reach "field capacity"—the point where the soil holds the maximum amount of water against gravity. Any more, and it leaches out nutrients. Any less, and the plant wilts.
My 14-Day Experiment: A Step-by-Step Log
I selected a struggling 'Peace' rose on my 4th-floor balcony for this experiment. The balcony faces south and gets intense afternoon sun. Here is exactly what I did and what happened.
Day 1-3: The Diagnostic Phase
Step 1: The Finger Test
I stopped watering immediately. I stuck my index finger two knuckles deep (about 2-3 inches) into the soil. It was bone dry. This confirmed my plant was dehydrated, but the soil had become hydrophobic—water was running down the sides of the pot rather than soaking in.
Step 2: The Bottom-Watering Rescue
To fix the hydrophobic soil, I took the pot to a bathtub. I filled it with 3 inches of water and let the pot sit for 30 minutes. I saw bubbles rising—air escaping as water rehydrated the peat moss. This is a crucial container rose care tip for neglected plants.
")
Observation: By Day 3, the leaves perked up slightly, but the edges were still brown and crispy.
Day 4-7: Establishing the Routine
Step 3: Morning Watering Only
I shifted my schedule to strictly 6:30 AM. Why? Evaporation rates are lowest, and the plant has water to face the heat of the day. Watering in the evening leaves foliage wet overnight, which is a magnet for spores.
Step 4: The Volume Calculation
I used a 1-gallon watering can. For my 10-inch pot, I poured slowly until water streamed out the bottom holes. I waited 5 minutes and repeated. This ensured the entire root ball was moistened.
Observation: New, light green growth appeared at the nodes. This is a classic sign of recovery in potted rose maintenance. However, I noticed a few lower leaves turning yellow and dropping. This was "transplant shock" from the waterlogging incident, not a new problem.
Day 8-14: Optimization and Maintenance
Step 5: Mulching for Moisture Retention
On Day 8, I added a 1-inch layer of pine bark mulch around the base of the stem, keeping it 1 inch away from the bark (to prevent rot). This reduced evaporation significantly.
Step 6: Checking the Weight
I lifted the pot. A dry 10-inch pot feels light; a wet one is heavy. This "heft test" became my daily quick check.
Observation: By Day 14, the rose had produced a new bud. The foliage was a deep, waxy green. The soil moisture remained consistent for 24 hours, proving the mulch and deep watering worked.
Advanced Techniques for Specific Scenarios
Handling Heatwaves and Wind
Balconies are wind tunnels. Wind strips moisture from leaves faster than roots can uptake it. During a heatwave last week (90°F+), I had to water twice—once at 6 AM and a light top-up at 5 PM. The key signs of overwatering roses vs. underwatering are distinct:
Underwatering: Wilting, dry soil, brown crispy leaf edges, flowers die quickly.
Overwatering: Yellowing leaves (chlorosis), soft mushy stems, no new growth, mold on soil surface.
If I saw wilting during the heat of the day, I didn't panic-water. I checked the soil first. Sometimes, the leaves wilt to protect themselves from sun scorch while the roots are still moist.
The "Leach and Feed" Method
Every 4 weeks, mineral salts from fertilizer build up in the pot. I perform a "leaching." I take the plant to a sink or shower and run water through the soil for 2 minutes at a slow trickle. This flushes out excess salts that can burn roots and block water absorption. This is a vital part of seasonal rose watering to prevent nutrient lockout.
Choosing the Right Tools
I switched from a plastic watering can to a long-spout brass can (often called a "Haws" style). The long spout allows me to direct water to the soil base, avoiding the foliage entirely. Wet leaves + sun = magnified lens effect + fungal spores. Keeping the leaves dry is the cheapest fungicide you can buy.
Troubleshooting: The Problems I Faced and Solved
Problem 1: Bud Blast (Buds Drying Up)
About two weeks into my new routine, I noticed buds forming but then turning brown and falling off. I panicked. Was it a pest?
The Solution: I realized my balcony gets full sun, but the roots were getting too hot in the black plastic pot. I moved the pot to a slightly shadier spot in the morning and applied a thicker layer of mulch. Bud blast is often a stress response to inconsistent moisture or temperature swings. Consistency is the holy grail of how to water balcony roses correctly.
Problem 2: Chlorosis (Yellow Leaves with Green Veins)
Despite watering, the new leaves looked pale.
The Diagnosis: I tested the soil pH. It was 7.5 (alkaline). Hard tap water on a concrete balcony raises pH over time, locking out iron.
The Fix: I watered with a solution of chelated iron and a splash of vinegar (to acidify slightly). Within a week, the leaves greened up. This taught me that water quality matters as much as quantity.
Long-Term Care: Beyond the Watering Can
Fertilizer and Water Synergy
Water acts as the delivery system for nutrients. I use a liquid rose fertilizer (NPK 10-10-10) every two weeks. However, I never fertilize a dry plant. It burns the roots. I always water lightly first, apply the fertilizer solution, then water heavily to wash it into the root zone. This "feed and weep" method is standard professional rose hydration protocol.
Winter Protection
Balcony roses are vulnerable to wind desiccation in winter. Even if it rains, wind dries the soil. I water sparingly once a month in winter, only when the soil is dry and the temperature is above 40°F (4°C). The goal isn't growth; it's keeping the roots from turning to dust.
Common Questions I Get Asked
Q: How do I know if my balcony rose needs water if the soil looks dark?
A: Don't trust your eyes; trust the weight and the finger. Dark soil can be moist on top but dry 3 inches down. Always push your finger into the root zone. If you feel resistance or dryness, water. If it feels cool and muddy, wait.
Q: Can I use ice cubes to water my roses?
A: Please don't. While popular for orchids, the sudden temperature shock damages the fine feeder roots of roses. It also doesn't provide enough volume to reach the bottom roots. Stick to room-temperature water.
Q: My balcony is windy all day. How often should I water?
A: Wind increases transpiration. You will likely need to water daily, but perhaps slightly less volume each time to avoid waterlogging. Focus on mulching heavily to lock that moisture in.
Mastering how to water balcony roses correctly is less about a rigid calendar and more about developing a feel for the plant and its environment. It took me two weeks of close observation to undo months of bad habits. The "Finger Test," deep watering, morning routines, and proper drainage are the pillars of success. When you get it right, the reward is a balcony exploding with color and fragrance, proving that even in a concrete box, a rose can thrive if you respect its thirst. Remember, a slightly dry rose recovers quickly; a drowned one rarely does. Observe, adjust, and let your plant tell you what it needs.

发表评论