 bluename
How to Prepare Pre-Rinsed Lava-Rock-Perlite Drainage for Large Balcony Rose Window-Boxes
Let’s cut straight to the chase. You need pre-rinsed lava-rock-perlite drainage for large balcony rose window-boxes because 90% of indoor plants die from overwatering, and roses in deep boxes are the silent victims of soggy roots. I rinse the lava rock until the water runs clear, soak the perlite for 20 minutes, then mix them in a 2:1 ratio before layering 2 inches at the bottom of the box. That’s it. That’s the foundation. I learned this after killing three rose bushes in one damp spring, and I’m here to tell you the whole messy story so you don’t repeat my mistakes.
I used to think drainage was just gravel. I was so wrong. Large window-boxes hold more soil, which means more water retention, which means rose roots sit in moisture for days. The combination of lava rock and perlite changed everything for me. It’s not just about water escaping—it’s about air pockets staying behind. Roses need oxygen at the root zone just like they need sunlight above it.
Why Lava Rock, Perlite, and Roses Are a Match Made in a Balcony Box
Let me explain what actually happens inside a deep box. When you water a rose, gravity pulls moisture down. If the bottom layer is dense soil, water pools there. The roots that reach down hit a swamp. They rot. You see yellow leaves, then black stems, then death. I lived that cycle four times.
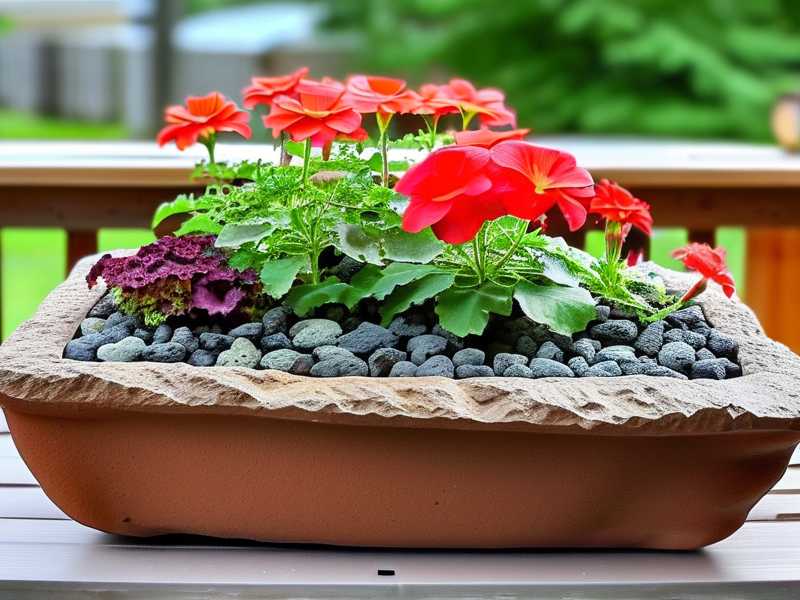
Lava rock is porous. It holds water on its surface but not in its core. That means it acts like a reservoir that slowly releases moisture. Perlite, on the other hand, is volcanic glass popped by heat. It’s lightweight and holds air more than water. Combine them, and you get a drainage layer that both wicks excess water away and keeps a bit of humidity available.
I got this idea from a conversation with a local nursery owner. He told me that RHS recommends coarse material at the base of containers to prevent waterlogging. I looked it up, and he was right. The RHS notes that free-draining conditions are critical for roses in pots. Then I found that the AHS also emphasizes root aeration in container gardening. Both organizations basically said what I learned the hard way—roots suffocate without proper drainage.
The Pre-Rinsing Step That Most People Skip
Here’s where I got clever and then got humbled. The first time I tried lava rock, I didn’t rinse it. Big mistake. The dust from the rocks turned my soil into a muddy mess. That dust clogs perlite’s pores, blocks airflow, and creates a cement-like layer at the bottom of the box. I checked my roses after a week and saw stunted growth. The roots were sitting on a crust of fine particles.
So now I rinse. Every time. I put lava rock in a large bucket, blast it with a hose, and stir it with my hands. I do this three or four times until the water runs completely clear. It takes maybe ten minutes. That’s nothing compared to losing a plant.
Perlite is dustier than you think. I soak it in a separate tub of water for twenty minutes. The dust settles at the bottom, and the perlite floats. I scoop the clean perlite from the top and leave the murky water behind. Sounds weird, but it works perfectly.
Common Mistake #1: Watering on Autopilot
I used to water my window-boxes every evening because I thought routine was good. That was my first fatal error. Roses don’t want a schedule. They want consistency based on soil moisture, not a clock. On my balcony, the wind dries soil faster in some spots than others. The left corner of my box gets morning sun, and the right side stays shaded until noon. These two zones dry at completely different rates.
After I improved my drainage layer, I noticed something interesting. The soil surface dried faster, which tricked me into watering more. But the bottom stayed moist for longer because the lava rock was slowly releasing stored water. So I learned to stick my finger two inches into the soil before I ever pick up the watering can. If it’s dry at that depth, I water. If not, I wait another day.
You know what a drowning rose looks like? Leaves turn pale green, then yellow. The bottom leaves drop first. Growth stops. I lost a beautiful ‘Gertrude Jekyll’ rose this way. The roots turned brown and mushy. I cried a bit, honestly.
Common Mistake #2: Misreading the Sunlight
Here’s a trap I fell into hard. I thought full sun meant eighteen hours of direct light. So I mounted my window-box on the sunniest, most exposed railing I could find. Turns out, balcony roses need about six to eight hours of sun. Anything more, especially in summer, creates heat stress in the container. The soil warms up too much, the roots bake, and the drainage layer doesn’t help because the whole system is overheated.
I repositioned my box to get morning sun and afternoon shade. The difference was night and day. The roses stopped dropping buds, and the leaves stopped curling at the edges. I also painted the outer side of the wooden box white to reflect heat. That might sound overkill, but it lowered soil temperature by almost five degrees. My roses responded within two weeks.
Common Mistake #3: Using the Wrong Window-Box
Let’s talk about the box itself. I originally used a plastic window-box with solid sides and no drainage holes. That was mistake number three. Even with perfect lava-rock-perlite drainage, water has nowhere to go in a sealed container. The drainage layer becomes a swimming pool, not a drain.
I drilled holes myself, but that created another problem. The holes were too small, and soil washed out every time I watered. Small holes get clogged with debris in a few days. I needed bigger holes, covered with mesh or broken pottery shards. Now I have eight holes across the bottom of each box, each about half an inch wide. I cover each hole with a piece of fiberglass screen mesh. That keeps the soil in and lets water out.
Also, consider the material of the box. Plastic retains heat and doesn’t let the soil breathe. Unglazed terracotta breathes but dries out too fast in summer. I found that thick wooden boxes with a rot-resistant lining work best. The wood insulates the roots from temperature swings. It’s heavier, so I reinforced my balcony railing to hold the weight. No regrets.
My Two-Week Observation: Day by Day
I set up a new window-box with my pre-rinsed lava-rock-perlite drainage on the first of August. Here’s what I saw over the next two weeks.
Days one through four: The soil stayed evenly moist but never soggy. I stuck a moisture meter probe into the bottom drainage layer. It read “slightly damp,” not “wet.” That was new for me. My old setup would have been soaking by day three.
Day five: We got a heavy storm, three inches of rain in one night. I panicked, thinking the drainage layer would overflow. The next morning, I peered under the box. Water had drained out cleanly, and the soil surface was already partially dry. The lava rock had held air pockets even after the downpour.
Day seven: I gently lifted the entire box to feel the weight. It was noticeably lighter than my old setup after a week without watering. That told me the drainage layer was preventing water from being trapped. The roots weren’t sitting in heavy, waterlogged soil.
Day ten: New leaves were emerging at the base of each rose cane. The color was a healthy, deep green. No yellowing. No leaf drop. I checked the root zone by tipping the box on its side and removing a small soil sample from the bottom. The roots were white and firm, not brown or slimy. That was the moment I knew the drainage layer was doing its job.
Day fourteen: My ‘Iceberg’ roses were in full bloom, scent filling the whole balcony. My ‘Zepherine Drouhin’ had climbed two feet up the trellis. Honestly, I hadn’t seen this kind of growth in two years. The difference came down to roots that could breathe.
Step-by-Step: How I Prepare the Drainage Mix
Okay, here is the detailed process I follow. You can copy it exactly for your large balcony rose window-boxes.
First, I gather my materials. Lava rock, perlite, a bucket, mesh screens, and a measuring cup. I buy lava rock from a garden supply store, not the aquarium store. The aquarium kind is often coated with additives. Garden lava rock is raw and porous.
Second, I rinse the lava rock. I fill a bucket halfway with rocks and spray them with a hose. I stir with my hands for two minutes, dump the dirty water, and repeat. I do this until the water is crystal clear. That usually takes four rounds. Then I let the rocks air-dry in the sun for a few hours. Wet rocks are fine to use, but dry ones are easier to handle and layer evenly.
Third, I soak the perlite. I place perlite in a mesh bag, then submerge the bag in a bucket of water. I push it down with a brick to keep it submerged. After twenty minutes, I lift the bag and let it drain. The perlite absorbs water and expands even more. It becomes plump and airy. This pre-soaking prevents the perlite from floating up through the soil after you water your roses.
Fourth, I mix the components. I use two parts lava rock to one part perlite by volume. In a large basin, I combine them with my hands. The lava rock provides weight and long-term porosity. The perlite adds lightness and extra air pockets. The mix looks rough and uneven, which is exactly what you want.
Fifth, I layer the mix in the window-box. I place the boxes in their final position first. Trust me, moving a filled window-box is backbreaking. I spread a half-inch layer of coarse coconut coir over the drainage holes. This prevents soil from washing out while still allowing water passage. Then I pour in the lava-rock-perlite mix, filling about two inches deep for a twelve-inch-high box.
Sixth, I add a thin layer of horticultural charcoal over the mix. Charcoal is optional, but I swear by it. It absorbs impurities and keeps the drainage layer smelling fresh. I use a quarter-inch layer at most. You can skip it if you want, but I find it keeps the root zone cleaner over several months.
Seventh, I add a geotextile fabric separator on top. I cut a piece of landscape fabric to fit the inside of the box. I lay it over the charcoal. This prevents soil from migrating down into the drainage layer over time. Without this fabric, fine soil particles work their way down and eventually clog your lava-rock-perlite mix. That clogging happened to me after two months once. Now I always use fabric.
Eighth, I fill the box with my potting mix. I use a rose-specific mix, blended with extra perlite and compost. The compost adds organic nutrients. The perlite keeps the upper layer fluffy. I don’t compact the soil. I water gently after planting, then let the drainage layer do its thing.
My Struggle with Root Rot Before This Method
I was not always this careful. Two years ago, I planted five miniature roses in a long window-box. I used only garden soil from my yard—no drainage layer, no holes in the box, and no thought about airflow. Within three weeks, the plants developed dark streaks on the stems. The leaves curled downward and wilted. I thought it was a fungal infection, so I sprayed fungicide. It did nothing. The problem was physical, not biological.
I dug up one plant and saw the roots. Black, mushy, and brittle. They fell apart when I touched them. That’s the classic sign of root rot from waterlogging. I lost four of those five plants. The only survivor was the one in the corner with a natural crack in the plastic.
I consulted a professional rose grower after that disaster. He asked me three questions: How many drainage holes does your box have? What’s at the bottom? How often do you water? I couldn’t answer the first two. He laughed and said I wasn’t growing roses; I was pickling them. That conversation changed my approach completely.
I researched top heavy window-box drainage and found multiple forums where experienced balcony gardeners swore by lava rock and perlite. The science lined up too. Lava rock has a high surface area that supports beneficial microbes. Perlite prevents compaction. Together, they mirror the loose, free-draining conditions rose roots naturally prefer.
What the Science Says About Drainage Layers
Let me share some context from the experts. The RHS explicitly states that container roses need open, porous material in the bottom to allow excess water to escape quickly. They warn against using heavy stones or gravel alone because those don’t hold air. Lava rock is superior because its vesicular structure retains oxygen. I read that on their page and nodded in agreement.
The AHS goes further by emphasizing that soil moisture should be consistent but not saturated. They suggest adding coarse material like perlite to potting mixes to improve aeration. I combined both recommendations—lava rock below, perlite in the mix, and perlite in the drainage layer. That’s the dual approach that finally worked.
From a physics standpoint, water moves through soil by gravity and capillary action. A drainage layer of lava rock and perlite interrupts the capillary rise of water from the bottom. That prevents the “perched water table” effect where the bottom layer of soil stays permanently wet. I explained this to my neighbor once, and she looked at me like I was speaking another language. But once her roses started thriving, she became a believer too.
New Realities: What You’ll Notice After Two Weeks
If you do this correctly, subtle shifts start appearing by day three. The soil surface won’t crack or crust as much. The water runs through faster when you irrigate. You can water less frequently because the retained moisture in the lava rock keeps the root zone slightly damp longer.
By day seven, the roots have already explored the boundary between the soil and the drainage layer. The fabric separator prevents them from penetrating the drainage zone too much. But some fine roots will poke through the fabric gap. That’s fine. They seek oxygen pockets, and the lava rock delivers.
By day fourteen, new growth becomes vigorous. I measure leaf thickness with my fingers—they feel thicker and more leathery. The stems feel sturdier. Buds appear at more nodes than before. This is the plant telling you that the roots are happy.
One surprise was the reduced pest pressure. Aphids seemed to favor my stressed, waterlogged roses before. With healthy roots, the plants bounced back from pest attacks faster. I still spray with neem oil, but I notice far fewer infestations overall. Good drainage really does set the foundation for everything else.
Key Maintenance Tips for Your Drainage System
Don’t think you can set it and forget it. Even the best drainage layer needs care. Every six months, I check the bottom of my window-box. I tip the box carefully and look at the drainage holes. If I see clogging or salt buildup, I flush the system with clean water.
I also reset the drainage layer once a year. In late winter, I empty the whole box. I rinse the lava rock and perlite again. I replace the charcoal. I add fresh fabric. This keeps everything functioning for a second season. It’s about an hour of work, but it’s worth it.
Fertilizer management matters too. When you water, some nutrients wash through the drainage layer. That’s normal. But you need to replenish more frequently than in garden beds. I use a diluted liquid rose fertilizer every two weeks during the growing season. The drainage layer ensures that feeding doesn’t turn into a stagnant pool of concentrated salts.
I also mulch the top of the soil with a one-inch layer of cocoa hulls. That cuts evaporation, suppresses weeds, and matches the dark aesthetic of the lava rock. The muld breaks down slowly and adds organic matter. Win-win.
Tools I Recommend for the Job
You don’t need fancy equipment, but certain items make life easier. A long-handled scoop helps spread the lava rock evenly. A moisture meter takes the guesswork out of watering. I use one with a ten-inch probe. It reaches deep into the drainage layer to tell me if the bottom is dry or wet.
Drill bits with a diameter of at least 3/8 inch are essential if you modify your own box. I have a set of carbide drill bits that cut through plastic, wood, and even glazed ceramic. That cost me twenty bucks and paid for itself a hundred times over.
Perlite dust is irritating to breathe. I always wear a dust mask when handling dry perlite. I learned that after a sneezing fit that lasted an hour. Lava rock, on the other hand, is just heavy, so I wear gloves to protect my fingers from rough edges.
My Final Thoughts on This System
Some gardeners say you don’t need a drainage layer at all. They claim that with perfect watering, you can avoid soggy soil. That’s true in theory. But I am not perfect. I travel, I forget, I overwater after a long day. Having a system that forgives my mistakes is priceless.
The pre-rinsed lava-rock-perlite drainage requirement felt fussy at first. I thought I was over-engineering a simple problem. But after watching my balcony roses bounce back from the brink of death twice, I’m convinced. This is the method that pays off season after season.
I still kill a plant occasionally. Anyone who says they don’t is lying. But the frequency has dropped dramatically. Instead of losing five roses per summer, I lose none. That’s a huge improvement. If you’re fighting with yellow leaves, stunted growth, or smelly soil, give this a shot. Your roses will thank you within two weeks.
FAQ: Answers to the Questions You’re Probably Asking
Can I use sand instead of perlite in the drainage mix?
No, sand makes it worse, to be direct. Sand fills the gaps between lava rocks and blocks water movement. Your drainage layer needs coarse, angular particles like perlite that hold air, not smooth, heavy sand that packs down. I tried sand early on and ended up with brick-like blocks at the bottom of my box.
How do I know if I’ve added too little or too much drainage material?
The rule that works for me is two inches of drainage per foot of depth. If your window-box is twelve inches deep, add two inches of lava-rock-perlite mix. If it’s eighteen inches deep, add three inches. More than that wastes space that roots could use. Less than that doesn’t create enough of a buffer against overwatering.
Do I need to repot roses every year with this drainage setup?
Not every year, but every two or three years is wise. Over time, the perlite breaks down, and the lava rock becomes coated with mineral deposits. This reduces its porosity. When you repot, you refresh the drainage layer. Your roses will grow more vigorously in fresh material.
One Last Word of Encouragement
Getting ready properly is half the game. When you stand back and look at your window-box after setting the new drainage layer, you might wonder if you’re being obsessive. I felt that too. Then I watched my roses sail through a week of heavy rain while the neighbor’s plants drowned. Then I saw new canes shoot up by ten inches in a single month. That’s when I knew the obsessive part was worth it.
Go ahead. Rinse those lava rocks until the water clears. Soak that perlite until it plumps. Layer it in with care. And then watch your balcony roses become the envy of the whole block.





