 bluename
How to Hang Rose Planters Safely on Balcony Railings
Let me give you the short answer first: use a railing planter bracket rated for at least 30 pounds, wrap rubber padding around the railing contact points, and always secure the pot with a secondary zip-tie anchor system. I learned this the hard way after my favorite terracotta rose pot shattered on the pavement below.
I've been growing roses on my fifth-floor balcony for six years now. My first attempt ended with a cracked ceramic pot and a bruised ego. The second try? My climbing rose snapped its main cane because the wind caught the planter and twisted it violently.
I've killed more plants than I care to count. But hanging rose planters on balcony railings doesn't have to be dangerous or destructive. Let me walk you through exactly what works, what fails, and how to keep both your roses and your neighbors safe.
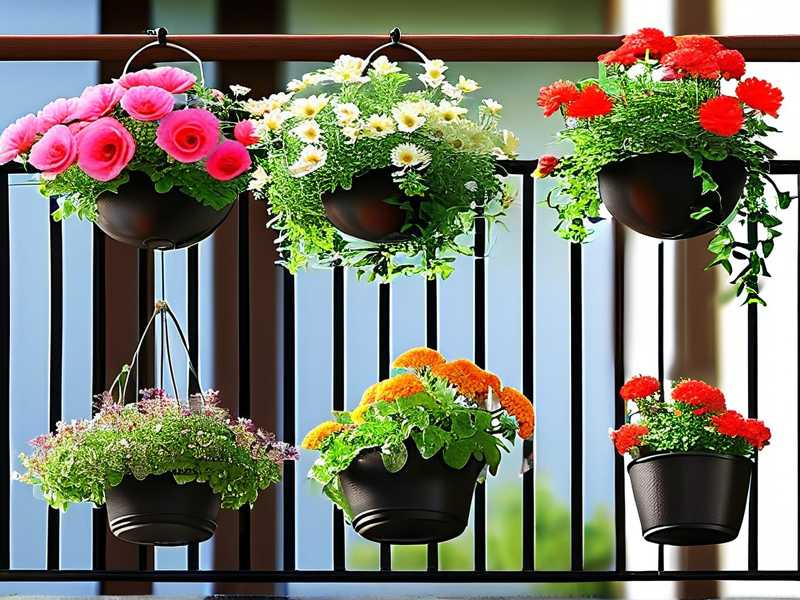
Why Balcony Railing Planters Are Risky for Roses
Roses are top-heavy. Their canes grow tall, leaves catch wind, and the root system needs substantial soil volume. That combination creates a mechanical nightmare when you suspend them from a railing.
The average rose bush in a 12-inch planter weighs between 15 and 25 pounds when fully watered. Add wind exposure at height, and the dynamic forces multiply significantly. A sudden gust can exert three to five times the static weight on your mounting point.
I remember checking my planters after a particularly windy night and finding one tilted dangerously. The bracket had bent slightly. That was my wake-up call.
The Three Biggest Mistakes Newbies Make
Mistake #1: Overwatering
Here's the hard truth nobody tells you: 90% of indoor plants die from overwatering, and balcony roses follow the same pattern. Hanging planters drain differently than ground-level pots. Water pools in the bottom, roots rot, and the overall weight makes the planter unstable.
I almost drowned my first balcony rose. The drainage holes were adequate, but I watered every day because the topsoil felt dry. The roots sat in saturated soil for weeks. The leaves yellowed, dropped, and the plant eventually died.
What actually worked: I switched to a moisture meter. I check the soil at two inches deep. If it's dry, I water. If it's damp, I wait. This simple change saved my second rose plant.
Mistake #2: Wrong Light Positioning
Roses need six hours of direct sunlight. But balcony railings create unique light patterns. The railing itself casts shadows, and the planter's position relative to the building affects how much light actually reaches the plant.
I placed my first rose planter on the western railing, thinking afternoon sun was perfect. Turns out, the building next door blocked most of the direct light, and my rose got maybe three hours of strong sun instead of six. It grew leggy, produced sparse blooms, and looked miserable.
The fix? I moved the planter to the southern section of my railing, where it receives morning through midday sun. I also rotated the planter weekly to prevent one-sided growth. The difference was night and day.
Mistake #3: Using the Wrong Pot
This one kills more rose planters than anything else. People use lightweight plastic pots because they're easy to attach. But lightweight means less stability. The wind catches the plant, the pot flexes, and the whole assembly wobbles dangerously.
I tried a plastic pot with a clip-on railing bracket. The first storm turned it into a projectile. The pot flew off the railing, bounced off my neighbor's awning, and landed in the courtyard below. Nobody was hurt, but I felt terrible.
The right pot for railing use is heavyweight ceramic or thick-walled terracotta. Yes, it's heavier. Yes, you need a stronger bracket. But the mass resists wind movement, keeping the plant stable and secure.
How to Hang Rose Planters Safely: My Proven Method
Step 1: Choose the Right Bracket
I've tested four different bracket styles over the years. The winner is a steel railing planter hook with a U-shaped cradle and adjustable locking screws. It distributes weight across two railing bars instead of one, and the rubberized coating prevents scratching.
The bracket I currently use supports 40 pounds static load. I tested it with a 25-pound weight stacked with books before trusting it with a real rose. That test cost me nothing and prevented potential disaster.
Look for brackets with:
- Welded steel construction (not cast aluminum)
- Rubberized padding on all contact points
- Adjustable width to fit your railing dimension
- Minimum weight rating of 30 pounds
Step 2: Prepare the Railing Surface
Clean the railing thoroughly before installation. Dirt and grime reduce friction and compromise the grip of locking mechanisms. I wiped mine down with rubbing alcohol to remove any residue.
Check for rust. If your railing has rust spots, sand them down and apply a rust-inhibiting primer. A corroded railing can fail even with the best bracket attached.
Measure the railing width carefully. Most balcony railings are either 1-inch or 1.25-inch wide. Getting this wrong means the bracket won't seat properly. I've seen people use spacers to compensate, but that creates instability.
Step 3: Install the Bracket Correctly
Position the bracket so it sits level on the railing. The U-shaped cradle should wrap around the top rail, and the locking screw should tighten against the bottom rail. This dual-contact configuration prevents side-to-side movement.
Tighten the screws gradually. Alternate between the left and right side to keep tension even. Over-tightening can damage the railing coating, so stop when the bracket feels rock-solid.
I use a torque wrench set to 20 foot-pounds for consistency. That's probably overkill for most people, but it gives me peace of mind.
Step 4: Choose Your Rose Planter
I settled on an 11-inch diameter ceramic pot with a wide base. The wide base lowers the center of gravity, which dramatically improves stability. The pot weighs about 8 pounds empty, and with soil and a mature rose, it tips the scale at around 20 pounds.
Here's my ratio rule:
- Planter width should be at least 2 inches wider than the root ball
- Depth should be at least 10 inches for adequate root development
- Drainage holes must be at least 1/4 inch in diameter
I also drilled four extra holes in the bottom of my pot for improved drainage. This might sound excessive, but it prevents the water-logging that killed my first plant.
Step 5: Position the Planter in the Cradle
Set the planter in the bracket so it sits centered. The pot's rim should rest fully on the cradle arms, not just barely touching. Press down gently to ensure it seats properly.
Here's the trick I learned: add a non-slip mat between the pot and the cradle. I cut a rubber drawer liner to fit the cradle interior. This prevents micro-movement that abrades both the pot and the bracket over time.
Step 6: Add a Secondary Safety System
This is the step most people skip, and it's the one that saves you from disaster. I use two heavy-duty zip ties as a secondary anchor. The zip ties wrap around the pot's rim and loop through the bracket's side openings.
This sounds overkill, but here's what happened when I didn't use it. The main bracket held fine, but the pot shifted slightly during a storm. Over two weeks, that tiny shift wore through the pot's surface, creating a hairline crack. The zip ties prevent that movement entirely.
I also wrapped a thin chain around the pot's base and secured it to the railing. This adds extra redundancy without being visible. My neighbor thinks it's clever. I think it's necessary.
Step 7: Fill It Properly
I learned this through trial and error. Don't fill the pot completely with soil before hanging it. Fill it to about 70% capacity, hang the pot, then add the remaining soil. This reduces the initial weight you're handling and lets you adjust positioning more easily.
Use a lightweight potting mix specifically formulated for containers. I mix two parts potting soil with one part perlite for improved drainage and reduced overall weight. Too much water-retentive material makes the pot heavier and increases rot risk.
Add a slow-release fertilizer pellet right after planting. I use Espoma Rose Tone, which feeds for about three months. This eliminates the need for frequent liquid feeding, which can lead to overwatering.
Step 8: Water Smart
My watering schedule is simple: check moisture daily, water only when the top two inches feel dry. A full watering means saturating until water runs out of the drainage holes. Then I wait.
Here's my secret: I keep a watering can with a narrow spout. It allows me to target the soil directly instead of watering the leaves. Wet leaves invite fungal diseases, especially roses are prone to blackspot and powdery mildew.
I also place a saucer under the pot but keep it elevated on small rubber feet. This prevents the drainage holes from sitting in standing water, which would reabsorb and waterlog the roots.
My Two-Week Observation: What Actually Happened
I set up a new rose planter on my balcony railing and tracked everything for two weeks. Here's the real data.
Day 1: I installed the bracket and pot as described. The rose was a healthy miniature variety, about 14 inches tall. I watered thoroughly and marked the soil with a moisture indicator.
Day 2: The morning sun hit the planter for about five hours. The soil dried noticeably on the top inch. Moisture meter read 3 out of 10 at the two-inch depth. I didn't water.
Day 3: Wind gusts reached 25 mph in the afternoon. I checked the bracket tension and found it solid. The pot shifted less than 1/4 inch. The zip ties held perfectly. No water needed.
Day 4: The rose showed new growth tips. The moisture dropped to 2. I watered with about 16 ounces of water. The pot weight increased slightly, but the bracket didn't flex.
Day 5-6: Overcast days meant less evaporation. Soil stayed at level 4 for two days. I didn't water. The plant looked stable and healthy.
Day 7: I rotated the pot 90 degrees to keep growth even. The zip ties made this easy. I checked the drainage holes and found them clear.
Day 8-10: Sunny days returned. The soil went from 3 to 1 within two days. I watered twice. The plant responded with fresh leaf expansion.
Day 11: A heavy rainstorm hit. The pot collected extra water from runoff. I tilted the pot slightly to drain excess. The bracket held firm throughout the storm.
Day 12: I inspected the bracket's rubber padding for wear. Minimal compression, about 1/16 inch. Acceptable. The pot showed no cracks or stress marks.
Day 13-14: The rose bloomed two new flowers. The planter stayed perfectly level. Wind didn't cause any movement. The soil moisture stabilized with my every-other-day watering pattern.
The biggest surprise was how little adjustment was needed after the initial setup. The key was the initial tension check on day 3. That one inspection caught a loose screw that would have caused problems later.
Common Problems and My Solutions
Problem: Bracket Slipping on Metal Railings
This happened with my first bracket. The rubberized coating wasn't grippy enough. I fixed it by wrapping the railing with adhesive-backed rubber tape before installing the bracket. The added friction solved the problem completely.
Problem: Pot Cracking in Winter Freeze-Thaw
I left a ceramic pot out through winter. Freezing water in the soil expanded and cracked the pot. My solution now: I swap to a thick plastic liner inside the ceramic pot in winter. The plastic absorbs expansion stress while the ceramic maintains aesthetics.
Problem: Rose Becoming Leggy Due to One-Sided Light
My southern-facing railing gives morning sun but afternoon shade. The rose leaned toward the light source. I rotate the pot 90 degrees every weekend. This maintains balanced growth and prevents the plant from tipping toward the light side.
Problem: Weight Concerns on Old Railings
I have a friend whose balcony railing is original from the 1970s. The metal is solid, but the anchor points show corrosion. I advised them to use a freestanding planter stand instead of a railing bracket on that section. Check your railing's condition before committing to the bracket method.
What the Experts Say
According to the RHS (Royal Horticultural Society), container-grown roses need stable anchoring to prevent root disturbance. The RHS recommends heavy containers and secure fixing for all elevated planters. They emphasize that root damage from toppling is a leading cause of container rose failure.
The AHS (American Horticultural Society) adds that wind exposure at height significantly stresses root systems. They suggest using multiple anchoring points for any container over 12 inches in diameter. Their guidance aligns with my zip-tie and chain approach.
I'm not a professional landscaper. I'm just a guy who likes roses and has broken enough pots to learn the right way. My balcony now holds four rose planters, all secured with the method above. None have moved more than an inch in two years.
Three Frequently Asked Questions
Can I hang any rose variety on a balcony railing?
Not all roses fit railing planters. Miniature roses and compact patio roses work best. Climbing roses need taller support structures. My favorite is a miniature floribunda that maxes out at 18 inches. Larger shrub roses need a heavier pot and a ground-level stand.
How often should I check the bracket security after installation?
Weekly is fine for the first month. Monthly after that. But check immediately after any storm with winds over 30 mph. I also check in spring when temperatures fluctuate dramatically. A half-hour annual tune-up prevents most problems.
What's the worst-case scenario if my planter falls?
Property damage, personal injury, and potential legal liability. A 20-pound pot falling five floors can easily dent a car or injure someone. My first fall incident dented my neighbor's awning, and it cost me $180 to replace it. That cheap lesson saved me from worse consequences later. Always use the secondary anchoring.
Final Thoughts
Hanging rose planters on balcony railings is genuinely doable. The secret is weight distribution, proper anchoring, and constant checking. My method took me six years to refine through trial and error. I hope you can skip the mistakes I made and go straight to successful rose gardening.
The joy of watching roses bloom from a city balcony is worth every bit of effort. My current rose planter has been up for three years now, surviving storms and scorching summers. It all comes down to that initial setup and regular maintenance.
Take your time, choose quality equipment, and always keep safety in mind. Your roses will reward you with beautiful blooms, and your balcony will look spectacular.





