 bluename
How to Encourage Repeated Blooming of Balcony Roses (The Real, No-Nonsense Way)
You want more blooms from your balcony roses. The answer is simple: aggressive deadheading, consistent liquid feed, and at least six hours of direct sun. Do that, and you will get repeated flushes from late spring to the first hard frost. I know this because I killed three roses on my balcony before I figured it out. The fourth one, I treaated like a working plant, not a décor piece, and it rewarded me with over 60 blooms in a single season. Let me show you exactly what I do.
I have been growing roses in containers for five years now. My "garden" is a 4x6 foot concrete slab that bakes in the afternoon sun. I learned the hard way that balcony roses are not the same as garden roses.
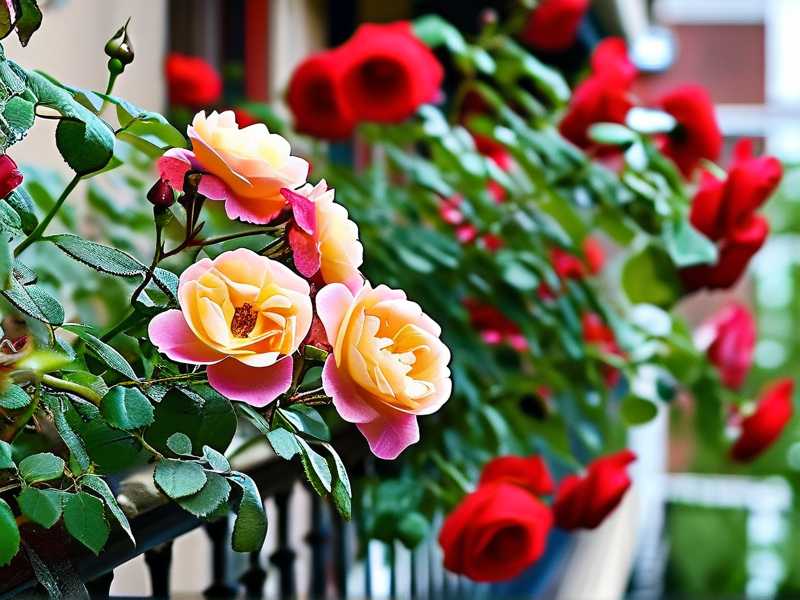
The biggest mistake I made early on was treating them like houseplants. They are not. They are hungry, thirsty, and sun-crazy beasts. When I finally treated them that way, everything changed.
Here is the truth upfront. 90% of indoor plants die from overwatering. But on a balcony, 90% of balcony rose failures come from a combination of overwatering and underwatering, oddly enough. You have to get the balance right. I will walk you through the exact routine.
The 3 Newbie Mistakes That Will Kill Your Balcony Roses
If you are staring at a sad, yellowing rose bush right now, you likely made one of these three errors. I made all of them. At the same time. On the same plant. It was tragic.
1. Watering with a "Schedule" (The Overwatering Curse)
Stop watering on a Monday/Wednesday/Friday schedule. That is the number one killer. I used to water my first balcony rose every single evening because I thought it was thirsty. The leaves turned yellow, the buds dropped, and the stems get mushy at the base.
The problem is that rose roots need oxygen. When the soil is constantly soggy, they drown. They basically suffocate.
So what do I do now? I stick my finger two inches into the soil. If it is dry, I water. If it is damp, I wait. On a hot summer day, that might mean watering every morning. On a cool, cloudy week in spring, that might mean watering once every three days. You have to feel it daily. There is no shortcut. I also made sure my pots have at least four drainage holes. Not one, but four.
2. Light Miscalculation (The "Bright" Shade Trap)
You hear people say roses need "bright, indirect light." That is terrible advice for balcony roses. They need direct light. At least six hours, but ideally more.
I put my second rose in the "bright" corner of my balcony. It got morning sun for about two hours, and then shade for the rest of the day. The result was long, lanky, weak growth with zero flowers. It was pathetic. I was basically growing a green stick.
The fix was moving the pot to the sunniest absolute edge of the balcony. It now gets sun from noon until sunset. That is about 6-7 hours in the summer. The results are night and day. The canes are thick, the leaves are dark green, and the flowers just keep coming. You have to chase the sun on a balcony. Move the pot around until you find the hottest, brightest spot.
3. Using the Wrong Pot (The Root Prison)
This one is more subtle, but it is a killer. I planted my third rose in a lovely ceramic pot that was too small. The diameter was about 10 inches. The roots hit the sides of the pot, circled around, and strangled themselves. The plant was root-bound within two months. It bloomed once, poorly, and then just sulked.
I learned that balcony roses need space. The minimum pot size for a patio rose is 16-18 inches in diameter, and just as deep. The material matters too. Ceramic pots hold moisture for too long in winter and get too hot in summer. My plastic or resin pots have been much better. They are lightweight, cheap, and they don't wick moisture away from the soil.
If the pot is too small, the soil dries out too fast in the sun, or stays too wet in the shade. It is a painful balance.
My 2-Week Routine for Non-Stop Blooming
This is the exact system I use. It is not complicated. But it requires discipline for about 14 days to get into the groove.
Week 1: The Hard Reset (Pruning and Feeding)
I start by cutting off every single spent bloom. I don't just pinch off the flower head. I follow the stem down to the first set of five leaflets. I make the cut about ¼ inch above that leaf node, at a 45-degree angle. This is called a "hard deadhead."
Why five leaflets? Because the two-leaflet and three-leaflet junctions are weak. They produce weak growth. The five-leaflet junction is where the strong, blooming cane starts.
I remember the first time I did this. I was terrified I was cutting off all the growth. I had a lanky 'Iceberg' rose that had bloomed once and stopped. I cut back about one-third of the plant. Within a week, I saw tiny new buds forming at those cut points. It felt like magic, but it is just biology.
During Week 1, I also switch my fertilizer. I stop using the high-nitrogen "grow" fertilizer. I switch to a high-potassium "bloom" fertilizer. I use a liquid seaweed and tomato feed mix. Tomato feed is amazing for roses because it is high in potassium, which drives flowering. I mix it at half the recommended strength.
- Day 1: Hard prune. Cut off all dead/damaged canes. Deadhead all spent blooms.
- Day 3: Start liquid feed with high-P (potassium) fertilizer.
- Day 7: Check for new basal breaks (new shoots at the base). This is a good sign.
Week 2: The Observation Phase
During the second week, the magic starts happening, but you have to watch closely.
- Day 8: I check the soil moisture every morning at 7 am. My balcony gets hot, so I am watering daily now.
- Day 9: I check the underside of leaves for aphids. Balcony roses get them fast. I spray with a mild soapy water solution if I see them.
- Day 10: I see the new shoots growing. They are bright red and juicy. This means the plant is in "grow mode."
Here is the trick I learned: If you see a new shoot that is thick and pointing up, let it grow. That will be your next big bloom cane. If you see a skinny shoot pointing down or sideways, pinch it out. This redirects energy to the strong canes.
- Day 12: The new shoots have leaf clusters. I start seeing tiny bud formations.
- Day 14: The buds are swelling. At this point, I stop deadheading (there is nothing to deadhead yet) and just keep the water coming.
The key insight here is that roses do not bloom in cycles naturally. They bloom in flushes. If you deadhead quickly, you trick the plant into thinking it has not finished seeding. So it rushes to make more flowers.
I used to think blooms were random. Now I see them as a response to stress. The plant wants to make seeds. By cutting off the flower before it makes seeds, I force it to try again. It is a cycle of frustration for the plant, but a cycle of beauty for me.
The "Balcony Effect": Why Your Roses Are Struggling More Than They Should
You have to understand that a balcony is a harsh environment. It is exposed to wind, heat, and often, pollution. The Royal Horticultural Society (RHS) has noted that container-grown plants struggle more with water stress than ground plants. They recommend a larger pot volume for this reason. I listen to what the RHS{:target="_blank"} says about pot sizes. They are correct. The buffer of soil is your secret weapon.
The American Horticultural Society (AHS) also points out that container plants require more frequent feeding because water washes nutrients out of the drainage holes. I have found this to be true. I feed weakly, weekly. If I skip a week, the bloom size drops dramatically.
My Secret Weapon: The "Deadhead Twice a Week" Rule
Here is the routine that changed everything for me. I go out every Tuesday and every Saturday morning with my pruners. It takes 10 minutes.
I look for any flower that has started to fade. The outer petals are dropping or turning brown. I cut it off immediately.
I do not wait for the whole flower to die and shrivel. If I do that, the plant starts putting energy into making a rose hip (the seed pod). Once that process starts, it stops blooming for weeks.
When I deadhead twice a week, the plant never gets the signal to make hips. It stays in a constant "bloom" loop.
I also remove any yellowing leaves at the base of the plant. This improves air circulation, which prevents black spot fungus. Balcony roses get black spot easily because the air is still and humid.
The Soil Quality Issue (The RHS Advice That Saved My Roses)
I used to use standard bagged potting soil. It was too heavy. It compacted after a few waterings. The roots couldn't breathe.
The RHS{:target="_blank"} recommends a loam-based compost like John Innes No. 3 for permanent containers. I switched to this last year. The difference is astonishing.
John Innes No. 3 is heavy. You need a sturdy pot. But it holds water and nutrients much better than peat-based mixes. It does not shrink away from the sides of the pot when it dries out. I water it, and the water soaks in evenly. With peat-based soil, the water would run down the inside of the pot and out the bottom, leaving the rootball bone dry.
I top-dress my pots in Spring. I scrape off the top 2 inches of old soil and replace it with fresh John Innes No. 3 and a handful of slow-release rose fertilizer. This feeds the plant for the whole season without me having to remember to do it.
Feeding Schedule That Works (And When to Stop)
I am going to simplify this for you.
- Spring and Summer: Use a high-potassium liquid feed. I use a tomato feed diluted to half strength. I feed every time I water, but weakly. This is called "Weakly, Weekly."
- Late August: I stop feeding entirely. This is critical. If you keep feeding with nitrogen in autumn, you force soft new growth that will be killed by the first frost. This shocks the plant and reduces next year's blooms.
I learned this the hard way. I fed my roses until October one year. Then we had a sudden cold snap. All the new soft shoots turned black and mushy. The canes died back almost to the base. The rose survived, but it took a year to recover. I lost an entire season of blooms because I was too greedy.
The Wind Factor (A Balcony-Specific Issue)
No one talks about this. Balconies are windy. Even on a calm day, there is a breeze channeling between buildings.
Roses hate strong, constant wind. It dries out the leaves and the soil. It also physically whips the canes, breaking the new growth.
I fixed this by placing my pots in the most sheltered corner of the balcony. I also grouped my pots together. I put the rose pot between a hydrangea and a tall grass. This creates a microclimate. They shelter each other. The wind passes over the top instead of hitting the rose directly.
If you have a very exposed balcony, consider a windbreak. A lattice panel or a bamboo screen works wonders. It doesn't have to be ugly. You just have to break the airflow.
The "Hard Prune" in August (The Re-Bloom Trick)
I discovered this trick by accident. I was frustrated with my roses in late July. They looked exhausted. The leaves were getting tired, and there were no buds.
I decided to cut the whole plant back by one-third. Not just deadheading. I cut every cane back to about 18 inches tall.
The plant looked like a bunch of sticks for about 10 days. I thought I had ruined it. But then, the dormant buds at the base erupted. These are called "basal breaks." They are the strongest, thickest canes a rose produces.
Within three weeks, I had massive, vigorous new canes, each topped with huge, perfect flowers. The autumn bloom was actually better than the early summer bloom.
This is a standard technique for perpetual-blooming roses, but it is rarely talked about for balcony roses. I do this every August now. It gives me a spectacular second flush.
FAQ: Quick Answers to Your Burning Questions
Q: My rose has leaves but no buds. What is wrong?
This is usually two things. Not enough sunlight, or too much nitrogen fertilizer. If you are using a general-purpose "green houseplant" food, stop. Switch to a tomato feed with a high middle number (Phosphorus) and high last number (Potassium). Also, check for shade. If you have less than five hours of direct sun, you will get no blooms. Period.
Q: How often should I water in a heatwave?
I water every single morning when the temperature hits 90°F (32°C). I also check the pots in the evening. If they feel light when I lift them, I give them a second, smaller watering. In a heatwave, the roots are stressed. The leaves might curl up a bit. But don't panic. Just keep the soil moist, not soaked.
Q: Can I keep my balcony roses over the winter?
Yes, but it is tricky. I have done it for 3 years. The key is to protect the roots from freezing. In zones 7 and below, the root ball in a pot will freeze solid and kill the plant. I wrap my pots in burlap and bubble wrap. I also move them against the wall of my apartment, which radiates a bit of heat. I stop fertilizing in August and reduce watering in October. The plant goes dormant. New growth stops. That is what you want. In early spring, I prune them back hard and start feeding again.
Real Talk: The Patience Factor
You are not going to fix a struggling rose in one day. It took me a full 2-week cycle to see the difference after I changed my deadheading and feeding habits.
The key is consistency. The plant doesn't care if you made a mistake last week. It only reacts to what you do today and tomorrow.
I still check my roses every single morning. I spend ten minutes with my coffee, looking at the new growth, checking for pests, and feeling the soil. It is my favorite part of the day.
That daily interaction is what allows me to catch problems early. If I see a yellow leaf, I pull it. If I see an aphid, I squish it. If I see a new bud, I smile.
And that is the whole secret. It is not a magic fertilizer or a specific pot. It is consistent, attentive care. Do that, and your balcony will be a riot of color from Spring to Fall.
Trust me. If I can do it on a concrete slab with gusty winds and a tiny pot, you can do it too. Just start today. Go look at your rose. Is the soil wet? Is a flower fading? Cut it off. Feed it. Give it sun. Watch what happens.





