 bluename
I’ve killed more Balcony Roses than I care to admit. The culprit was almost always the same: root rot from overwatering. So, here’s the direct answer: stop watering on a schedule, check the soil moisture with your finger at least two inches deep, and if the roots are already mushy and brown, you must repot immediately, cut away all the dead roots, and let the root ball dry out for 24 hours before replanting in a gritty, well-draining mix.
That’s the 60-second fix. But if you want your roses to survive the next two weeks and actually thrive, you need the full process. I’m going to walk you through exactly what I did, what I messed up along the way, and how I saved my balcony roses from a soggy grave.
Let me start with the brutal truth: 90% of indoor plants die from overwatering. Outdoor balcony plants are not far behind. We kill them with kindness. I did this for years.
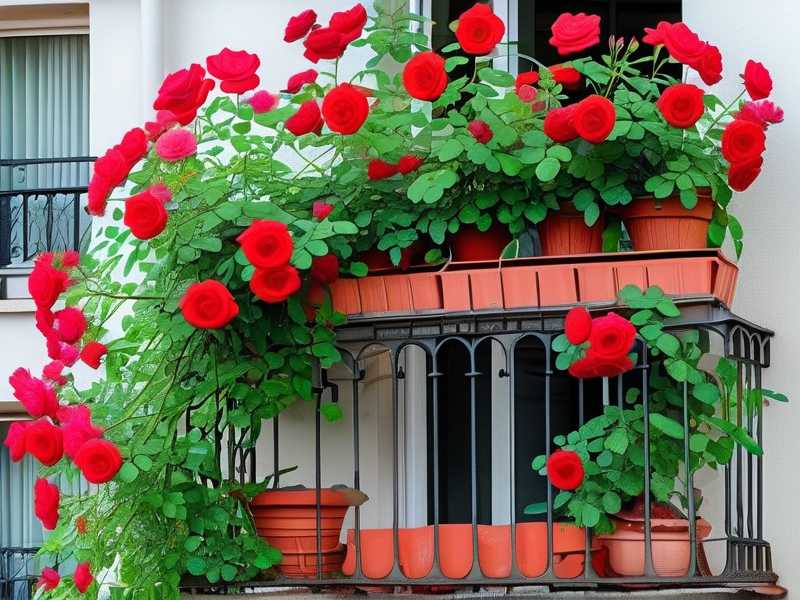
Why Your Balcony Rose is Actually Drowning
Here’s the thing I learned after killing my third rose bush. The symptoms look like thirst. Yellow leaves, drooping stems, crispy edges. So I watered more. That made it worse.
The roots need oxygen. When you drown the soil, the roots suffocate. Then they rot. The rotten roots can’t take up water. So the leaves wilt. You see wilt, you water again. It’s a death spiral.
One key fact from the RHS website, they note that root rot is a common cause of rose decline in containers. They stress the importance of free-draining compost. I ignored that advice for too long.
The 3 Fatal Mistakes That Killed My Roses
I’m sharing these because I made every single one. Maybe you’re making one right now.
Mistake #1: Watering on a Fixed Schedule
I used to water every Sunday morning. It was my ritual. Coffee, then watering can. That’s how I killed plant number two.
Here’s the problem. The weather changes. The wind dries the soil faster. The rain adds extra water. My fixed schedule didn’t account for any of that. Some weeks the pot was still soaking wet from Tuesday, and I added more water anyway.
The fix: Stick your finger into the soil. Not just the top inch. Go down to the second knuckle. If the soil is damp, walk away. Don’t water. If it’s dry, then you water thoroughly. I started doing this daily. It took me ten seconds.
Mistake #2: The Wrong Pot Location
My balcony gets harsh afternoon sun. I thought roses loved that. They do love light, but the pot gets baking hot. The roots cook. And when I watered, the cold water hit the hot roots. That stress weakened the plant. It made it more susceptible to rot.
I also kept the pot in a decorative outer sleeve. That trapped water. There was no drainage from the outer pot. The inner pot sat in a puddle for days. That was mistake number one, actually, in disguise.
The fix: I moved the rose to a spot with morning sun and afternoon shade. I removed the decorative wrapper. If a pot sits in standing water for more than 30 minutes after watering, you have a drainage problem.
Mistake #3: Using a Pot With No Drainage Holes
This sounds obvious. But I bought a beautiful ceramic pot and used it as the main home for my rose. It had one small hole. The roots clogged it. Water had nowhere to go. The soil stayed wet for a week.
The fix: I only use pots with multiple drainage holes now. I also add a layer of broken terracotta pieces at the bottom. That creates a gap, so the holes never clog. I invested in a cheap plastic nursery pot that fits inside the nice ceramic one. That way, I can lift it out to check drainage and water flow. It changed everything.
The Resurrection: My Step-by-Step Root Rot Fix
I’m assuming you have a rose that’s already looking sad. Yellow leaves, soggy soil, maybe a musty smell. Here’s exactly what I did to save mine.
Step 1: Remove the Rose From the Pot Immediately
Don’t wait. The rot spreads fast. I once waited a week, hoping it would recover. It didn’t. It spread to the healthy roots.
Slide the plant out of its pot. You’ll see the soil is probably very wet. It might even smell bad. That’s sulfur from anaerobic bacteria. That’s the rot.
Step 2: Wash Off ALL the Old Soil
I used a gentle hose spray. Or you can use a bucket of water and swish the roots around. I was very scared to do this because I thought I’d hurt the roots. But you need the roots clean to inspect them.
The old soil is full of fungal spores that cause rot. You need to get rid of all of it. I was shocked at how much soil was stuck. It took a few minutes.
Step 3: The Brutal Surgery – Cut the Rotten Roots
This is the part that made me cringe. But it’s necessary. Use sharp, sterilized scissors or shears. I wipe them with rubbing alcohol first.
What does a rotten root look like? It’s dark brown, mushy, and pulls apart easily. Sometimes it smells bad. A healthy root is firm and white or light tan.
I cut away every single mushy root. I cut back the healthy white root tips by maybe a third. This encourages new growth. If I had any doubts, I cut it. I’d rather have a smaller root system that’s healthy than a bigger one with rot.
Step 4: The 24-Hour Drying Period
I know this sounds backwards. But don’t repot immediately. Let the roots dry out.
I laid the root ball on a newspaper on the balcony, out of direct sunlight. I left it for 24 hours. This lets the wet center of the roots dry out and helps heal the cuts I just made. It reduces the chance of the rot returning.
I remember wringing my hands the whole time. I thought the plant was dying. It wasn’t. It was just dry. A rose that’s been overwatered can bounce back from a short dry period much better than a rose with soaked roots.
Step 5: Prepare a New, Gritty Potting Mix
This is the game-changer. I used to use regular garden soil. That was a disaster. It holds water like a sponge.
You want a mix that drains fast. I now use a mix of:
- 50% quality potting mix (specific for roses if you can find it)
- 30% perlite
- 20% coarse sand or fine gravel
This mix feels gritty. When you squeeze a handful, it clumps together but breaks apart easily if you poke it. That’s the texture you want. It holds some water but never becomes waterlogged.
Step 6: Repot With Care
Put fresh soil in the bottom of a clean pot. The pot must have good drainage holes. I added a layer of gravel at the bottom too, but a thick layer isn’t necessary today. Just make sure the holes are clear.
Position the rose in the center. Fill the sides with your gritty mix. Gently firm the soil down. Do not press it too hard. I learned that pressing too hard makes the soil compact and reduces airflow to the roots.
Step 7: Don’t Water Immediately
This is the biggest mental hurdle. I wanted to water it to settle the soil. But I had just dried out the roots. Watering them again right away would defeat the purpose.
I waited three days before the first watering. That felt like forever. But the soil I used was slightly moist to begin with. That was enough for the first few days.
After three days, I watered thoroughly. I mean, water came out the bottom drain holes. Then I waited again. The finger test is your best friend here.
What Happened Over the Next 2 Weeks
I’m sharing my actual timeline so you know what to expect. It’s not a quick fix. It takes time.
Days 1-3: Panic and Doubt
After repotting, the rose looked worse before it looked better. The leaves were still yellow. Some of them dropped off entirely. I thought I had failed. I almost repotted it again in a panic. Don’t do that.
The plant needs time to recover from the stress. I just left it alone, out of direct sunlight, in a sheltered spot. I didn’t fertilize. I didn’t overwater. I just waited.
Days 4-7: Signs of Life
Around day four, I noticed the stems were getting stronger. The drooping stopped. By day six, I saw tiny bits of new green growth at the base of the plant. That was the signal.
The roots were healing. The new growth meant the root system had recovered enough to support the top of the plant.
I started giving it a bit more light. Morning sun, still shade in the afternoon. I checked the soil moisture every day, but I didn’t water unless the top two inches were dry.
Days 8-10: Faster Growth
The new shoots started stretching out. The old yellow leaves were mostly gone. It looked like a scraggly plant, but it was alive and healthy.
I turned the pot a quarter turn each morning. This helps the plant grow evenly. You don’t want one side getting all the sun.
Days 11-14: We’re in the Clear
By day 14, my rose was covered in fresh, green leaves. It wasn’t blooming yet, but it looked strong and healthy. I even saw the start of a flower bud. I wanted to fertilize right away, but I’m glad I didn’t. Apparently, you shouldn’t fertilize for the first month after root rot treatment.
I finally gave it a weak dose of liquid seaweed fertilizer. I used half the recommended strength. The roots are still fragile. A full dose could burn them. That’s a mistake I almost made. I read on the AHS website that new roots are extremely sensitive to chemical salts. I’m glad I listened.
My Most Important Lessons Learned
After two weeks of recovery, I realized a few things about my whole approach. This is the core of what I’m trying to say.
Watering is Not a Task, It’s a Check
You don’t water plants. You check if they need water. When you’re checking, you look at the leaves. you feel the soil. you lift the pot.
I get a feel for how heavy the pot is when it’s dry. That’s a good tricky. When the pot is light, it’s dry. When it’s heavy, it’s wet. Simple and effective.
Don’t Strive for Perfection
I wanted the perfect rose bush on my balcony. I kept over-managing it. I watered it when I was bored. I moved it around when it didn’t need moving. These plants are tougher than we think. They don’t need constant attention. They need the right conditions to be left alone.
Let the Soil Dry Out Between Waterings
For roses in containers, this is important. The top few inches should dry out between waterings. Roots need to breathe.
Never Water Based on the Calendar
Forget what day it is. Only water when the soil is dry. I tell my friends this all the time. You want to water based on soil condition, not your schedule.
The Tool I Bought That Changed Everything
I finally invested in a cheap moisture meter. It’s a metal probe you stick in the soil. It shows a reading from 1 to 10. If it’s below 3, time to water.
For a while, I was too cheap to buy one. I thought my finger was good enough. It is, for the top two inches. But the moisture meter showed me what was happening deeper in the pot. That’s where rot starts.
I was shocked. The top of the soil was dry, but the middle of the pot was still wet. That’s what caused rot in the first place. The probe paid for itself in the first week. It’s a five-dollar tool that saved a thirty-dollar plant.
Common Questions About Fixing Root Rot in Roses
I’ve gotten these questions from friends and other balcony gardeners. I’ll answer them directly.
Q1: Can a rose with no roots at all survive?
If there is absolutely no healthy root tissue left, then no. The plant can’t take up water without roots.
You might get a cutting to root eventually. But the main plant will die. I’ve tossed a few plants that were 100% mushy roots. It’s heartbreaking, but sometimes it’s the right call.
Q2: Should I mix hydrogen peroxide with the water?
I’ve tried this. It’s a home remedy. A diluted solution of 3% hydrogen peroxide with water can help add oxygen to the soil. But it’s harsh. I accidentally used too much once and burned the roots even more.
Now I just use clean, room-temperature water. If the rot is really bad, I skip the peroxide and go straight to the repotting surgery. That’s more effective.
Q3: How long until my rose blooms again?
In my case, it took about six to eight weeks to see full blooms after the rot fix. The first two weeks were just recovery. The next month was for root growth.
Don’t expect flowers while the plant is fixing its roots. It’s putting all its energy into surviving. Once the roots are established, you’ll see a burst of growth. Patience is key. I get impatient, but plants don’t respond to that.
The Bottom Line on Saving Overwatered Roses
I went through a lot of trial and error. I still make mistakes, but I don’t kill plants from overwatering anymore. It feels good to see them thrive.
The biggest mindset shift is this: less is more. When it comes to water, you’re not helping when you drench the soil every day. You’re killing the roots. Let the plant tell you when it needs water.
If you catch the rot early, you can save it. Remove the plant. Cut the bad roots. Repot in dry, gritty soil. Wait and watch. Your balcony rose will reward you with strong growth if you give it a chance to breathe.
Just remember what I learned the hard way: 90% of indoor plants die from overwatering. I added that number to my brain. Now, I’m a lot less generous with the watering can and a lot more generous with the patience. Your rose will do the same if you give it the chance.





