 bluename
How to Repot Balcony Roses Without Hurting Root Systems
Let me give you the short answer first: the secret to repotting balcony roses without damaging roots is to water the plant thoroughly 24 hours before, tip the pot sideways, squeeze the flexible container gently, and slide the root ball out intact—never pull the stem. I learned this the hard way after killing two perfectly good roses in my first year of balcony gardening.
I have been growing roses on my tiny apartment balcony for over six years now. In that time, I have repotted dozens of plants. I have also wrecked more root systems than I care to admit. The turning point came when I finally understood that roots are not stems. They are fragile, white, and easily torn. Once you damage them, the plant goes into shock. It drops leaves. It stops blooming. Sometimes it just dies.
So in this guide, I want to walk you through exactly how I repot balcony roses without butchering their roots. I will share my real steps, what I observed over two full weeks after repotting, the mistakes that cost me dearly, and the fixes that actually worked.
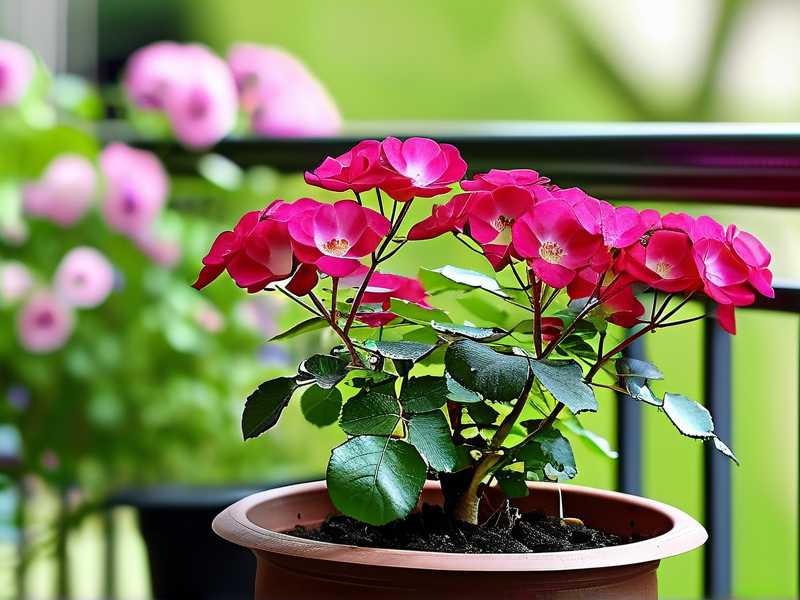
Why Repotting Balcony Roses Is Trickier Than You Think
I used to think repotting was just about moving a plant to a bigger home. Wrong. For balcony roses, it is a delicate surgery. Why? Because container-grown roses develop a dense, circular root mass. That root ball is easily disturbed. The moment you yank the plant out, you tear fine feeder roots. Those feeder roots are what absorb water and nutrients. Without them, your rose wilts fast.
I remember my first repotting attempt. I grabbed the stem and pulled. The plant came out, sure, but half the roots stayed behind in the old pot. That rose looked sad for a month. It never fully recovered. I later found out that I had basically committed root genocide.
Another thing that makes balcony roses tricky? They are often root-bound. The roots have circled the bottom of the pot many times. If you just dump them into a bigger pot without untangling, they will keep circling and eventually strangle themselves. That is why you need a proper technique.
The 3 Most Lethal Mistakes Newbies Make
Before I share my step-by-step process, let me address the elephant in the room. I see these three mistakes everywhere in online forums. I made all of them myself. Trust me, avoiding these will save you a lot of heartbreak.
Mistake #1: Overwatering Before and After Repotting
Here is a shocking stat that changed how I think about watering: 90% of indoor plants die from overwatering. Yes, you read that right. And balcony roses are no exception.
I used to think that after repotting, I needed to drown the plant to help it settle. I was so wrong. Soggy soil suffocates roots. It creates anaerobic conditions. That invites root rot, which is a silent killer.
The fix? Water the plant thoroughly 24 hours before repotting. This hydrates the roots and makes the soil stick together. Then after repotting, water once lightly. Wait. Let the top inch of soil dry out before watering again. Simple, right? But it took me three dead roses to figure this out.
Mistake #2: Wrong Light Placement After Repotting
Another mistake I see constantly is putting the freshly repotted rose straight into blazing afternoon sun. I get it. You want to give your plant the best spot. But after repotting, the roots are injured. The plant cannot take up enough water to match transpiration rates in strong sunlight. So leaves curl, tips brown, and the plant looks like it is roasting.
I learned this when I repotted a lovely miniature rose and placed it on a south-facing balcony ledge. Within three days, every leaf was crispy. I had to move it to shade and mist it daily for a week to bring it back.
Now I always keep freshly repotted roses in bright, indirect light for about five to seven days. Then I slowly reintroduce them to direct sun over another week. This gradual approach works wonders.
Mistake #3: Using the Wrong Kind of Pot
This one surprises many people. The pot material and drainage matter more than the size. I once repotted a rose into a beautiful ceramic pot with no drainage hole. I thought I was being clever by adding a layer of pebbles at the bottom. It was a disaster. Water pooled at the roots. Within two weeks, the leaves yellowed and dropped.
The rule I follow now is simple: the pot must have drainage holes, full stop. Terracotta is great because it breathes. Plastic is fine if it has holes, but you have to be careful with overwatering. Also, do not go too big. A pot that is only 2 to 3 inches wider in diameter than the current one is perfect. Bigger pots hold more soil, which stays wet longer. That increases the risk of root rot.
Step-by-Step: How I Repot Balcony Roses Without Hurting Roots
Alright, let us get into the actual process. I have refined this over years of trial and error. I will be very specific because details matter here.
Step 1: Stop Watering Two Days Before Repotting
Here is the thing I do differently now. I stop watering about 48 hours before the repotting day. This might sound counterintuitive because I just told you to water 24 hours before. Let me clarify.
For most of my roses, I water normally until two days before. Then I let the topsoil dry out slightly. This makes the soil firm enough to hold its shape when you tip the pot out. If the soil is too wet, it sticks to the pot walls and crumbles. If it is too dry, it falls apart. The sweet spot is slightly damp, not soaked, not bone-dry.
But once, when I had a very root-bound rose, I watered it thoroughly the night before. That helped the roots slide out easier. So use your judgment. The key is to have a cohesive root ball that holds together.
Step 2: Prepare the New Pot and Soil Mix
While the rose is settling, I prepare the new container. I add a layer of drainage material at the bottom—maybe an inch of coarse gravel or broken terracotta pieces. Then I add a layer of my soil mix.
For balcony roses, I use a mix that is one part potting soil, one part compost, and one part perlite or coarse sand. This ensures good drainage while retaining some moisture. The RHS actually recommends a loam-based compost for container roses, like John Innes No. 3. I tried that once and it was excellent, though a bit heavy for the balcony. These days I blend my own lighter mix.
I then place the rose in the pot to check the depth. The graft union—the swollen knot where the rose was grafted—should be about 1 to 2 inches below the rim. That gives you room to water without spillage.
Step 3: Slip the Rose Out of Its Old Pot
This is the critical moment. I never pull the stem. Instead, I place my hand over the top of the pot with the stem between my fingers. Then I tip the pot upside down, supporting the soil ball with my palm. I give the rim a gentle tap on the edge of a table. Usually, the root ball slides out slowly.
If the roots are sticking out of the drainage holes, I cut those roots off with clean scissors. Do not try to pull them back through the holes. That will tear bigger roots. I learned this after struggling with a rose whose roots had grown through the drainage holes. It was a mess.
For stubborn plants, I run a knife around the inside edge of the pot. This breaks the bond between root mass and pot wall. Again, pressure, not force.
Step 4: Inspect the Root Ball and Trim Only What Is Necessary
Once the rose is out, I examine the root ball. I look for dark, mushy roots—those are rotten. I cut them off. I also look at the bottom of the root ball. If the roots are circling tightly, I gently tease them apart with my fingers.
I cannot stress this enough: be gentle. I think of it like untangling a delicate necklace chain. The goal is to loosen the outer roots so they can grow outward into the new soil. I do not break up the entire root ball. Just the outer layer.
The AHS notes that roots are the most critical part of a rose transplant. Damaged roots cannot supply the plant with water, even if the soil is soaked. That is exactly why I treat this step like surgery.
Step 5: Place the Rose in the New Pot and Backfill Carefully
I set the root ball in the center of the new pot. Then I start backfilling around it with my soil mix. I add a bit, then gently press down with my fingers. I do not stomp on it. I keep the soil level the same as it was in the old pot. Burying the stem deeper can cause rot.
I tap the pot on the ground a few times to settle the soil. This removes air pockets without me having to poke and prod. Air pockets are bad because roots will dry out if they are exposed to air. But over-pressing makes the soil too compact, which suffocates roots. So gentle tapping is my go-to.
Step 6: Water Lightly and Keep It in Shade
After repotting, I give the rose a light watering. I aim to moisten the soil around the roots, not drench the whole pot. I then place the pot in a shaded spot on my balcony. I keep it there for five days. Then I move it to morning sun for two days. After that, I place it back to its original sunny location.
I know, it feels like babying. But trust me, this transition period is the difference between a rose that thrives and one that sulks for months.
Two-Week Observation: What I Saw After Repotting
I want to show you exactly what I observed over fourteen days after repotting one of my hybrid tea roses. This is not theory. This is my real experience.
Day 1 to Day 3: The Adjustment Phase
After the repot, my rose looked a bit droopy. The leaves were soft and slightly curled. This is normal. The roots are injured, and the plant cannot take up water as fast as it loses it. I kept it in shade and did not water again because the soil was still evenly moist.
I could see the plant slowing down. No new growth. The existing leaves stayed green but looked tired. I was tempted to fertilize. I did not. Fertilizing fresh roots is like pouring salt on a wound. I learned this when I killed a rose by feeding it three days after repotting. The roots burned and the leaves turned yellow. Never again.
Day 4 to Day 6: Stabilization
By day four, I noticed the droop was gone. The leaves were turgid again. The plant looked like it had caught its breath. I started exposing it to morning sun for a couple of hours. The soil was starting to dry on top, so I watered lightly.
I also noticed a tiny bit of leaf yellowing at the bottom. That is common. The plant sheds older leaves to redirect energy to root recovery. I picked those off instead of letting them rot on the soil.
Day 7 to Day 10: Signs of New Life
Around day seven, I saw the first sign of new growth. A tiny red bud forming at a leaf axil. That might not sound exciting, but for me, it was the signal that the roots had connected with the new soil. I moved the rose to its final sunny spot on day seven.
By day ten, the new shoot had elongated. Two more buds appeared. The old leaves looked glossy and healthy. I gave the rose its first light feeding with a diluted liquid rose fertilizer. I used half the recommended dosage. That is important. You do not want to overwhelm a recovering root system.
Day 11 to Day 14: Full Recovery
By day fourteen, my rose was pushing out three new shoots and a flower bud. The plant looked better than before I repotted it. The canopy was fuller, and the leaf color was a deep, rich green. I felt proud. The repotting had been a success.
But here is the thing: this only happened because I respected the roots. I did not rush. I did not overwater. I gave the plant the right conditions to heal. That is the entire game.
Personal War Stories: Roses I Almost Lost
I want to share a couple of specific disasters, so you do not repeat them.
The Time I Used a Pot Too Big
I once repotted a patio rose into a massive container because I thought it would "grow into it." Huge mistake. The excess soil stayed wet for weeks. The roots sat in moisture and developed rot. The leaves yellowed and fell off. I had to repot it again into a smaller pot with fresh, dry soil. It survived, but it took two months to look normal again.
Now I stick to the rule: size up only 2 to 3 inches in diameter. Keep it moderate.
The Time I Potted in Extreme Heat
Another time, I decided to repot on a scorching summer afternoon. I figured, "How bad could it be?" Well, the root ball dried out within minutes of being exposed to air. Fine roots turned brown and brittle. The plant went into severe shock. It dropped all its outer leaves and looked like a stick for a month.
That taught me to repot only in mild weather. Early morning or late afternoon is best. Or on a cloudy day. Heat is the enemy of bare roots.
The Time I Skipped the Soil Check
I also learned about drainage the hard way. I filled a pot with garden soil—just plain soil from the ground. It compacted into a brick within a week. Water could not flow out. The roots drowned.
Now I always use a potting mix designed for containers. And I always add perlite. It is non-negotiable for me.
Common Questions People Ask About Repotting Balcony Roses
How Often Should I Repot My Balcony Rose?
I repot my balcony roses every two years. Some fast-growing varieties need it annually. The signs are roots growing out of drainage holes, water running straight through the pot, or stunted growth. If you see those, it is time to repot.
When Is the Best Time to Repot Roses?
I prefer early spring, just before new growth starts. This gives the roots time to establish before the plant blooms. In my experience, autumn works too, especially in mild climates. But spring is the most forgiving.
Can I Repot a Rose While It Is Blooming?
I do not recommend it. The plant is spending energy on flowers, not root recovery. If you must repot, I would cut off the blooms first. That redirects energy to root repair. I did this once with a floribunda, and it worked fine. The plant bloomed again six weeks later.
Final Thoughts from Someone Who Has Killed Roses and Learned
I hope my story helps you avoid the pain I went through. Repotting balcony roses is not hard, but it requires patience and a gentle hand. The main points are: water before, handle the root ball with care, use the right pot with drainage, keep the plant in shade for a week, and do not fertilize too early.
I honestly believe that anyone can master this with a bit of practice. I went from killing two roses in my first year to now having a balcony full of healthy, blooming roses that I repot with confidence. The difference came from understanding roots. They are the heart of the plant. Protect them, and your roses will reward you with stunning growth.
Take your time. Be gentle. Your roses are worth it.





