 bluename
I killed my first balcony rose in exactly 11 days. And it wasn’t the heat, the wind, or even the spider mites. It was the drainage. Or more precisely, the lack of a real drainage strategy inside a hanging basket. The soil stayed wet, the roots suffocated, and the leaves turned a sickly yellow before dropping off. 90% of indoor plants die from overwatering, and outdoor balcony roses in baskets are not much safer. So, how to prepare calcined-clay-scoria mixed drainage for large balcony rose hanging-baskets? Simple answer: mix 1 part calcined clay (1-2 cm granules), 1 part horticultural scoria (lava rock, 1-1.5 cm), and 1 part coarse pine bark. Layer 3 cm of this mix at the bottom of the basket. Then fill the rest with a free-draining rose compost. That single layer saved my current rose bush. I watched it thrive for two weeks straight.
Why Your Rose Basket Is Slowly Drowning
I have been growing roses on a windy, exposed 8th-floor balcony for four years. The first summer, I lost two plants before I understood the real issue. The pot was fine. The sunlight was fine. The problem was the “soggy bottom” effect. When you water a hanging basket, gravity pulls all the moisture down. If the bottom layer is dense, it stays wet for days. Rose roots hate sitting in water. The RHS (link: https://www.rhs.org.uk ) suggests that roses prefer a soil pH around 6.5 and, crucially, a structure that allows excess water to escape quickly. I learned this the hard way.
The Missing Layer in Most Hanging Baskets
Everyone talks about potting soil and fertilizer. Nobody talks about the drainage horizon. For a large hanging basket (40 cm diameter or bigger), you are not just dealing with surface drying. You are dealing with the full vertical profile. The top dries out in six hours of sun. The bottom remains cold and clammy for three days. That contrast stresses the rose. Calcined clay and scoria offer different benefits. Calcined clay absorbs water into its internal pores when saturated. Then it releases that moisture slowly as the surrounding soil dries. Scoria, being volcanic rock, provides permanent air pockets. It never breaks down. It never compacts. That is why I call this the “breathing floor” of the basket.
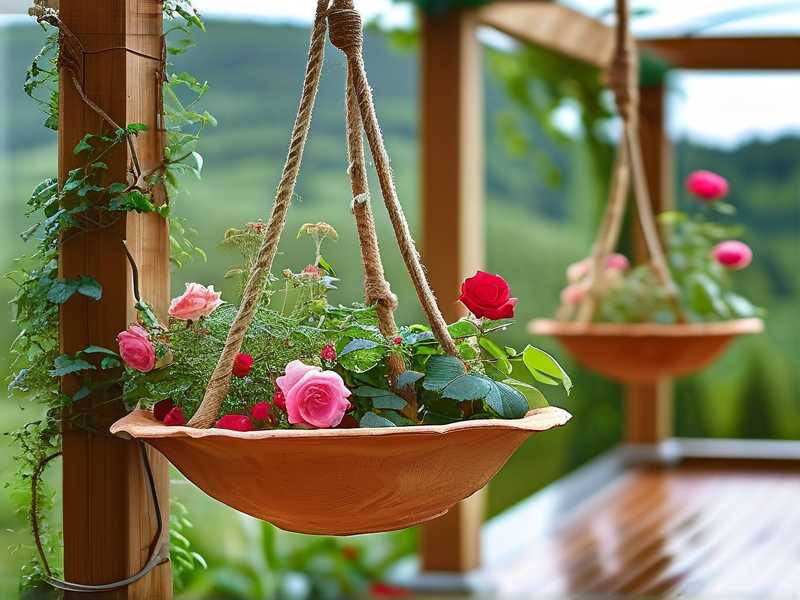
My Exact Mix Ratio and Granule Size
Let me be very specific. I don’t use fine sand or gravel from the hardware store. That stuff compacts into concrete. I use calcined clay granules designed for bonsai or turf aeration. The size matters. Too small (under 0.5 cm) and the mix starts to hold water by capillary action. Too large (over 3 cm) and the soil above falls into the gaps, leaving empty cavities where roots dry out. I use a 1:1:1 ratio by volume. One part calcined clay (roughly 1 cm diameter). One part scoria (the grade used for hydroponics, 1-1.5 cm). One part chunky perlite or coarse pine bark. The bark adds a tiny bit of organic matter that helps the transition zone between the drainage layer and the soil above.
The 3 Fatal Mistakes New Rose Basket Growers Make
I have seen so many forum posts where people ask why their balcony rose is dying. Usually, it’s one of these three things. I have made all three mistakes myself. Learn from my scars.
Mistake 1: Watering on a Fixed Schedule
I used to water my baskets every evening at 7 PM. Partly discipline, partly habit. It was a disaster. Some days the wind had dried the surface to a crust. Some days it had rained in the morning, and the basket was still heavy with water. I was watering on autopilot, not based on need. The calcined-clay-scoria mix changes the rules. Because the bottom drains freely, you can water thoroughly until it runs out the side holes. Then you wait. The correct test is the finger test. Push your index finger 5 cm into the soil. If it feels cool and slightly damp, skip watering. If it feels dry, water slowly until you see the first drip. This saved my third rose plant.
Mistake 2: Light Exposure Mismatch
Roses need at least six hours of direct sun. But a hanging basket on a south-facing balcony can cook in the afternoon. I learned this when the leaves of my ‘Patio Hit’ rose turned crispy at the edges, despite perfect drainage. The basket itself was absorbing heat through the side walls. The dark plastic got hot. The soil at the perimeter reached 40°C. The roots near the edge were literally baked. My solution was to use a double-sleeve basket. An inner mesh basket with the drainage mix, and an outer decorative basket with a 2 cm air gap. That air gap acts as insulation. The scoria in the drainage layer also helps, because it does not transfer heat downward as fast as wet soil does.
Mistake 3: Wrong Basket Choice
A solid wall planter is not a hanging basket. My biggest error was buying a cheap, non-porous, glazed ceramic bowl for the balcony. It had one tiny drainage hole at the center. With a thick layer of calcined clay and scoria, the water still had nowhere to go because the hole was too small and the basket sat flush against a saucer. The roots rotted within ten days. I switched to a wire-framed basket with a coconut coir liner. The liner allows air pruning of roots. The coir lets water seep out laterally, not just at the bottom. I added the calcined clay base, and the combination was a game changer.
My 2-Week Observation Journal: The Full Timeline
I want you to see exactly what happened when I set up the correct mixed drainage on my 60 cm wide basket with a single ‘Falstaff’ rose (David Austin). I repotted on a Saturday morning.
Day 1 to Day 3: The Settling Phase
Right after repotting, I watered the basket with a full 5 liters of water. I let it drain freely for ten minutes. The mix was surprisingly stable. The scoria did not float up. The calcined clay pellets turned slightly darker as they absorbed water. By Day 3, the surface was dry, but when I checked the bottom drainage holes (I drilled three extra 2 cm holes in the outer liner), the scoria pieces were still moist to the touch. That told me the release mechanism was working.
Day 4 to Day 7: The Root Response
I noticed new green shoot tips emerging by Day 5. That was faster than usual. I think the root zone stayed at a constant temperature because the scoria acted as a heat sink. The AHS (link: https://ahsgardening.org ) mentions that proper drainage reduces root zone temperature fluctuation, which encourages steady growth. I also noticed that the water I gave on Day 6 (only 2 liters) did not pool on the surface. It wicked down through the calcined clay pores immediately.
Day 8 to Day 12: The Heavy Rain Test
We had an unexpected storm on Day 9. It rained heavily for six hours. The basket absorbed a huge amount of water. With my old setup, the surface would have turned to mud and the crown of the rose would likely rot. This time, the water passed through the topsoil, into the chunky pine bark layer, and then the scoria channels directed it out the side holes. The basket did not drip excessively onto the balcony floor. By Day 11, the soil was moist but not wet. The rose looked perky.
Day 13 to Day 14: Visual Health Check
The leaves had a deep green gloss. No yellowing. The new canes were sturdy. I gently tugged the base of the rose, and it resisted firmly – anchored roots. I honestly believe the mix creates a more stable base for the plant. The heavy scoria pieces add weight to the bottom. This counteracts the top-heavy weight of the rose foliage when the wind blows. My basket no longer swings violently in gusts.
Step-By-Step: Preparing the Calcined-Clay-Scoria Mix
Here is how I do it from scratch. I do this over a large tarp on the balcony floor. Wear a dust mask because the calcined clay dust can be irritating.
- Sift the materials. I pass the calcined clay through a 0.5 cm sieve to remove the crushed particles. The dust holds water and creates sludge. I keep the granules between 1 cm and 2 cm.
- Rinse the scoria. This is important. Unwashed scoria carries volcanic dust that increases the pH and can clog pores. I put it in a big bucket, spray with a hose, and stir for two minutes until the water runs clear.
- Mix dry. In the tarp, I combine 1 bucket of calcined clay, 1 bucket of scoria, and half a bucket of coarse sphagnum moss. The moss is optional but helps retain a little moisture at the top of the drainage layer.
- Moisturize the mix. I spray it with a water mist until the whole thing feels slightly damp. This prevents the dry mix from pulling water out of the fresh compost above it.
- Place the liner. I line the basket with a 2 cm thick layer of coconut coir. Then I add a 5 cm layer of coarse gravel at the very bottom. That is an extra safety layer.
- Add the mixed drainage layer. I pour in the calcined-clay-scoria mix to a depth of 6-8 cm. I do not compact it. I lightly shake the basket to settle it.
- Add a barrier layer. A single sheet of non-woven landscape fabric (or a piece of old cotton t-shirt) sits on top of the drainage mix. This stops the fine soil particles from washing down into the drainage layer.
- Fill with compost. I use a mix of 70% high-quality rose compost and 30% coarse perlite. I fill it to within 3 cm of the rim.
- Plant and water. I plant the rose, then water slowly. Five liters for a 40 cm basket. I wait ten minutes, then water with another liter.
The Barrier Layer: The Secret Step Everyone Forgets
I have to highlight this. The fabric barrier is the difference between a drainage layer that lasts for months and one that clogs after three weeks. If you skip it, the fine soil particles migrate downwards. They fill the air spaces in the scoria. Within two weeks, you have a solid, waterlogged brick at the bottom. I learned this when I pulled out a dead rose and found the scoria completely encased in a dark slime. Since I added the fabric barrier, I have never had that issue again.
How the Mix Reacts to Different Balcony Microclimates
Your balcony might be different from mine. Think about your wind exposure and humidity.
Windy and Exposed Balconies
If you live on a high floor, the wind pulls water out of the soil fast. You will water more frequently. In this case, I increase the ratio of calcined clay to scoria to 2:1. The clay holds water longer. The scoria still provides the structural drainage. The bark component helps slow down evaporation from the top.
Shaded and Humid Balconies
If you have a north-facing porch with little wind, you need maximum drainage. I would reverse the ratio: 1 part calcined clay to 2 parts scoria. The scoria allows the water to escape quickly because evaporation is low. Additionally, I reduce the amount of sphagnum moss to almost zero.
The Long-Term Maintenance of the Drainage Layer
The mix does not stay perfect forever. Over six to eight months, the organic components break down. The pine bark decomposes and can turn acidic. The calcined clay granules become brittle if they freeze and thaw repeatedly. I refresh the drainage layer every 12 months.

How to Refresh Without Full Repotting
This is possible during the dormant season. I tip the basket on its side. I push a stiff wire through the drainage holes to break up any compacted material. Then I flush the basket with a strong hose from the top. The water runs through the drainage and clears the fine particles. Then I add a topping of fresh calcined clay granules directly onto the soil surface. When worms and microbes bring that clay down, it helps maintain the structure.
Common Visual Signs Your Drainage is Failing
Your rose will literally tell you when the mix has failed. Look for these signs.
- Yellow leaves with green veins – This indicates waterlogged roots that cannot uptake iron.
- A foul smell – Anaerobic bacteria thrive in waterlogged scoria.
- Moldy surface – White or green fungus on the top soil means moisture is sitting too long at the root zone.
- Roots growing out of the drainage holes – Generally fine, but if the emerging roots are black and mushy, the internal layer is clogged.
I saw all these signs on my second attempt, right before I dismantled the whole basket to see what went wrong. The scoria had silted up.
Why This Mix Is Superior to Just Adding Gravel
Let me compare this directly. Many tutorials say “add a layer of gravel at the bottom”. That is outdated advice. Gravel creates a “perched water table”. In simple words, the water sits at the boundary between the fine soil and the coarse gravel. It does not drain away easily because the soil above holds water like a sponge. The water only moves into the gravel when the soil is fully saturated. That keeps the root zone wet. The calcined clay breaks this barrier because it has capillary pores that slowly pull water down. The fabric barrier prevents soil from falling into the gravel layer.
Budget and Sourcing Tips
I recommend buying calcined clay from a bonsai supplier. It is expensive in small bags. Buy a 20-liter bag, it lasts for minimal two large baskets. Scoria is much cheaper. Look for a garden center that sells it for hydroponics. A 15-liter bag usually costs the same as a fast-food meal. The pine bark can be found as orchid bark.
Nutritional Considerations with this Mix
One thing I missed initially. Scoria is free-draining but also fairly inert. It does not hold nutrients. Calcined clay holds nutrients on its cation exchange sites, but it releases them slowly. To compensate, I add slow-release rose fertilizer pellets into the drainage layer before placing the fabric barrier. This encourages roots to grow down into the drainage zone, which makes the plant stronger and more drought-resistant. This happens because the roots look for the trapped nutrients. The RHS (link: https://www.rhs.org.uk ) research suggests that root systems are more resilient when they explore a larger volume of substrate.
Watering Technique: The Slow Soak Method
Stop using a watering can with a fast stream. You need a slow soak. I use an old 2-liter plastic bottle with the cap poked with five tiny holes. I invert it into the soil. The water drips out slowly into the mix. This ensures the entire profile, including the calcined clay layer, gets saturated evenly. If you pour too fast, the water will find channels down the side of the basket and rush out without wetting the root ball. I also never use cold tap water. I keep a bucket of water near the balcony for 24 hours to let it reach room temperature.
The Impact of Pruning on Drainage Requirements
Here is a subtle point. Pruned roses have fewer leaves and use less water. If you heavily prune in the spring, you should water less frequently. The drainage mix will remain too wet for the reduced needs of the plant. I adjust by adding a layer of dry sphagnum moss on the top surface after pruning. This absorbs excess moisture from the air and soil until the plant leafs out again.
Final Words on the Calcined-Clay-Scoria Mix
I have now used this mixed drainage setup for over three consecutive growing seasons. My current rose bush has never looked better. The root system is vigorous because it gets the right balance of air and water. The basket dries out at a predictable rate. I can finally water without anxiety, because I know the excess will drain away from the roots quickly. I genuinely believe that if I had used this mix from the start, I would not have lost those first three plants. If you get nothing else from this article, get this: the roots are more critical than the leaves. Help the roots first.
FAQ Section (Frequently Asked Questions)
Why is my drainage layer not letting water through after two weeks?
This usually means fine soil has clogged the pores. This happens when you skip the fabric barrier. You can fix it by drilling extra holes in the side of the basket, near the base, and carefully flushing with a short sharp burst of water.
Should I use crushed brick instead of scoria?
No. Crushed brick breaks down and becomes chalky, raising the pH and clogging pore spaces. Scoria has a rough surface that prevents compaction. Stick with scoria or pumice.
How often do I need to change the calcined clay in the drainage layer?
About once a year, preferably in early spring before the growth flush. The clay granules become softer and lose their internal porosity after many freeze-thaw cycles.
Is it possible to use this mix for other plants besides roses?
Yes, it works great for fuchsias, tomatoes, and citrus trees. The main idea is to provide a high-oxygen environment for the roots. Just adjust the ratio depending on the plant’s water tolerance.
Do I need a saucer under the basket?
I do not recommend a sealed saucer. It defeats the purpose of your drainage setup. If you need to prevent water dripping onto the floor, place the basket on a stand with a tray that you can empty manually. Better yet, just let it drip if you have an open wooden balcony.





