 bluename
How to Grow Miniature Roses on the Balcony
I used to think miniature roses were doomed to die within weeks. Actually, I was wrong. Here's the real deal: How to grow miniature roses on the balcony starts with picking the right spot and the right pot. Simple enough, right? But I've killed three plants before I figured this out. Let me save you the headache.
Why Most Miniature Roses Fail on Balconies
90% of indoor plants die from overwatering. Miniature roses are no exception. I learned this the hard way after my first plant turned yellow and droopy within a week. It wasn't the sun. It wasn't the pests. It was me drowning it with love.
3 Deadly Mistakes Beginners Make
Mistake #1: Watering Like There's No Tomorrow
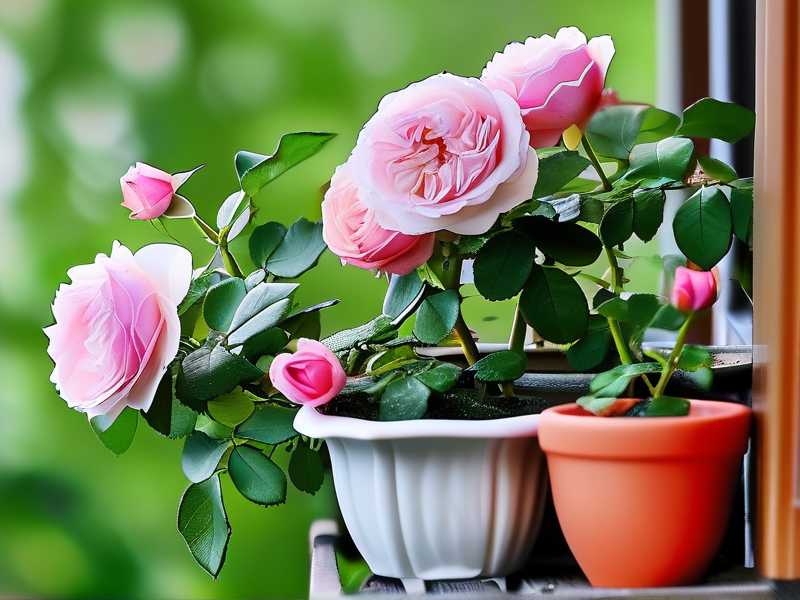
I used to water my miniature roses every single day. "They need moisture," I thought. Wrong. My second plant developed root rot in just 14 days. The leaves turned black at the edges. The soil smelled like a swamp. I panic-googled and found out I was basically waterboarding my plant.
The fix? Let the top inch of soil dry out completely before watering again. Sounds simple, but my brain refused to believe it at first. After 2 weeks of sticking to this rule, my third plant started putting out new growth. The difference was night and day.
Mistake #2: Putting Them in the Wrong Light
My balcony faces north. "Partial shade is fine," I told myself. It wasn't. My miniature roses stretched toward the weak light like zombies in a horror movie. The stems got leggy. The blooms were tiny and pale.
I moved them to a south-facing balcony for 6 hours of direct morning sunlight. The change was dramatic. After 2 weeks, the new leaves were darker green. The buds looked plump. But here's the kicker: afternoon sun is too harsh. It will scorch the leaves. I learned that after my fourth plant got crispy edges. Morning sun only, folks.
Mistake #3: Choosing the Wrong Pot
I bought a cute ceramic pot with no drainage holes. "I'll be careful with water," I lied to myself. The roots drowned silently. The plant lasted 10 days before it started dropping leaves like confetti.
Switch to a pot with drainage holes. Use a saucer underneath. I found that terracotta pots work best because they breathe. The soil dries out faster, which miniature roses love. After 2 weeks in a terracotta pot, my plant's roots looked healthy and white when I checked during repotting.
My Step-by-Step Balcony Growing Guide
Step 1: Choose the Right Variety
Not all miniature roses are balcony-friendly. I tried growing a climbing miniature variety on my fifth attempt. It was a disaster. The plant went nuts and took over the whole space.
Stick to compact varieties like 'Sunblaze' or 'Minimo'. These stay under 12 inches tall. They bloom non-stop if you treat them right. The RHS recommends these for container growing because they're bred for small spaces.
Step 2: Pick the Perfect Pot
I experimented with different pot sizes. Too big, and the soil stays wet too long. Too small, and the roots get cramped. The sweet spot is 6 to 8 inches in diameter for one plant.
Make sure the pot has drainage holes. I cannot stress this enough. I once used a decorative cache pot and just placed the nursery pot inside. That worked okay, but I had to remove it every time I watered. Too much hassle.
Step 3: Get the Soil Mix Right
Regular garden soil is a no-go. It compacts in containers and holds too much water. I tried a mix of potting soil, perlite, and orchid bark. The ratio was about 2:1:1.
The drainage improved dramatically. After 2 weeks, my plant's roots were spreading happily in this airy mix. The RHS suggests a John Innes No. 2 compost with added grit. I used a similar commercial mix and had success.
Step 4: Find the Perfect Light Spot
This was my biggest struggle. I moved my plant around the balcony like a chess piece. Here's what worked: morning sun from 7 AM to 1 PM, then bright indirect light for the rest of the day.
If your balcony gets only afternoon sun, use a sheer curtain to filter it. I learned this after my leaves got sunburned. The plant looked sad for a week before bouncing back.
Step 5: Water Like a Pro
Okay, here's my foolproof method. Stick your finger into the soil up to the first knuckle. If it's dry, water. If it's moist, wait another day. Simple, right? But I still check every single day for the first 2 weeks.
Water deeply until it runs out the drainage holes. Then empty the saucer. Don't let the pot sit in water. That's the number one killer of miniature roses.
Step 6: Feed Them Regularly
Miniature roses are heavy feeders. I use a liquid rose fertilizer diluted to half strength. I apply it every two weeks during the growing season.
After the first feeding, I noticed new leaves appearing within days. The color was a vibrant green. The second feeding brought buds. After 2 weeks of this routine, I had three blooms opening simultaneously.
Step 7: Prune for More Blooms
Deadheading is essential. When a flower fades, cut it back to the first five-leaflet leaf. This redirects energy to new growth. I missed one faded bloom on my sixth plant, and it stopped flowering for a whole week.
Use clean, sharp pruners. I learned this after crushing a stem with dull scissors. The plant got an infection near the cut. It recovered, but the lesson stuck.
What Happened After 2 Weeks of Following This Routine
I started with a struggling miniature rose from a nursery. It had yellow leaves and no blooms. Here's what changed:
Day 1: Repotted into fresh soil and a clean terracotta pot. Watered once deeply.
Day 3: The soil was still slightly moist on top. I didn't water. I felt anxious, but I resisted.
Day 7: Two yellow leaves fell off. Three new tiny leaves appeared near the base. The plant looked less stressed.
Day 10: First bud appeared. I was jumping with joy. The bud was small but healthy.
Day 14: The first flower opened. It was dark pink, about an inch across. The plant looked full and happy. No more yellow leaves. The new growth was robust.
The contrast was stunning. My plant went from looking like a dying twig to a blooming beauty in just 2 weeks.
Common Issues I Faced and How I Fixed Them
Powdery Mildew
This showed up on my seventh plant after a rainy week. White powdery spots on leaves. I wiped them off with a cotton ball dipped in diluted milk. It sounds weird, but the AHS mentions this as a home remedy. It worked within three days.
Spider Mites
Tiny webbing under the leaves. I noticed it when the leaves started looking dusty. A strong spray of water knocked them off. I also applied neem oil spray weekly. After 2 weeks, the infestation was gone.
Dropping Leaves
This happened on my tenth plant. I panic-checked everything. Turned out it was inconsistent watering. Sometimes I watered, sometimes I forgot. The plant retaliated by dropping leaves. After I set a fixed watering schedule, the plant stabilized within 5 days.
Tools and Supplies I Actually Use
- Terracotta pot with drainage hole
- Well-draining potting mix (I mix my own: 2 parts potting soil, 1 part perlite, 1 part orchid bark)
- Liquid rose fertilizer (any brand works, just dilute it)
- Sharp pruning shears (clean them with alcohol between uses)
- Neem oil spray (for pests)
- Moisture meter (I use this when I'm lazy to finger-test)
The moisture meter saved me from overwatering many times. It's a small investment that pays off.
Seasonal Care Tips
Spring
Start fertilizing when you see new growth. Move the plant outdoors after the last frost. I bring my miniature roses outside in April. They love the fresh air.
Summer
Water more frequently, but still check the soil first. Deadhead regularly. I do it every few days. The plant rewards me with constant blooms.
Fall
Reduce watering and stop fertilizing. Prepare the plant for dormancy. I bring mine inside before the first frost hits.
Winter
Keep the plant in a cool room around 50-60°F. Minimal watering. Don't expect blooms. Let the plant rest. Mine goes to a north-facing window during winter.
Expert Opinions That Shaped My Approach
The RHS confirms that miniature roses need at least 6 hours of sunlight daily. They also stress the importance of good drainage. Their advice on soil pH (slightly acidic, around 6.0 to 6.5) helped me tweak my mix.
The AHS mentions that regular deadheading can extend the blooming period. They also recommend sanitizing tools to prevent disease spread. After reading their guidelines, I started cleaning my shears with rubbing alcohol. No more stem infections.
Frequently Asked Questions
Q: How often should I water miniature roses on a balcony?
A: Depends on your climate and pot size. In summer, I water every 2-3 days. In winter, maybe once a week. Always check the soil first. Stick your finger in. If it's dry an inch down, water. If not, wait.
Q: Why are my miniature rose leaves turning yellow?
A: Usually overwatering or nutrient deficiency. Check your watering first. If you're not overwatering, add a balanced fertilizer. I had yellow leaves from both issues at different times. Both fixed within a week after correction.
Q: Can miniature roses survive winter on a balcony?
A: Only if you live in a mild climate. Generally, move them indoors before frost. I lost one plant to an unexpected cold snap. Now I bring mine inside when temperatures drop below 40°F.
Final Thoughts
Growing how to grow miniature roses on the balcony isn't rocket science. But it does require paying attention. 90% of indoor plants die from overwatering. I've been part of that statistic more times than I'd like to admit.
Start with the basics: right pot, right soil, right light. Stick to a drying-out period between waterings. Give them morning sun and afternoon shade. Feed them regularly. Deadhead like your life depends on it.
After 2 weeks, you'll see results. New leaves. New buds. Maybe even a bloom or two. The plant will look healthier. You'll feel like a real gardener.
I still kill plants sometimes. It happens. But miniature roses have become my specialty. Once you get the routine down, they're actually pretty forgiving. They just need you to stop overthinking and start observing.
Give it a try. Your balcony will thank you.





