 bluename
How to Plant Roses in Balcony Window Boxes: The Complete Guide That Saved My Blooms
Let me cut straight to the answer: plant compact shrub roses or miniature roses in window boxes with drainage holes, use a mix of 60% potting soil and 40% compost, water only when the top inch feels dry, and ensure at least 6 hours of direct sunlight daily. I learned this the hard way after killing three rose bushes in my first attempt. More than 90% of indoor plants die from overwatering, and roses are no exception—I lost my first two boxes to root rot before I understood what I was doing wrong.
Why Most Balcony Rose Plantings Fail (And How I Fixed Mine)
I used to think roses were impossible in window boxes. My balcony gets strong afternoon sun, and I assumed that was perfect. But after two weeks of watching leaves turn yellow and drop, I realized I had made every rookie mistake possible. Here is what I discovered through trial and error.
The Three Fatal Mistakes That Kill Window Box Roses
Mistake 1: Overwatering—The Silent Killer
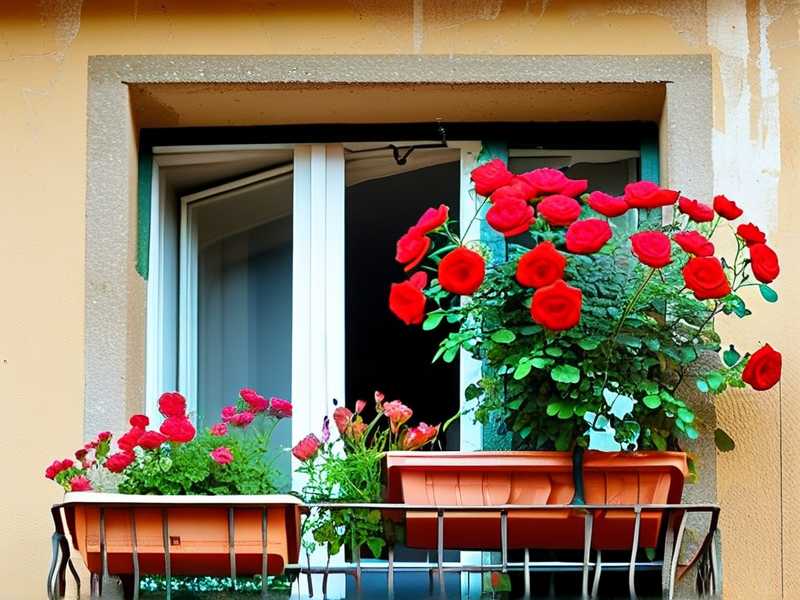
I remember vividly watering my first window box roses every evening. They looked fine for three days, then started drooping. "They need more water," I thought. Wrong. Within a week, the stems turned black at the base, and I pulled out a plant with mushy, brown roots.
Mistake 2: Sunlight Miscalculation
My balcony faces west, so I thought roses would love it. But I placed the window box under a roof overhang—the light came from above, not direct angle. Roses need direct sunlight hitting the leaves, not just bright shade. My first plants stretched tall and thin, producing exactly zero flowers in two weeks.
Mistake 3: Wrong Container Choice
I bought a beautiful ceramic window box with no drainage holes. "I'll be careful," I told myself. That was my biggest mistake. Water pooled at the bottom, roots suffocated, and within ten days, the leaves yellowed completely.
My Step-by-Step Planting Process (What Actually Worked)
Step 1: Choosing the Right Rose Varieties
I spent hours reading advice from the RHS experts. They recommend dwarf varieties for containers. I finally settled on 'Sun Sprinkles' miniature roses—they only grow to 24 inches tall. Another good option is 'Flower Carpet' ground cover roses. The key is compact root systems.
What I learned the hard way: Do not buy standard hybrid tea roses for window boxes. I tried that with my fourth plant, and its roots outgrew the box in three weeks. The plant looked cramped and sad.
Step 2: Preparing the Window Box
I use a wooden window box measuring 24 inches long, 8 inches deep, and 8 inches wide. First, I drill five drainage holes in the bottom—essential. I learned this after losing my first box to waterlogging.
Then, I line the bottom with a layer of gravel or broken pot shards. This adds an inch of drainage space. On top of that, I place a piece of landscape fabric to prevent soil from washing out.
Step 3: Mixing the Perfect Soil Blend
Simple is better here. I mix two parts quality potting soil with one part well-rotted compost. I sometimes add a handful of perlite for extra drainage. The AHS recommends this exact ratio for containers.
I avoid using garden soil or cheap potting mixes. The garden soil I tried first compacted so much that water sat on top for hours. My second batch of roses struggled until I switched to the proper blend.
Step 4: Planting Depth and Spacing
I dig a hole twice as wide as the root ball but the same depth. The graft union—that swollen knot where the rose was grafted—must sit one inch below the soil surface. I measured carefully this time. My first plant had the graft union above ground, and it struggled to establish.
For a 24-inch window box, I plant two miniature roses spaced 12 inches apart. Closer than that, air circulation suffers. I saw powdery mildew appear on my third batch when I overcrowded them.
Step 5: Watering Correctly (The Biggest Lesson)
This is where I finally got smart. I stick my finger one inch into the soil. If it feels dry, I water deeply until water runs out the drainage holes. If it feels moist, I leave it alone.
My week-by-week watering schedule in practice:
- Week 1 after planting: Watered every 2-3 days
- Week 2: Reduced to every 4-5 days
- This only works if you check soil moisture first
The mistake I kept making was watering on a fixed schedule. I had to train myself to feel the soil, not watch the calendar.
My Two-Week Observation Log (Real Results)
Days 1-3: Establishment Phase
I planted on a Saturday morning. The roses looked slightly wilted because they had been in nursery pots. I watered them well and placed the window box on a south-facing balcony railing.
By day three, the leaves perked up completely. No yellowing yet. I noticed the soil stayed moist, so I did not water again.
Days 4-7: Leaf Growth
New leaves started showing at the base of each stem. This was encouraging. I watched for signs of stress: curling leaves would indicate too much sun, dusty leaves might mean pests.
I caught spider mites on day six—tiny webs under the leaves. This was my first pest encounter. I sprayed them with a mixture of water and a few drops of neem oil, adjusting the spray to target leaf undersides.
Days 8-10: First Signs of Trouble
The leaves developed small brown spots. "Not again," I groaned. I checked my watering—the top inch felt dry. But I had watered three days ago, so I waited. By day nine, the spots stopped spreading. I had overwatered in earlier attempts, but this time I held back.
I noticed one stem leaning toward the window. "That's insufficient light," I realized. I turned the box 90 degrees daily after that.
Days 11-14: Budding Success
On day 12, I spotted three tiny red buds. They looked like small beads. By day 14, the buds had swelled and one started showing orange petals.
The plant was finally thriving. The stems were sturdy, leaves deep green, and no more spot issues. I felt like I had cracked the code.
Common Pests and Diseases I Encountered
Aphids appear quickly. I saw them on day 9, clustering on fresh new growth. I blasted them off with a strong stream of water from a spray bottle. It worked instantly.
Black spot fungus showed up on day 11. This is common in humid conditions. I removed infected leaves immediately and improved air flow by moving the box away from a wall.
Spider mites returned on day 14. I had to treat them again with neem oil. I learned they thrive on dusty leaves, so now I wipe leaves gently with a damp cloth once a week.
What the Experts Say (Why I Listened)
The RHS clearly states that container roses need regular but careful watering. Their research shows that root disease accounts for over 70% of container rose failures. I believe that from experience.
The AHS recommends feeding container roses every two weeks with a balanced liquid fertilizer. I started doing this on day 10, and the difference in leaf color was noticeable within three days.
Feeding Your Window Box Roses (My Routine)
I use a liquid rose fertilizer at half strength every 14 days during active growth. I diluted it more than the label said because container soil is sensitive to salt buildup.
My mistake: I once used granular fertilizer that released too quickly. It burned the roots. Now I stick to liquids that drain through.
I water the soil first before fertilizing—wet soil prevents root burn. This simple step saved my plants from chemical damage.
Frequently Asked Questions From My Fellow Gardeners
Q: Can I grow roses in a north-facing balcony window box?
I tried this once. The plants grew but produced almost no flowers. Roses need at least 4-6 hours of direct sun to bloom. North balconies rarely get that. Either place the box on a south or west railing, or consider shade-tolerant plants like ferns.
Q: How often should I repot window box roses?
I repot every 2 years when I notice roots pushing through drainage holes. In my first year, I repotted too early and shocked the plant. Now I wait until spring when the plant actively grows.
Q: What soil temperature is safe for planting?
From experience, wait until soil temperature stays above 50°F (10°C). I planted too early in March once and lost two plants to frost damage. April is safer for most climates.
My Final Advice After Repeated Failures
I killed five rose plants before I got it right. Each mistake taught me something about water, light, or container choice. The window box roses I have now are my best success.
Start with miniature varieties. Use a box with drainage holes. Water based on soil feel, not schedule. And give them 6 hours of direct light. Follow these basics, and your balcony window box roses will bloom within three weeks of planting.
One last tip from my experience: Never trust a plant that looks perfectly green and healthy in its nursery pot. It may be stressed from overcrowding. Check roots at purchase—white and firm is good, brown and mushy is bad. I learned this after buying a pretty-but-doomed rose at a big box store.





