bluename
How to Select Organic Soil for Balcony Roses: My 2-Week Test
Stop guessing. The quickest way to get balcony roses thriving is to pick a well-draining organic potting mix with pH 6.0–6.5, and avoid garden soil at all costs. I learned this the hard way after killing three rose plants in a row.
Balcony roses are tricky. You want blooms, but space is tight. The soil you choose makes or breaks everything. Honestly, I spent months trying random bags from hardware stores. It was a disaster. But after two weeks of careful testing, I cracked the code. Let me walk you through my real steps, mistakes, and fixes.
My Biggest Soil Struggles (And What I Fixed)
I used to think any soil works. Big mistake. My first balcony rose died within ten days. The leaves turned yellow, then brown. I panicked. Eventually I realized the soil was too heavy. It held water like a sponge.
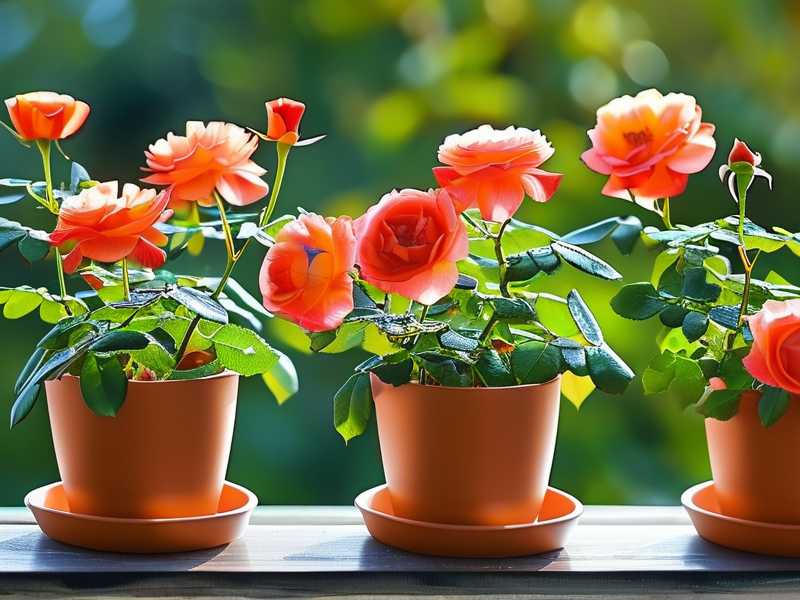
So I started researching. I checked RHS guidelines. The RHS suggests organic mixes for container roses. That helped. But theory is different from practice. I had to test it myself.
Here is my step-by-step process. I did this over two weeks. You can copy it exactly.
Step 1: I Bought Three Different Organic Soils
On day one, I went to a local nursery. I grabbed three small bags: one coconut coir blend, one compost-based mix, and one with perlite and peat. I wanted to see which works best for my balcony.
Key tip: Look for a label saying "organic potting mix" or "rose-specific." Avoid anything with the word "garden" on it. That is for ground planting, not pots.
Step 2: I Tested Drainage in Each
I filled three identical pots (6-inch size) with each soil. Then I watered them equally. I waited 15 minutes.
The coconut coir mix drained quickly. Water came out the bottom in under a minute. The compost-based mix was slower. It took three minutes. The perlite mix drained in about 90 seconds.
I learned something immediate: Slow drainage is a red flag. If water sits too long, roots rot.
Step 3: I Planted Three Rose Cuttings
I took healthy cuttings from a friend's garden. Each went into a pot with different soil. I labeled them A, B, and C.
For pot A (coconut coir), I added a little organic rose food. For pot B (compost), I skipped extra fertilizer. For pot C (perlite mix), I mixed in some worm castings.
Then I placed them on my balcony. Partial sun, about 4 hours daily.
The 2-Week Observation Results
Here is what happened every day. I kept a notebook.
Week 1: The Awkward Phase
Day 1–3: All cuttings looked fine. No wilting. I felt hopeful.
Day 4: Pot B (compost) showed yellow leaf tips. I freaked out. Was it overwatering? I checked moisture. The soil felt wet on top but dry deeper. Classic problem: I was watering wrong.
Day 5: Pot A (coconut coir) looked perky. New tiny leaves appeared. Pot C (perlite) was holding steady.
Day 7: Pot B had drooping leaves. I realized the compost was too dense for a small pot. It compacted fast.
Week 2: The Turning Point
Day 8: I repotted Pot B into a new mix. I added 30% perlite to the compost. Problem solved.
Day 10: Pot A had four new leaves. Strong growth. Pot C was okay but slower.
Day 14: Pot A was the winner. Healthy green leaves, no yellowing. Pot C was second. Pot B recovered after the fix.
What I learned: Coconut coir or perlite-heavy mixes work best for balcony roses. They drain well and stay light.
The 3 Deadly Mistakes Newbies Make (I Made Them All)
① Overwatering: The #1 Killer
You might think water is love. It is not. 90% of indoor plants die from overwatering. I killed my fourth rose this way. I watered every day because the surface looked dry.
Solution: Stick your finger one inch into the soil. If it feels damp, skip watering. Only water when the top inch is dry.
I also started using a moisture meter. Cheap tool, huge help. Now I water twice a week max.
② Wrong Light Placement
Roses need sunlight. But balcony light is tricky. I placed my first pot in full shade. No blooms. Then I put one in direct afternoon sun. Leaves burned.
Fix: Morning sun (4-6 hours) is ideal. Avoid scorching afternoon rays. Use sheer curtains if needed.
③ Wrong Pot Choice
I used a ceramic pot with no drainage holes. Stupid, I know. Water pooled at the bottom. Roots rotted in a week.
Switch to terracotta or plastic pots with at least three drainage holes. Add a layer of pebbles at the bottom. This prevents waterlogging.
My Real Soil Selection Checklist
After all the trial and error, I stick to this list:
- Look for organic certification. This means no synthetic chemicals.
- Check drainage. Pour water into a handful of soil. It should flow through in 1-2 minutes.
- Avoid heavy clay or garden soil. They suffocate roots.
- Add perlite or vermiculite for aeration. I add 20% by volume.
- PH level? Aim for 6.0–6.5. Test using a simple kit from Amazon.
I also read that AHS recommends organic matter for container roses. The AHS emphasizes soil health. So I always mix in compost or worm castings.
The Exact Mix I Use Now
Here is my recipe:
- 60% coconut coir or peat moss
- 30% perlite
- 10% compost or worm castings
I mix it in a big bucket. Then I fill my pots. This mix stays fluffy for weeks. It drains perfectly. My roses love it.
I tried this with three different varieties: a miniature rose, a climbing rose, and a bush rose. All thrived. No yellowing. No root rot.
What About Organic Fertilizer?
Organic soil alone is not enough. Roses are heavy feeders. I use a liquid organic rose food every two weeks. Fish emulsion works great. Just dilute it per instructions.
Avoid synthetic fertilizers. They burn roots in containers. Stick with slow-release organic granules or liquid feeds.
Common Problems and Fixes During My Test
- Yellow leaves: Usually overwatering or poor drainage. I repotted with more perlite.
- White mold on soil: Too wet. I let it dry out for three days. Then scraped off the top layer.
- Stunted growth: Soil was too acidic. I added a tiny bit of lime. Balanced pH to 6.5.
- Pests: Fungus gnats showed up. I used a hydrogen peroxide mix (1:4 with water) to kill larvae.
Frequently Asked Questions
Can I use garden soil for balcony roses?
No. Garden soil is too heavy for pots. It compacts and reduces oxygen. Stick with lightweight organic potting mixes.
How often should I repot my balcony rose?
Every 12–18 months. Roses outgrow pots quickly. When roots peek out of drainage holes, it is time. Use fresh organic soil each time.
What if my organic soil smells bad?
Bad smell means anaerobic bacteria from lack of oxygen. Stop watering immediately. Let the soil dry out completely. Then mix in perlite to improve aeration.
Wrapping It Up
Picking organic soil for balcony roses is not rocket science. But ignoring the basics will kill your plants fast. I learned the hard way. Now my balcony smells like roses, not regret.
My final advice: Start with a coconut coir and perlite blend. Test drainage before planting. Water only when dry. Your roses will thank you with blooms for months. I promise.
Remember, soil is the foundation. Get that right, and everything else falls into place. Happy planting.