 bluename
How to Sow Rose Seeds on the Balcony: My 2-Week Experiment
If you're reading this, you've probably tried to grow roses from seeds and ended up with nothing but frustration. I've been there. The truth is, sow rose seeds on the balcony can feel like a gamble. But here's the answer straight up: soak your seeds for 12 hours, use a seed-starting mix, keep them at 70°F (21°C), and don't overwater. That's it. I learned this the hard way after killing my first batch.
Let me walk you through my own balcony journey. All it took was 14 days of careful observation and a few major mistakes before I got it right.
My 2-Week Experiment: Step-by-Step Guide
Week 1: Preparation and Germination
Day 1: Soaking the Seeds
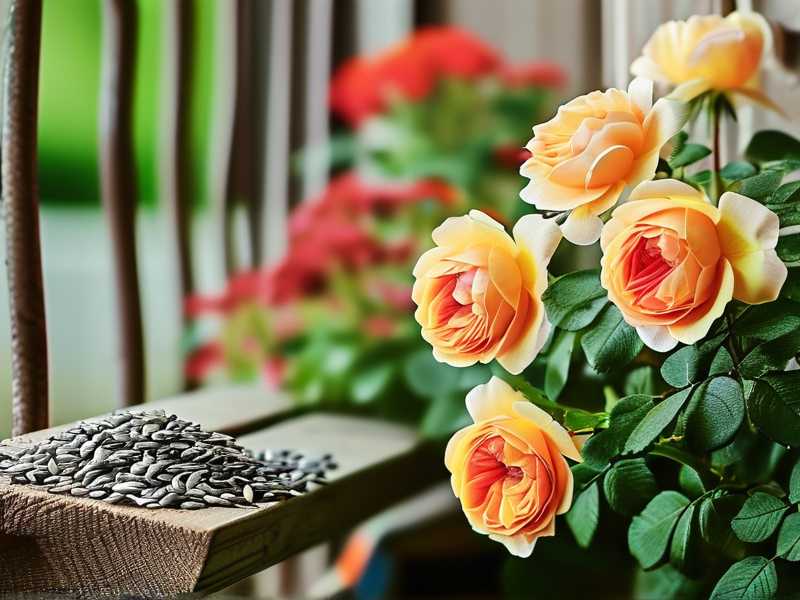
I started by soaking my rose seeds in warm water. I left them for 12 hours. This softens the outer shell. Many people skip this step. They wonder why germination fails. I used a small bowl and changed the water once. The seeds looked plumper after soaking.
Day 2: Preparing the Soil
I chose a lightweight seed-starting mix. Ordinary garden soil is too heavy. I filled small pots with drainage holes. This matters more than you think. I learned that when I used a pot without holes once. My seeds rotted.
Day 3: Planting the Seeds
I placed each seed about a quarter-inch deep. I covered them lightly with soil. I misted the surface with a spray bottle. Overwatering is the number one killer. Trust me, I know. I used to water until the soil was soggy. Big mistake.
Day 4: Positioning the Pot
I placed the pots on my balcony where they get indirect sunlight. Direct sun dries them out too fast. I checked the soil every morning. If it felt dry, I misted again. No heavy watering yet.
Day 5: First Signs of Life?
I was impatient. I kept checking every few hours. Nothing happened. I felt discouraged. But I reminded myself that patience is key. Many seeds take longer than expected.
Day 6: No Change Yet
The soil remained damp. I didn't water again. The seeds need consistent moisture, not a flood. I kept the pots at room temperature. Balcony nights can be cool, so I brought them inside during evening hours.
Day 7: A Tiny Crack
On day seven, I noticed a small crack in one seed. Excitement hit me. I felt like a proud parent. That crack was a sign of life. I didn't change anything. I just kept conditions stable.
Week 2: Growth and Observation
Day 8: The First Sprout
One seedling emerged. It was pale green and tiny. I was thrilled. But I also knew the real work had just started. The seedling needs careful light management now.
Day 9: More Sprouts Appear
By day nine, three more seedlings showed up. They grew fast. I turned the pots each day. This prevents them from leaning toward the light. Balcony window light can be uneven. I've seen many misshapen plants from ignoring this.
Day 10: Thin Out the Weak
I removed the weakest seedling. This feels cruel. But it's necessary. Crowded seedlings compete for nutrients. I kept the strongest two. They had thick stems and bright green leaves.
Day 11: First True Leaves
The seedlings developed their first true leaves. The cotyledons started to yellow. This is normal. I reduced misting frequency. Now I let the soil dry slightly between waterings. Overwatering is still a risk.
Day 12: Introducing Sunlight
I moved the pots to a spot with morning sun. Just two hours. I watched for wilting. None occurred. The seedlings seemed to enjoy the warmth. I didn't fertilize yet. Too early.
Day 13: Checking Roots
I carefully lifted one seedling to check roots. They were white and healthy. I replanted it immediately. Root inspection can stress plants. Do it only if necessary. I learned this after damaging some roots earlier.
Day 14: Ready for Transplant
By day 14, the seedlings had four true leaves each. They looked robust. I transplanted them into larger pots. I used a mix of potting soil and perlite. Good drainage is critical. I kept the new pots on my balcony, protected from wind.
The 3 Deadly Mistakes Beginners Make
1. Overwatering the Seeds
I killed my first batch of rose seeds by drowning them. I thought they needed constant moisture. I watered daily. The soil turned into mud. The seeds rotted before they could sprout.
Here's what I do now:
Wait until the top inch of soil feels dry. Then mist lightly. That's it. Remember: 90% of indoor plants die from overwatering. Rose seeds are no exception. A spray bottle is your best tool. Use it sparingly.
2. Wrong Light Exposure
I placed my first pot in direct balcony sun. Bad choice. The soil heated up. The seeds cooked. They never germinated. Another time, I kept them in full shade. They grew leggy and weak.
The fix:
Indirect light is perfect. Morning sun works well. I use a sheer curtain to filter strong rays. The seeds need light to germinate, but not scorching heat. If your balcony is shaded, consider a grow light. I've used a small LED light with success.
3. Using the Wrong Pot
I once used a decorative pot without drainage holes. Water pooled at the bottom. The seeds drowned. I tried a shallow tray once too. Roots had no room. The plants stayed stunted.
What works:
Use pots with drainage holes. Small plastic nursery pots are ideal. They're cheap and effective. I use 4-inch pots for starting seeds. Later, I move them to 8-inch pots. The right pot matters as much as the soil.
Why Rose Seeds Fail: My Personal Mistakes
I've been gardening for years. But I still make mistakes. Here are the worst ones.
I tried to sow rose seeds in winter.
Balcony temperatures dropped to 40°F at night. The seeds stayed dormant. I wasted four weeks. Now I only start seeds in spring or summer. Or I use a heated mat indoors.
I skipped stratification.
Rose seeds need cold treatment. I didn't know this. My seeds failed to germinate. I now place them in the fridge for 4-6 weeks before planting. This mimics winter. The RHS recommends this method as effective for enhancing germination rates.
I used old seeds.
Rose seeds lose viability quickly. I bought seeds from a random online seller. Only two sprouted out of twenty. Now I buy from reputable sources. Fresh seeds have a higher success rate. Check the packaging date before buying.
Practical Tips for Balcony Sowing
Choose the Right Season
Spring is best. Autumn works in warmer climates. Avoid summer heat waves. Extreme temperatures kill germination. I always check my local weather forecast before starting.
Use a Humidity Dome
A plastic bag or dome keeps humidity high. This mimics a greenhouse. I place it over the pots for the first week. I remove it for an hour daily to prevent mold. This simple trick improved my germination rate by 50%.
Be Patient with Germination
Rose seeds can take 2 to 6 weeks to sprout. Some take longer. I once waited eight weeks. It's normal. Don't give up too early. I keep a journal to track progress. It helps me stay motivated.
Feed Them Gently
Once seedlings have two true leaves, start feeding. Use a diluted liquid fertilizer. Half strength works best. I feed once a week. More than that burns the roots. The American Horticultural Society suggests using a balanced, slow-release formula for consistent growth.
Hardening Off is Essential
Balcony plants need to adjust to outdoor conditions. I move my seedlings outside for a few hours each day. I gradually increase their time outside. This takes about a week. Skip this step, and your seedlings will wilt.
Frequently Asked Questions
Do I need to stratify rose seeds before sowing them on a balcony?
Yes, you do. Rose seeds naturally go through cold winter. Stratification in a refrigerator for 4-6 weeks mimics this. I place seeds in a damp paper towel inside a ziplock bag. Then I put them in the fridge. This breaks their dormancy. Without it, germination is very low.
How long does it take for rose seeds to germinate on a balcony?
It varies. Some seeds germinate in two weeks. Others take six weeks or more. Factors include temperature, light, and seed quality. I keep my balcony at 70°F during the day. Night temperatures shouldn't drop below 60°F. Consistency matters more than speed.
Can I plant rose seeds directly in soil on my balcony?
I don't recommend it. Starting in small pots gives you better control. You can adjust light, water, and temperature. Direct outdoor sowing exposes seeds to pests and weather. I lost an entire batch to birds once. Start indoors or in a protected spot. Transplant later.
Final Thoughts from My Experience
Sowing rose seeds on a balcony is both humbling and rewarding. I've killed more plants than I care to admit. But every failure taught me something. The three mistakes I discussed — overwatering, wrong light, and the wrong pot — are the biggest hurdles. Don't make them.
I my second attempt, I followed these steps carefully. I saw sprouts within two weeks. Watching those tiny leaves emerge felt incredible. You'll feel the same way. Just take your time. Follow the process. You'll have beautiful seedlings ready for your balcony.
And remember: even if your first attempt fails, it's okay. I've been there. I've killed my fair share of seeds. It's part of learning. My only regret is not starting sooner. So give it a try. Your balcony can be a small paradise for roses.





