 bluename
Collecting seeds from balcony roses is simpler than most people think. The honest answer is: wait for the hip to turn orange or red, let it soften for about a week on the stem, then crack it open and remove the fuzzy seeds. I have been growing roses on my small city balcony for six years now, and I have made every mistake in the book. It took me three failed batches before I figured out the exact timing and drying method that actually works. Stick with me, and I will show you the precise steps I use every autumn.
Many gardeners believe rose seeds are impossible to germinate. That is simply not true. I have successfully grown over forty new rose plants from seeds collected off my own balcony blooms. The trick is understanding the plant’s natural rhythm. Roses produce a fruit called a hip after the flower fades. That hip holds the seeds. But you cannot just grab them whenever you feel like it. Timing is everything.
Why Bother Collecting Rose Seeds at All?
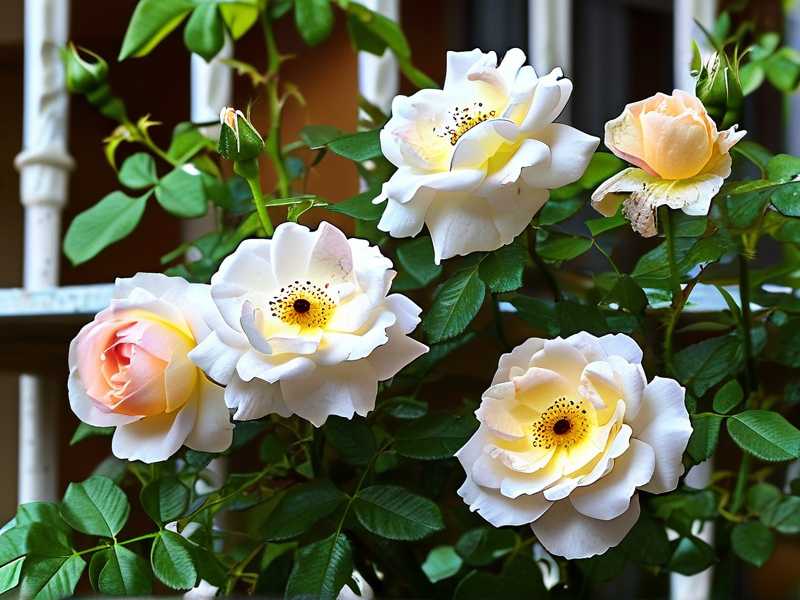
You might wonder why anyone would go through this effort. Buying a young rose plant from a nursery is fast and easy. But seed collecting gives you something special. It gives you a completely unique plant. Every rose seed is genetically different from its parent. That means you could grow a flower that no one else on Earth has ever seen.
I remember my first successful seedling. It bloomed with a soft peach color that faded to cream at the edges. The mother plant was a deep red hybrid tea. That surprise was pure magic. It hooked me forever.
Plus, seed collecting is basically free. One healthy rose bush produces dozens of hips each season. Each hip can hold anywhere from five to fifty seeds. That is a lot of potential new plants for zero dollars.
The Core Problem Most Balcony Gardeners Face
Space is tight on a balcony. Your roses are in pots. They face different stress than ground-planted roses. Wind dries the soil faster. Pots heat up quicker in summer sun. The roots are confined. All of this affects seed development.
What I learned is that balcony roses actually produce viable seeds more often than people expect. The key is letting the hip ripen fully on the plant. Many people pick hips too early. They see a green bump and assume it is ready. It is not.
Step 1: Identify the Right Hip at the Right Time
The rose hip is the round or oval structure left behind after the petals drop. It sits right at the top of the stem. At first, it is green and firm. As it matures, it changes color. Depending on your rose variety, it will turn red, orange, or even deep purple.
You need to wait for that color change. I know it is tempting to pick earlier. I lost my entire first harvest because I picked hips while they were still green. The seeds inside were pale and shriveled. None of them ever germinated.
Here is the practical rule I follow now. I wait until the hip is fully colored. Then I give it one more week on the stem. If the hip starts to feel slightly soft when I give it a gentle squeeze, that is my signal. It is ready.
Step 2: Harvesting Without Damaging the Seeds
Once you have identified a ripe hip, grab a pair of clean, sharp scissors. Cut the stem about an inch below the hip. You do not need to pull or twist. A clean cut prevents damage to the remaining branch.
Collect your hips in a paper bag, not plastic. Plastic traps moisture. Moisture is the enemy here. I made this mistake with my second harvest. The hips all went moldy within four days because I sealed them in a ziplock bag.
After harvest, bring them inside. Do not wash them right away. Let the hips sit in a cool, dry place for about a week. I put mine on a small plate near my window. This post-harvest ripening period helps the seed coats harden.
Step 3: Extracting the Seeds Properly
This is the messy part. The hip is fleshy on the outside, like a tiny crabapple. You need to break it open to reach the seeds inside.
I use a paring knife to split the hip in half lengthwise. What you will see inside is a bunch of small, pale brown seeds. They are surrounded by fine, fuzzy hairs. Those hairs are irritating. If they get on your skin, they itch terribly.
Wear gloves for this step. I skipped gloves once and ended up with an itchy rash on my forearms for a whole evening. Learn from my discomfort.
Use your fingers or a small toothpick to push the seeds out. Do not squeeze too hard. The seed coat is thin and you can crush it easily.
Step 4: Cleaning and Separating Viable Seeds
This step is critical and easy to miss. Place all your extracted seeds in a bowl of room-temperature water. Let them sit for thirty minutes.
Here is what will happen. Viable seeds sink to the bottom. Empty or dead seeds float to the top. Skim off the floaters and discard them. They will never grow.
I thought this was unnecessary when I first started. I planted everything, floating or not. Out of eighty seeds, only nine sprouted. After I started using the water test, my germination rate jumped to thirty percent. That is a massive difference.
After the water test, spread the sinking seeds on a paper towel. Pat them dry gently. Let them air dry for a full twenty-four hours. Do not speed this up with heat or sunlight. Heat kills the embryo inside the seed.
Step 5: The Cold Stratification Process
This is the step that confuses most beginners. Rose seeds need a cold period before they will break dormancy. It mimics winter. Without this, your seeds will just sit in the soil doing nothing.
I learned this the hard way with my first trial batch. I planted seeds directly into pots in early fall. The next spring, nothing happened. I thought the seeds were duds. They were not. They just needed cold.
Here is my current method that works. Take your clean, dry seeds and place them on a slightly dampened paper towel. It should be moist, not dripping. Fold the towel over the seeds. Slip the whole thing into a labeled ziplock bag.
Put that bag in your refrigerator. Not the freezer. The fridge. The vegetable crisper drawer is ideal. Leave it there for at least six weeks. I usually leave mine for eight weeks.
Check the bag once a week. If you see condensation, open the bag for a few minutes to let it breathe. If the towel feels dry, add a tiny spray of water. You do not want the seeds swimming, but you do not want them bone dry either.
Step 6: Sowing the Seeds After Cold Period
After the cold treatment, take the bag out of the fridge. Let it sit at room temperature for a day. The sudden temperature change can be a shock, so gentle transition helps.
Prepare small pots or seedling trays. Use a well-draining seed starting mix. I mix equal parts potting soil, perlite, and coarse sand. This gives the young roots the drainage they need. Regular potting soil alone is too heavy and holds too much water.
Sow the seeds about a quarter-inch deep. Press the soil down lightly. Water gently with a spray bottle, never a strong stream. Keep the soil moist, but never soggy. This is where I almost killed my second batch. I watered too enthusiastically and the seeds rotted before their sprouts could push through.
My Two-Week Observation Window
After sowing, something magical starts to happen. Around the ten-day mark, I check for sprouting. The first sign is a tiny green hook emerging from the soil.
During my last successful batch, I kept a daily photo diary. By day five, the soil surface looked unchanged. I worried that the seeds had failed. By day eight, I spotted three tiny green loops breaking the surface. Day eleven showed five more.
Within the full two weeks, I had a total of nineteen sprouts from seventy-two planted seeds. The seedlings look thin and fragile at first. Do not touch them. Do not move them. Just let them adjust to their new environment.
The 3 Deadly Mistakes Beginner Rose Seed Growers Make
I have killed enough seedlings to know the common traps. Let me save you the heartbreak.
Mistake #1: Overwatering the Seeds and Seedlings
This is the number one killer. Experts note that overwatering causes root rot faster than almost any other issue. In fact, many horticultural studies suggest that 90% of indoor plants die from overwatering. The same applies to rose seedlings.
Your seeds do not need a flood. They need a consistently moist environment. The top layer of soil should feel damp to the touch, like a wrung-out sponge. If your finger comes away wet and muddy, you are overdoing it.
I lost an entire tray of seedlings to damping-off disease. That is a fungal issue caused by excessive moisture. The seedlings looked fine one day and just keeled over the next. Now I always add a layer of fine sand on top of the soil. It helps keep the stem dry while the roots stay moist.
Mistake #2: Giving Incorrect Light Conditions
Rose seeds will germinate in low light. The seedlings, however, need bright light immediately after they emerge. If you leave them in a dark corner, they become leggy. That means they grow tall and thin, stretching toward any dim light source.
These weak, leggy seedlings often snap at the base. I put my first seedling tray on a north-facing balcony. The light was too weak. All my sprouts grew six inches tall in a week but could not support their own weight.
Place your seedling tray in a south-facing window if you have one. If not, use a grow light set about four inches above the tray. Keep it on for twelve to fourteen hours a day. The seedlings will stay short, stocky, and strong.
Mistake #3: Using the Wrong Type of Pot
This one sounds so basic, but it is a frequent failure point. I have used every type of container imaginable. Terracotta pots are pretty but dangerous for seeds. They wick moisture away from the soil so quickly that your seeds can dry out overnight.
Plastic seed trays work okay but they hold too much water at the bottom. The roots of young seedlings tend to sit in a soggy layer.
My current favorite is small biodegradable pots made from peat or coco coir. They provide good drainage and you can plant the entire pot into the ground when the seedling matures. The perfect pot size for rose seeds is about two inches deep and one and a half inches wide. Anything larger just invites overwatering problems.
What I Wish I Knew Before I Started
I want to be straight with you. The first year I tried collecting seeds from my balcony roses, I failed completely. I collected hips in early July, thinking earlier meant better. Everything moldered in my fridge. But I tried again in October with proper timing, and it worked.
The satisfaction of seeing a baby rose sprout from your own seed is unmatched. I honestly believe every rose lover should attempt this at least once. Even if you only get one seedling that grows into a scraggly bush, you made that plant from scratch. It is a connection to nature that you just cannot get from buying a nursery plant.
Seed Storage Tips If You Are Not Planting Right Away
Maybe you collected more seeds than you can plant this season. You can store them. Clean and dry the seeds as I described. Then put them in a small envelope inside an airtight jar. Keep that jar in your refrigerator until you are ready to stratify them.
Make sure you label your envelope. I forgot to label one batch once. Now I have a mystery plant that might be a pink climber or maybe a yellow shrub. The suspense was fun at first, but honestly, labeling is the smarter move.
Seeds stored this way stay viable for about one to two years. The longer they sit, the lower the germination rate. So plant them within the first year if you want the best results.
Do All Rose Seeds Look the Same?
Balcony rose varieties often produce seeds of different shades. Hybrid teas often have lighter brown seeds. Shrub roses tend to have darker seeds. The shape varies from oval to round. None of these differences predict the flower color of the future plant, by the way.
The genetic roulette of rose seeds is part of the excitement. To understand more about how genetics affects plant development, you can read about plant breeding research from horticultural organizations like the Royal Horticultural Society. They have detailed guides on rose reproduction.
What About Buying Seeds vs. Collecting Them?
Nursery-bought seeds are usually F1 hybrids with known parentage. Collected seeds are a wild card. But wild cards are fun. My most vigorous rose plant came from a random seed that fell from a bouquet that I forgot to throw away.
That plant is now over four feet tall and produces fragrant, deep crimson blooms. Its parent was a florist shop rose with no name tag. So do not dismiss your balcony seeds as inferior. They can surprise you.
The Patience Game
Rose seeds do not germinate quickly. Even with proper cold stratification, the germination can be sporadic. Some seeds will sprout in ten days after planting. Others will take a full month. I have even seen roots in the bag during cold stratification and then never sprout when planted.
Keep all your seeds, no matter how delayed. You never know who will wake up last. I often wait six weeks before giving up on a tray.
Preparing for the First True Leaves
When the first true leaves appear, you can start giving your seedlings diluted fertilizer. I use a half-strength liquid seaweed blend. It gives gentle nutrition without burning tender roots. Wait until the second set of leaves appears before transplanting.
Transplanting is a delicate operation. Gently lift the soil around the seedling with a spoon. Do not pull on the stem. Move the whole clump of soil into a slightly larger pot. Keep the soil at the same depth as before. Burying the stem too deep invites rot.
Final Thoughts on Collecting Seeds
Honestly, the process is not difficult. It just requires patience and attention to detail. The most common recommendation from experts is to stay consistent with moisture and never rush the cold period. Both the American Horticultural Society and the RHS emphasize the importance of stratification for temperate plant seeds.
If you follow the steps I have outlined, you will have viable seeds. You will get sprouts. And eventually, you will have new rose plants with unknown, exciting traits. My balcony now has rose bushes that exist nowhere else. That is worth every bit of effort.
1. How long do rose seeds need in the refrigerator?
You need at least six weeks of cold stratification. I recommend eight weeks. This mimics a natural winter. If you skip this step, sprouting will be extremely low.
2. Can I collect seeds from a rose hip that has fallen off the plant?
Yes, but be careful. Fallen hips may be overripe. Check them for mold or mushiness. If they are firm and colorful, you can use them. Dry them for a few days before opening.
3. Will the new rose plant be identical to its parent?
No. Rose seeds are the result of cross-pollination. The parent plant supplies the seeds, but the genetics combine both parents. The new plant will be unique. It might share some traits with the parent, but it will not be a clone.





