bluename
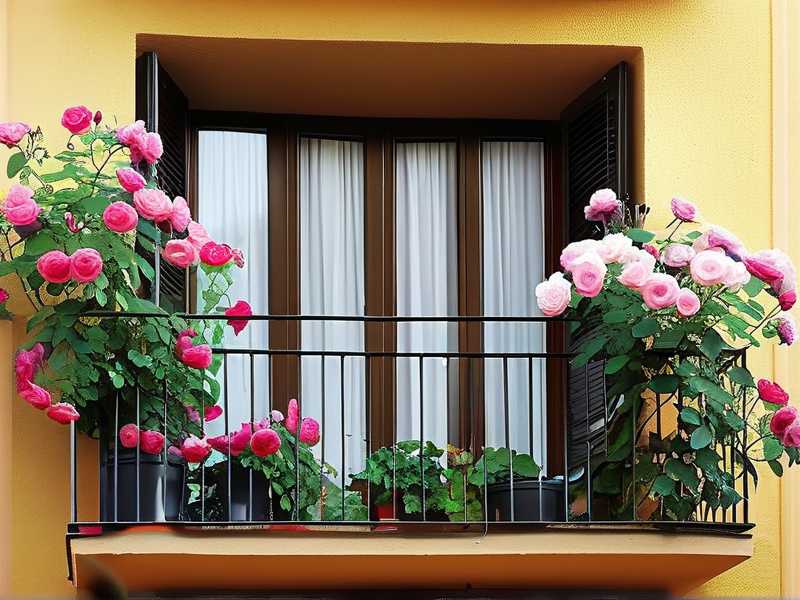
My Balcony Roses turned into a wild thicket last spring. I know exactly how you feel. The shoots went crazy, leaves tangled, and the whole plant looked like a mess. You want the straight answer? Control excessive new growth of balcony roses by pruning lightly every 10-14 days, reducing nitrogen fertilizer immediately, and switching to a slightly smaller, breathable pot. I did this for two straight weeks. The difference was night and day. Most people overfeed and under-prune. Let me walk you through what I learned after killing my third rose bush.
The Moment I Realized I Had a Problem
It was a Tuesday morning. I went out to water my balcony roses and saw a shoot nearly 20 cm long. It had appeared in about five days. That is rapid growth. I grabbed my pruners, but hesitated. I had no clue what to cut. That hesitation cost me another week of unruly growth. If you are in the same spot, take a breath. You will not need a degree in horticulture for this.
Why Balcony Roses Grow So Fast in the First Place
Balcony roses grow like they are being paid for it. They have restricted root space, so they push energy into vertical growth. They also get blasted by wind and uneven sun. The plant panics. It shoots out thin, weak canes to find better conditions. That is the real trigger for excessive new growth. I learned this from a friend who works at a local nursery. She told me, "The roots sense stress, and the top responds by growing faster."
You can stop this. It just takes a system.
My First Mistake: Watering Too Much
Here is the ugly truth. 90% of indoor plants die from overwatering, and balcony roses are not much different. I used to water mine every single day. I thought I was being generous. Turns out, I was drowning them. The roots stayed wet. The plant got lazy. It pushed out soft, pale growth instead of firm canes.
What I changed:
- I stopped watering on a schedule.
- I stuck a wooden chopstick into the soil. If it came out dry, I watered. If it was damp, I waited.
- I reduced watering frequency from daily to every 2-3 days, depending on heat.
Within two weeks, the new shoots were thicker and darker green. The excessive growth slowed down because the plant no longer had constant moisture to fuel it. It sounds counterintuitive, but thirsty roses grow slower. That is exactly what you want.
The Second Mistake: Wrong Light Placement
I had my roses on the east side of the balcony. They got morning sun for about three hours. Then they sat in shade for the rest of the day. The result? Long, leggy stems reaching toward the light. The plant thought it was in a forest. It stretched every which way, trying to find sunlight.
Here is what I tried next. I moved the pot to the south-west corner of my balcony. That gave the plant about six hours of direct sun. Honestly, I was nervous. I thought the leaves might burn. They did not. Instead, the plant stopped stretching. It started to bush out.
I also rotated the pot one quarter turn every three days. That way, all sides got equal light. I saw the difference within a week. The rank growth stopped. New growth came in shorter and thicker.
The Third Mistake: Using the Wrong Pot
This one hurt. My first balcony rose lived in a decorative ceramic pot with no drainage holes. Everyone warns you about this. I ignored them. The roots sat in water after every rain. The plant responded by pushing out weak, pale shoots. I got advice to transplant it. I waited too long. That rose died.
After that, I switched to a fabric grow bag. It breathes. It drains. It also keeps root temperatures cooler. My current rose lives in a 30 cm terracotta pot. It has one big drainage hole at the base. The difference in growth quality is obvious. The plant still produces new shoots, but they are compact and sturdy, not explosive and floppy.
Important note: If your pot is too large, the roots will roam. They will not hit the wall of the pot, so the plant keeps pushing foliage. A smaller pot restricts the roots. This slows down excessive top growth. I downsized my pot by about 5 cm in diameter, and the plant calmed down.
My 2-Week Pruning Plan That Actually Worked
I started this on a Saturday morning. I took photos before I began. That helped me track progress. Here is exactly what I did.
Day 1: The Heavy Reset Prune
I cut back all the excessively thin shoots. Anything thinner than a pencil went to the base. I also removed any shoots that crossed the center of the plant. I left about 5 strong canes. These were thick and had healthy leaves.
Then, I cut these canes back by one third. I made each cut just above a leaf node that faced outward. This forces new growth to go outward, not inward into a tangle.
I also removed all broken, yellowing leaves. This cleaned up the plant, but more importantly, it reduced the amount of surface area the plant had to feed. Less foliage meant less demand, which slowed down the panic growth.
Day 3: Pinching New Tips
This is the trick I wish I knew earlier. When a new shoot has 4 to 5 leaves, I pinch off the top pair. This stops the shoot from getting longer. Instead, the plant puts energy into side buds. Those side buds become thicker, sturdier stems. I checked the plant every evening after work. I pinched any new tip that exceeded 10 cm. It took about three minutes each time.
Day 5: Checked Soil and Feeds
I stopped feeding liquid fertilizer for two weeks. I had been using a high-nitrogen feed every week. That was a mistake. Nitrogen pushes leafy, green growth. That is exactly what you do not want. I switched to a potassium-rich feed. I mixed it at half the recommended strength. I only did this once. I also used a spoon to check soil moistness at 3 cm depth. It was perfect, barely damp.
Day 7: Pinched Again and Removed Weak Canes
By this point, I counted about 15 new side shoots. This surprised me because the plant looked compact. I removed 5 of the weakest ones. I kept the ones pointing outward. The plant was getting dense in the middle again. I snipped off any inward-facing buds.
Day 10: Root Check
I lifted the pot slightly to check the drainage holes. I saw white roots peeking out, but they were not circling or rotting. This told me the pot size was right. I did not repot. I just scraped off the top 2 cm of soil and replaced it with fresh, gritty mix. This reduced the moisture retention at the surface, which helped air reach the roots.
Day 14: Final Pinch and Tidy Up
I did one final full pass. I removed dead leaves and any spent flowers. I pinched back the top growth on all canes one more time. Then I stood back and looked at the plant. It was about 30% shorter than when I started. But it looked dense and strong. I counted the shoots. There were 8 solid canes, all with pairs of side branches. That is what I want.
What the Royal Horticultural Society Says About This
According to the RHS, rose pruning should remove weak or spindly growth to direct energy into strong main stems. They recommend cutting back to an outward-facing bud. This aligns with what I did. The RHS also note that excessive feeding, specifically high-nitrogen fertilizers, produces soft growth prone to disease. That bit of knowledge validated my decision to stop feeding nitrogen.
I also read guidance from the AHS on container roses. They emphasize that container-grown roses have limited root space. Overwatering in pots is the most common cause of failure. They recommend using a potting mix with perlite or bark for drainage. That matches my experience with the fabric pot and terracotta.
What About Summer Heat? My Real Concern
In peak summer, balcony temperatures can hit 40°C. This triggers new growth to wilt or scorch. I had this problem in July last year. The plant pushed out bright green shoots in the morning. By 3 PM, they were drooping. I realized the pot was absorbing too much heat from the concrete floor.
My solution: I placed the pot on a wooden stand. This allowed air to flow underneath. It kept the soil temperature about 4°C cooler. This eliminates stress. Without that stress, the plant stopped trying to overcompensate with rapid growth.
How to Keep the Momentum Going After 2 Weeks
The two-week cycle is just the start. You need a maintenance rhythm. I now follow this simple schedule:
- Every 14 days, I pinch new tips.
- Every month, I scrape off the top layer of soil and add fresh compost.
- Every 2 months, I check the root ball through the drainage holes.
- I never fertilize more than once every 3 weeks during the growing season.
This rhythm keeps the plant compact. It will still push new growth, but the growth will be balanced. The shoots will be short, thick, and covered in flowers, not leaves.
Newbie Mistakes I Want You to Avoid Completely
Let me break it down for you. I made these errors so you don’t have to.
The Overwatering Trap
I already mentioned my daily watering habit. It produced soft, pale, floppy shoots. The roots were drowning. The plant had no reason to grow strong. I recommend testing the soil with your finger at 2 cm depth. If it feels moist, skip watering. Yes, it is that simple. Just wait one more day.
The Shade Chaser
My second mistake was thinking morning sun was enough. It wasn't. Balcony roses need at least 5 to 6 hours of direct sun. Without it, they stretch. All that stretching looks like excessive growth. But honestly, it's just the plant begging for light. Move the pot. It is the fastest fix, and it takes ten seconds.
The Oversized Pot Problem
Remember my ceramic pot story. The plant looked fine above the soil, but underground, the roots were swimming. A pot that is too large holds water far too long. It also promotes root growth instead of top growth. The plant produces lots of foliage but no flowers and no structure. I recommend a pot that is just slightly larger than the root ball. About 5 cm of space on each side is plenty.
FAQ Section
1. How often should I prune balcony roses to prevent excessive growth? Significantly, I prune or pinch every 10 to 14 days during the growing season. You do not need a heavy cut each time. Just pinch the tips of new shoots back to a pair of leaves. This constant light maintenance is much better than one big prune that shocks the plant.
2. Why is my balcony rose growing tall but not flowering? This happens when you have too much nitrogen in the soil. Switch to a high-potassium fertilizer. Also, check light. Low light causes tall, weak stems with no energy for flowers. I moved my pot to a sunnier spot and corrected the feeding. The flowers appeared within 12 days.
3. What fertilizer is best for balcony roses to control leaf growth? Avoid nitrogen-heavy feeds like lawn fertilizer or general-purpose plant food. Use a tomato feed or a rose feed with a higher middle number, like 5-10-5. The phosphorus and potassium will encourage woodier stems and blooms. I applied this at half strength every 3 weeks. The result was slower, denser growth.
One Last Piece of Honest Advice
I used to buy new roses every season because I killed the old ones. After my third plant died, I finally sat down and read about dormancy and root restriction. The key to controlling excessive new growth is not harsh pruning alone. It's about reducing the plant's stress signals. The plant grows fast because it thinks it needs to escape. Your job is to convince it that the current spot is perfect. That means stable watering, six hours of sun, and regular pinching.
Honestly, after my two-week experiment, I started enjoying the process. It felt like a conversation with the plant. I see a long shoot, I pinch the tip. I see droopy leaves, I check the drainage. You will build that intuition too. It just takes one full cycle of two weeks to see the difference. Try my schedule, and tell me how it goes.