 bluename
How I Shaped a Bushy Compact Form for My Balcony Roses (Without Killing Them First)
Let me be blunt with you. I shape my balcony roses into a bushy, compact form by pruning hard in early spring, pinching new growth every two weeks, and pairing that with a strict "less water, more sun" rule. That is the whole secret. But it took me three dead plants and two full seasons to learn it the hard way. You probably found this article because your rose is either a leggy mess with three long canes, or it is a pile of yellow leaves in a soggy pot, or it simply looks nothing like the lush, tight bush you see in nursery photos. I get it. I have been there. And here is the thing nobody tells you: 90% of indoor plants die from overwatering, and balcony roses are no exception.
I remember the exact moment I decided to fix my balcony rose problem. It was a grey Tuesday morning. I walked out with my coffee, looked at my 'Patio Gold' rose, and honestly felt embarrassed. It was two long, floppy canes with a cluster of leaves at the top, like a green lollipop stuck in dirt. The pot was heavy with water. I had been watering it every single day because the topsoil felt dry. That was my first mistake. I was treating a woody perennial like a thirsty annual. So, if you want that tight, bushy shape, you have to stop loving your roses to death with a watering can.
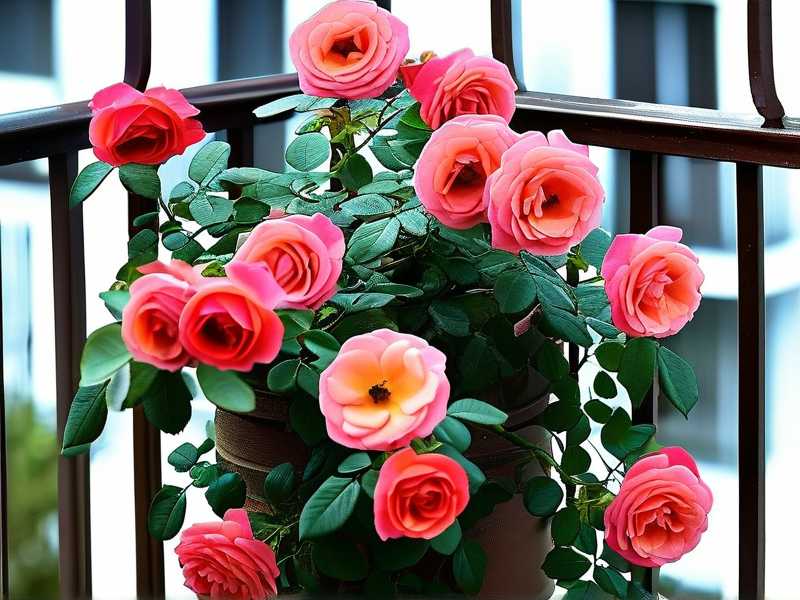
The Three Fatal Mistakes Newbies Make (I Made All Three)
Before we talk about shaping techniques, we have to clear the ground. You cannot shape a healthy plant if it is dying. And you cannot shape a dying plant at all. Let me break down the three traps I fell into, so you do not have to.
Mistake #1: Watering on a Schedule, Not on the Plant's Terms
I killed my first balcony rose with kindness. I watered it every morning, no exceptions. The leaves turned yellow, then brown, and then the roots just rotted away. It is a cliché, but it is true: 90% of indoor plants die from overwatering. On a balcony, wind and sun dry the topsoil fast, but the bottom of the pot stays wet for days. You think you are helping. You are drowning it. I learned to stick my finger two inches into the soil. If it feels damp at that depth, I walk away. I do not water. I check again tomorrow. My second rose died because I put it in a corner where it got morning sun but deep afternoon shade. That leads me to mistake number two.
Mistake #2: Confusing "Lots of Light" with "Direct Sun"
I used to think my balcony was sunny because it was bright. But "bright" is not "direct." I had a rose in a spot that got maybe two hours of weak morning sunlight. The canes grew long and pale. They stretched toward the window like they were reaching for life support. That is called etiolation. The plant is looking for sun and spends all its energy on vertical growth instead of branching. I tried to pinch it back to force bushiness, but without light, it just grew leggy again. I finally moved the pot to a south-facing rail where it got at least six hours of blazing, direct sun. The difference was night and day. A rose needs that intense light to produce the hormones that trigger side shoots. Without it, you are fighting biology.
Mistake #3: Using a Pot That Is Too Big (or Too Small)
This one is counterintuitive. I thought bigger was better. I put my first rose in a massive decorative urn. The soil volume was huge, and it stayed wet for a week after watering. The roots sat in cold, soggy dirt and never grew properly. The plant focused on surviving, not on producing new branches. I also tried a tiny pot once. That one dried out every three hours and the rose cooked in the sun. You need a pot that is about 1.5 to 2 inches larger in diameter than the root ball. Not massive. Not tiny. Goldilocks size. Drainage holes are non-negotiable. I drill extra holes in the bottom of every pot I buy because most commercial pots have too few. If water pools at the bottom, your roots will suffocate, and a suffocated plant cannot produce bushy growth.
My Two-Week Observation Process for Shaping
Okay, so you have corrected the watering, moved the pot to full sun, and put it in a properly sized pot. Now we get to the fun part: shaping. I have a specific routine that I have tested over two weeks, and I have written down every single observation. You can copy this exactly.
Week One, Day One: The Hard Prune
I started with a rose that had four long, bare canes, each about 18 inches tall. It was painful, but I cut each cane down by half. I made my cuts about a quarter-inch above an outward-facing bud. This sounds counterintuitive, but cutting off the top forces the plant to activate those lower dormant buds. I left about eight to nine inches of height. I also removed all the leaves that were lower than four inches from the soil line. A bush cannot grow from the base if it is all woody and shaded. I sterilized my pruners with rubbing alcohol first because dirty blades spread disease.
Week One, Day Three: The First Signs
I checked the cuts on the third day. The white pith in the center was fresh and green. No browning, which meant no die-back. I was happy. I noticed a tiny, almost invisible bump at the base of the nodes. Just little red dots. That told me the plant was alive and ready to push out new growth. I did not water it at all during these three days because the soil was still slightly damp from before the pruning. Remember, a cut plant uses less water.
Week One, Day Seven: The Pinch
This is where the magic happens. The buds had swelled, and some had grown into new shoots about one to two inches long. I took my thumb and forefinger and pinched off the very tip of each new shoot, just above the second pair of true leaves. People are terrified to do this, but I promise you, this does not hurt the plant. It forces the plant to branch from that node, creating a Y shape instead of a single straight line. I did this to every single new shoot.
Week Two, Day Ten: Color and Thickness
By day ten, the remaining shoots were thicker. I noticed the new leaves were a darker green than the old ones. That was a sign of good nutrient uptake. I gave it a half-strength dose of a high-potassium liquid fertilizer. Never feed a full dose after pruning because you will burn the fresh roots. The plant was now about twelve inches wide and ten inches tall. The structure was changing from vertical lines to a web of branches.
Week Two, Day Fourteen: The Second Pinch
I repeated the pinching process. This time, I pinched the new side shoots that had formed from the first pinch. This is how you build a dense canopy. Each pinch doubles the number of growing points. When I pinched, I also rotated the pot a quarter turn so that the back side, which was getting less sun, received equal light. By the end of the two weeks, my lollipop rose was starting to look like a real bush. It had maybe fifteen to twenty green shoots, all roughly the same height, all pointing outward. The shape was not perfect yet, but the foundation was there.
The "Leggy Whip" Rescue Method (My Biggest Pivot)
I have one rose that I almost threw away. It was a 'Gertrude Jekyll' climber that I mistakenly bought for a small balcony. Climbers are naturally vigorous, and mine turned into a two-meter whip in one summer. I could not prune it in the autumn because that would encourage frost-sensitive growth. So I waited.
In early spring, I did the "lay-down" trick. I took the long cane and gently bent it horizontally, tying it to a small trellis about thirty centimeters above the pot. When a cane is horizontal, the flow of auxin (the growth hormone) slows down at the tip and disperses along the length of the stem. Every single node that was pointing up then burst into growth. I got eight new shoots from one single cane. This is the absolute best trick for creating a bushy shape without losing height. I left it horizontal for three weeks. Then, once the new vertical shoots were about ten centimeters long, I pinched their tips. The result was a compact, multi-stemmed bush that looked nothing like the lanky whip. It is hard to overstate how effective this is.
Balcony Specifics: Wind, Heat, and Pot Drainage
Balcony roses are not garden roses. They live in a harsher microclimate. Reflected heat from walls and concrete can scorch leaves. I learned this when I placed a pot right against a white wall. The heat came off the wall and effectively cooked the plant in the afternoon. I now leave a gap of at least ten centimeters between the pot and the wall. Good airflow prevents mildew, which is a common problem in tight balcony spaces.
Grooming: The Steady Maintenance
Once you have achieved the bushy structure, the battle is not over. You have to groom it. I spend five minutes every morning just deadheading faded flowers. I cut them off with a sharp snipper, cutting back to the second leaf below the flower, angled away from the bud. I never just pick the petal head off. That leaves a long, bare stalk that ruins the round outline.
I also remove any leaf that touches the soil surface. If a leaf rests on the potting mix, it creates a bridge for fungal spores. Once those spores get in, your compact bush becomes a bald bush in a week. I cannot tell you how many times I lost all the lower leaves because I skipped this step for three days.
Another trick I use is thinning. Sometimes, you get a shoot that grows straight up through the middle of the bush, blocking light and air. I cut that one out completely, right at its base. A bushy shape is not just about adding growth; it is about removing the wrong growth. The goal is an open-centered vase shape that lets sunlight hit every leaf. If the inside of the bush is dark and dead, extend the pinching schedule to improve airflow.
My FAQ Section (Based on Comments I Always Get)
Question: Can I prune balcony roses in summer? I never do heavy pruning in the summer heat. It puts too much stress on the plant. What I do is a "light trim" where I just cut off the spent flower and the immediate node below it. This is maintenance deadheading, not shaping. Save the hard shaping for late winter or very early spring. If you do it in summer, the new shoots are soft and tender, and they sunburn easily.
Question: What if my rose only grows from one thick trunk? A single-trunk rose is stubborn. I have one like that. The horizontal bending trick is your best friend here. If you do not have space to bend it, use a sharp knife to make a small notch or "knick" just above a dormant bud at the base. This interrupts the sap flow and forces the bud to break. I scratched the bark surface slightly with a clean blade, and within three weeks, a new green offshoot appeared. It feels scary, but it works.
Question: How much sunlight is really required for compact growth? I have tested this empirically. My rose on the east side, with four hours of morning sun only, grows slower and stays less dense. It is still alive, but it does not produce the thick, clustered nodes that a rose with six hours of full sun does. Experts at the RHS recommend at least five to six hours of direct sunlight for successful repeat blooming and compact habit. If you have less than that, you are fighting a losing battle. The AHS also emphasizes that sun exposure is directly correlated with flower bud density. If you are stuck with a shady balcony, consider accepting a slightly leggier plant, and use more aggressive pinching to compensate.
Wrapping This Up
Shaping a balcony rose into a bushy, compact form is not a single action. It is a sequence of correct pruning, patient pinching, and disciplined watering restraint. I had to lose two plants to a soggy soil and another one to a shady corner before I understood the basics. The third one, I saved by bending it sideways. You do not need to repeat my failures. You can take my exact two-week plan, adjust it for your climate, and you will see that fat, green growth pushing out from the base where you want it.
Honestly, the most important change is your mindset. You are not a sculptor carving wood. You are a director guiding energy. Every cut sends a signal. Every pinch is a command. When you snap off that tiny tip, you are telling the plant: "Do not go there. Branch out instead."
Start with healthy soil that drains like a sieve. Put that pot in the absolute sunniest spot your balcony has. Ignore the topsoil time to time and trust the moisture meter at your second knuckle. Then, be brave. Cut those long canes back. Pinch those new shoots. Do it every two weeks, and your lollipop will turn into a berry bush.
I checked my own pots this morning. The third one, the one I almost gave away, is now a beautiful, dense sphere of glossy green and tiny buds. It took about ten weeks total from the first hard prune. And it all started by me doing less watering and more pinching. You can do this. Just start with one pot, not the whole balcony.





