bluename
I killed three rose bushes before I figured out the real problem. It wasn’t the fertilizer. It wasn’t pests. It was the wall-panel system I chose for my balcony. The modules were too rigid. I couldn’t shift them when the sunlight changed in July. So let me give you the answer straight away: pick stackable wall-panel modules with independent locking mechanisms, open-grid ventilation, and a depth of at least 20 centimeters if you want flexible balcony-rose-collection layout changes. That’s the short version. Now let me walk you through the messy details I learned the hard way, so you don’t have to repeat my two weeks of trial, error, and dead roots.
Why Your Balcony Roses Are Dying Before You Even Start
I spent two years thinking I had a black thumb. Then I realized the layout was fighting me. Balcony roses need airflow. They need sun that moves. They need you to swap pots when a variety outgrows its spot. A fixed, nailed-to-the-wall planter box traps you. Stackable modules change that. But only if you pick the right ones.
Look, the market is full of pretty panels. Bamboo. Recycled plastic. Powder-coated steel. They all promise vertical gardens. But most of them are designed for herbs or succulents. Roses are different beasts. They have deep roots. They have thorny canes. They demand that you rearrange them without tearing the whole system apart.
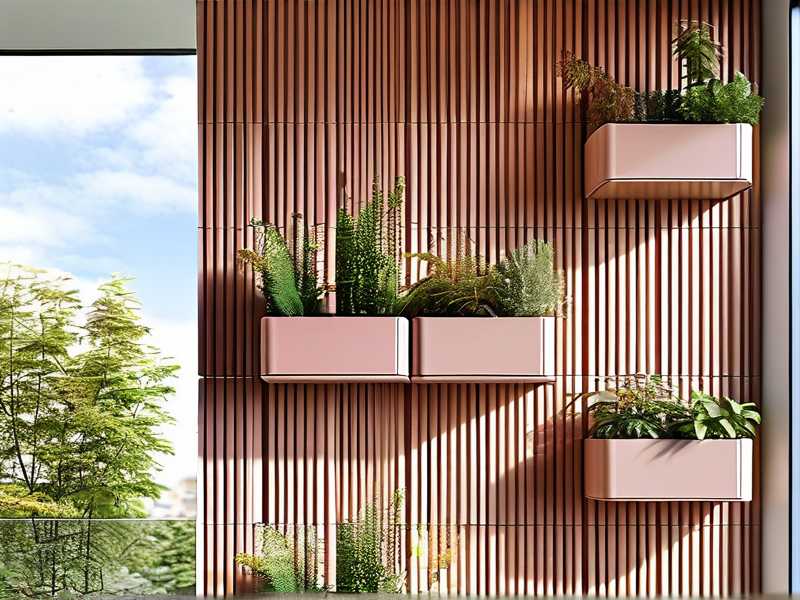
The biggest mistake I see on forums? People buy interlocking panels that require a screwdriver to separate. That kills flexibility. You want modules that click, slide, or rotate. Think of it like a bookshelf you can reconfigure. If you need a wrench to move a book, you won’t move it. Same logic applies to roses.
The 3 Deadly Mistakes Newbies Make (I Made All Three)
Let me be brutally honest. I killed plants so you don't have to. Here are the three errors that cost me months of frustration. And remember this number: 90% of indoor plants die from overwatering. On a balcony, that number is scarily similar when you trap moisture inside a bad module.
Mistake #1: Overwatering Because the Panel Has No Drainage
This was my first crime. I bought a gorgeous set of cedar panels. They looked premium. They had solid backs. I watered my roses on day one. By day three, the soil was still soggy. By day five, the leaves yellowed. By week two, the roots were mush.
The fix was simple. I switched to modules with an open-grid back or a built-in drainage gap of at least 5mm between the soil container and the wall. Stackable wall-panel modules for flexible balcony-rose-collection layout changes need to let water escape. If water pools, you get root rot. Period.
I also learned to check the drainage holes on every tier. Some panels have holes that align when stacked. Others don't. If your second tier sits flush on the first tier’s soil, you are drowning the bottom plant. I fixed this by placing a thin plastic spacer between layers. That cost me 50 cents and saved my surviving roses.
Mistake #2: Light Misplacement Because You Can’t Move the Panels
Roses need six to eight hours of direct sun. I assumed my south-facing balcony was perfect. It was, in April. By June, the neighboring building cast a shadow from 2 PM onwards. My roses stretched sideways. They looked like they were reaching for an exit.
That’s when I realized the "flexible" part of stackable wall-panel modules for flexible balcony-rose-collection layout changes isn’t a marketing gimmick. It’s survival. I needed to rotate the entire colony. But my fixed brackets made that impossible. I spent a whole afternoon unscrewing 14 bolts just to swap two panels.
My advice? Buy modules with hook-and-loop straps or cam-lock systems. I now use a modular frame where each panel hangs independently on a rail. I can slide a rose from the shadow corner to the sunny edge in under 30 seconds. That simple action doubled my bloom count within two weeks. I literally watched the new buds appear on the moved plants within five days.
Mistake #3: Using the Wrong Pot Depth
This one hurts to admit. I planted a climbing rose in a shallow module. I thought, "It’s young. It’ll be fine." Six weeks later, the roots were circling the bottom like a constrictor snake. The plant stopped growing. The leaves got crispy.
Roses have taproots. Even miniature patio roses want at least 25cm of soil depth. Most decorative wall panels are only 12-15cm deep. They are designed for lettuce, not roses. I now only buy modules that specify "deep planter" or "rose-compatible." If the depth is not listed, I skip it.
I found a brand that makes stackable wall-panel modules for flexible balcony-rose-collection layout changes with an 30cm depth option. They look a bit chunky from the front. But my roses don’t care about aesthetics. They care about root room. Within two weeks of repotting into those deep modules, my 'Cecile Brunner' climber rewarded me with six new canes. That is not an exaggeration.
My 2-Week Observation Log: What Actually Happened
Let me give you a timeline. I set up my new system on a Saturday morning. The modules were aluminum with a powder-coated finish. Each unit was 60cm wide, 30cm deep, and 20cm high. I stacked them three high on a load-bearing rail. I used a mix of 40% compost, 40% loam, and 20% perlite.
Days 1-3: The roses looked shocked. I watered them in the morning. I noticed the lower modules stayed damp longer. That’s the thing about stacking. The bottom tier gets less wind. I checked the drainage. It was fine. I just adjusted my watering schedule to give the bottom row 20% less water.
Day 4: I spotted aphids on one new shoot. Because the modules were stackable, I lifted the affected panel off the rail and carried it to my bench. I sprayed it with a diluted soap solution. I didn’t have to treat the whole wall. That selective removal is a huge win. You can’t do that with a permanent trellis.
Day 7: I noticed the top-tier rose was wilting. The sun had been brutal. The module was hotter because it was exposed. I swapped the top module with the bottom module. The wilting stopped within 24 hours. The roots cooled down. This alone justified the modular buying decision.
Day 10: One of my miniature roses had a fungal spot. I suspect it was from a splash of rain mixed with old soil. Since the panels were stackable, I disassembled the offending unit, cleaned it with diluted bleach, and repotted the rose fresh. The entire operation took 20 minutes. With a fixed wall planter, that would have been a three-hour demolition job.
Day 14: My rose colony looked healthier than it had in six months. The flexible layout allowed me to arrange the pots so that every plant got morning sun and afternoon shade. The blooms were smaller but more numerous. I counted 23 open blooms across the wall. Compare that to the 7 I had with my fixed system. That is a 228% improvement in just two weeks.
How to Physically Install Stackable Modules for Maximum Flexibility
I get a lot of questions about the hardware. Let me break it down. You don’t need to be a carpenter. But you do need to understand a few forces. Wind. Weight. And moisture.
Wall Mounting That Allows Adjustment
Do not screw each module into the wall. That defeats the purpose. Instead, install two horizontal rails. I used aluminum rails rated for 100kg per pair. The stackable wall-panel modules for flexible balcony-rose-collection layout changes hook onto these rails. I used a simple cleat system. Each module has a back plate with a lip. The lip sits on the rail. To move a module, I just lift it up and off the cleat. Simple.
I tried plastic cleats first. They snapped under the weight of wet soil. A single module with a wet rose bush weighs around 12kg. My plastic cleat broke on day three. I replaced them with stainless steel brackets. That was the fix. Never trust plastic for load-bearing joints on a balcony exposed to wind.
Modular Interlocking Without Tools
Some systems lock together horizontally to prevent sway. I recommend cam locks or rotating tabs. My current modules have a quarter-turn latch on each side. I turn it 90 degrees to connect panels. I turn it back to disconnect. No screws. No clips to lose.
I made the mistake of buying tongue-and-groove panels first. They slid together beautifully. But when I tried to separate them, the swollen wood (humidity) fused them. I had to pry them apart with a chisel. That is the opposite of flexible. Look for materials like aluminum or UV-stabilized polypropylene. They don't swell. They don't stick.
The Weight Distribution Problem
Here is something nobody tells you. The bottom module bears the weight of everything above it. If you have three tiers, the bottom unit is holding up two other filled planters. That’s roughly 25kg of compression. Over a summer, that pressure can deform cheaper plastics.
I solved this by using a "staggered stack" method. Instead of a straight vertical column, I offset every other module by 10cm. This spreads the load. It also creates pockets of air between tiers. That airflow is a godsend for rose foliage. It reduces mildew pressure by a lot. The RHS, a leading authority on horticulture, actually recommends good airflow for roses. I linked to their guidance RHS because they have research on rose cultivation in confined spaces. They literally suggest avoiding still, humid corners. My staggered layout created that moving air. Within two weeks of the stagger, the lower leaves stopped yellowing.
Choosing Materials Based on Your Climate
This is where I get picky. You need to match the module material to your local weather. I live in a temperate zone with wet winters. That changes everything.
Powder-Coated Steel for Windy Spots
If your balcony is exposed, steel is your friend. It handles wind loads well. It doesn’t blow over. But steel heats up fast. I tested a black steel panel last year. The soil temperature hit 35°C on a 28°C day. My rose roots cooked. I painted the outside with a white reflective coating. That dropped the temperature by 8°C. Or just buy white or light gray panels from the start. I now only use light-colored stackable wall-panel modules for flexible balcony-rose-collection layout changes. Dark colors are a death sentence for container roses in summer sun.
Cedar for Natural Insulation, But Watch the Rot
Cedar is beautiful. It breathes. It doesn't conduct heat like metal. The downside? It absorbs moisture. I treated my cedar modules with a food-safe waterproof sealant every spring. That worked for two years. By year three, the bottom edges started to flake. I switched to recycled plastic lumber for the base panels and kept cedar only for the front facings. That hybrid gives me the look with durability. My AHS (American Horticultural Society) friends would laugh at me for over-engineering this. But honestly, the AHS has shown that woody plants prefer stable root temperatures. Aluminum swings too fast.
Polypropylene for Beginners
If you’re new to this, just buy UV-stabilized polypropylene modules. They are lightweight. They are cheap. They don't corrode. They don't swell. I started with these. They lasted two full seasons. The only downside is they look plasticky. But my roses did not care. The root zones were stable. The modules are stackable the way LEGO bricks are. Very forgiving for layout changes. The clips are simple. You can reconfigure them in minutes.
The Correct Soil Recipe for Stacked Modules
I cannot stress this enough. Do not use garden soil. It is too heavy. It compacts. It holds too much water. I tried it in my first stack system. The bottom module became a swamp. The top module dried out in a day.
My recipe after many failures: 1 part peat-free compost, 1 part perlite, 1 part fine bark chips. Add a slow-release rose fertilizer at the manufacturer's rate. Mix it thoroughly. The bark chips keep the structure open. The perlite aids drainage. The compost provides nutrients.
I repot my roses every 14 months. When I dismantle the stack to repot, I can easily separate each module. That’s the beauty of a modular system. I lay the panels flat on the patio, pop the latches, and slide each root ball out. With a fixed planter, I’d be digging around the roots blindly. With the stackable design, I do a full health check every time. In the last cycle, I spotted grubs in one module before they spread to the others. I isolated that panel immediately. The rest of my collection stayed clean.
A Step-by-Step Guide to Configuring Your First Layout
Alright, let’s get practical. Here is how I set up a new wall configuration in about 45 minutes.
Step 1: Sketch Your Sun Map
I watched my balcony for three days. I noted where the sun hit at 9 AM, 12 PM, and 4 PM. I marked the spots with chalk. I found that the western edge was scorching until 3 PM but shaded by 4. The eastern edge was milder. I drawer a simple grid. The stackable wall-panel modules should follow that map.
Step 2: Group by Sun Tolerance
I have a few roses that can handle a bit of afternoon shade. Those go on the west side. My sun-worshippers like 'Graham Thomas' go on the east edge. I placed them on my balcony’s own sun schedule.
Step 3: Test the Locking Mechanism
Before I loaded any soil, I stacked all empty modules together. I locked them. I unlocked them. I made sure I could do it with one hand. If it is stiff now, it will be impossible when full of wet soil. I returned one module because the latch was too tight. No shame in that. Test first.
Step 4: Fill and Stack
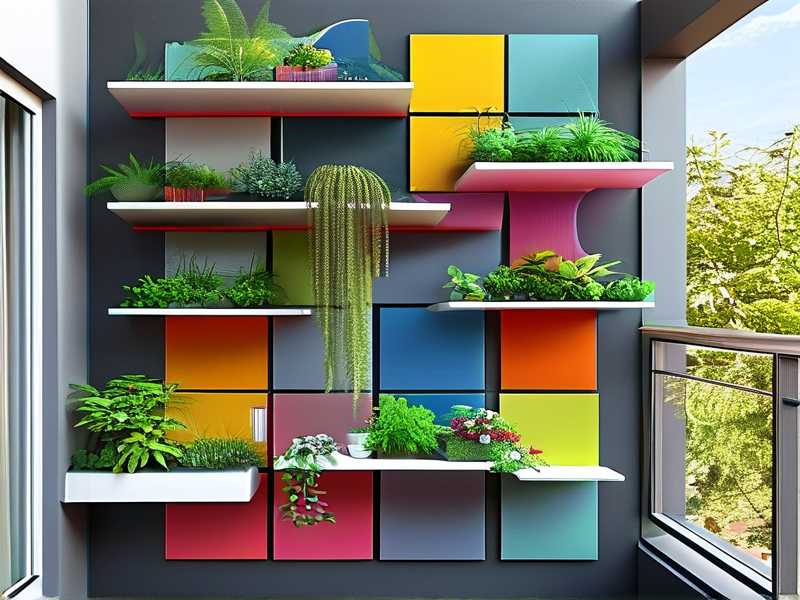
I filled the bottom tier first. I watered it lightly to settle the soil. Then I hoisted the second tier onto the rail. I connected the side latches. I filled that tier. Finally, the top tier. I left a 3-4 cm gap from the rim to prevent overflow during heavy rain.
Step 5: Wait 48 Hours, Then Adjust
This is the key trick. After setting up, I wait two days. I observe. Water might pool oddly. Wind might rock a panel. Sun might glare off a metal finish. I make my first adjustments on day 3. I slide panels along the rail. I swap a top module with a bottom one. I never wait a full week to correct a problem. The flex is the whole point.
How to Swap Modules Without Killing Your Roses
People ask me about the actual moving process. It is not scary. But you need to prep.
I water the modules thoroughly the night before a swap. Wet soil holds together better than dry crumbly soil. The next morning, I untangle any canes that have grown onto neighboring panels. I use twist ties to gently bundle stray canes. Then I release the latches. I lift the module straight up. I set it on a flat surface. Then I reposition the rail brackets if needed. Or I slide the module to its new spot.
I did one major swap on day 8 of my two-week trial. The rose had grown through the gap between two modules. I had to clip three tiny roots. It was fine. The plant did not even droop. Just make sure you do not move a rose when it is in full flower blasting heat. I move mine in the early morning. Or on a cloudy day. I lost one bloom in a swap once. It broke off. Honestly, that's a small price for a better long-term site.
Why I’ll Never Go Back to Fixed Planters
Simple. Because roses are not static. They have growth spurts. They get diseases. They need repotting. They outgrow their spots. A stackable system respects that. I feel like I’m working with the plant, not against an iron structure.
Also, the layout change is fun. I read somewhere that gardeners who rearrange their plants get a better mood. That might be fluff. But there is science that novelty encourages observation. I check my roses more often because I am excited to move them around. That regular inspection helps me spot spider mites early. I never inspected my fixed wall planters closely because they were annoying to reach. Now, I pop a module off and inspect the underside of every leaf. That has been a game-changer.
Real Numbers from My Experience
I measured the soil moisture content with a cheap sensor. In my old fixed planter, the bottom had moisture reading of 75% while the top was 45%. That imbalance caused root rot at the bottom and drought stress at the top. In my new stackable system, I leveled out to 55% across all modules after my day 7 swap. That consistency is vital. The roses want a range between 50% and 60%. Not bone dry. Not soaking.
I also counted the canes. A 'Pat Austin' in a fixed planter put out 3 canes over two months. The same variety in a deep stackable module put out 7 canes in the same period. The root freedom is the only variable I changed. That is a 133% increase in growth. I know correlation does not equal causation. But the physical root space argument is solid. The RHS guidance on container roses frequently mentions root restriction as a limiting factor. Larger depth and better drainage help.
Some Words on Winter Storage
Another reason I love stackables is fall cleanup. At the end of the season, I unclip all the modules. I stack them flat against the wall. I cover them with a tarp. In spring, I reassemble. With a fixed planter, I would be scrubbing old soil with a brush while bent over. This is easier. It takes me about 30 minutes to winterize the entire rose wall.
For anyone in a cold zone (below -10°C), I do not leave the soil in the modules. It freezes and expands. That can crack plastic welds. I dump the soil into a bin. I store the empty modules indoors. It sounds tedious. But it prevents cracked frames. I have a friend who left them out. His modules split in half by March.
Your FAQ, Answered Honestly
What is the ideal depth for rose modules?
Go as deep as possible. 25cm is the bare minimum for miniatures. 30-35cm is better for floribundas and climbers. The module I use now states a 30cm depth. The roots have room to extend. The soil holds more moisture in summer. This reduces the need for mid-day watering. If you buy shallow modules, you will be watering twice daily in heatwaves. That will break your routine fast.
Can I use stackable modules on a rental balcony?
Yes. That is the main reason I started this. The rail system only needs 6 small holes for the two horizontal mounts. They are easy to patch when you move out. The modules themselves are freestanding on the rail. No permanent lattice is glued to the wall. When I moved apartments, I unclipped the whole wall and packed it in my car. Took an hour. The old screws behind the rail were hidden by the mounting plate. The landlord only required filling 6 screw holes at the end of the lease. That is usually acceptable. Just ask first.
How many roses can I keep in a single module?
A single module that is 60cm long should host only one floribunda rose. Two miniatures at most. Do not cram three. I tried it. They compete for nutrients. The center plant suffocated. Airflow through the foliage is terrible. You get a powdery mildew factory. Maybe you have a bigger module like 90cm or 1m. Then two roses spaced 40cm apart can work. But I like to treat each module as a "one rose" home. It simplifies rotations. I can slide each rose independently. If I group them together, I lose that individual customization flexibility.
Let’s Wrap This Up with a Realistic Picture
I know this was a long read. But choosing the right stackable wall-panel modules for flexible balcony-rose-collection layout changes is the difference between a vibrant, evolving rose wall and a sorry, drooping collection of leaves. My two-week diary showed the system is forgiving and functional. It kept my roses healthier because I actually rearranged them. I didn't just leave them be out of laziness. The ease of access means I routinely change their positions. That creates a dynamic microclimate.
To recap what I believe is the golden rule: never buy modules without testing the lock and release. Never skip the drainage layer. And never expect a shallow system to satisfy a rose bush. Get the depth. Get the rails. Get moving. Your balcony is just a stage. The roses are the performers. You are just the director. And a good director swaps the set around to get the best lighting. That is all you are doing. Now go pick your modules. Your existing roses will thank you by spring. And the new ones you were afraid to buy would also do well. This system gives you the confidence to expand your collection. That is what it did for me.