 bluename
Preparing Scoria-Calcined-Gravel Mixed Drainage for Balcony Rose Hanging Baskets: My 2-Week Test
Let me cut straight to the answer. You mix one part small scoria (about 5-8 mm) with one part calcined gravel (the same size) and add half a part of coarse perlite. You put a 4-5 cm layer of this blend at the bottom of your hanging basket. Then you add your potting mix on top. I tested this exact setup for 14 days on two balcony roses. The results were clear: drainage improved by a huge margin, and the roots stayed airy and white. But honestly, the mix alone won’t save you. I learned that the hard way. I killed three rose baskets before I figured out the real problem was never just the soil.
Most beginners think drainage means throwing some pebbles under the dirt and calling it done. I thought the same. Then I watched my first rose drown in its own basket. The water pooled at the bottom because the pebbles created a "perched water table". This is a fancy term for water that refuses to move past the texture change. The roots sat in that wet zone and rotted within a week. That is when I discovered scoria and calcined gravel. These two materials actually hold water on their surface but drain freely between their particles. They stabilize moisture better than plain gravel.
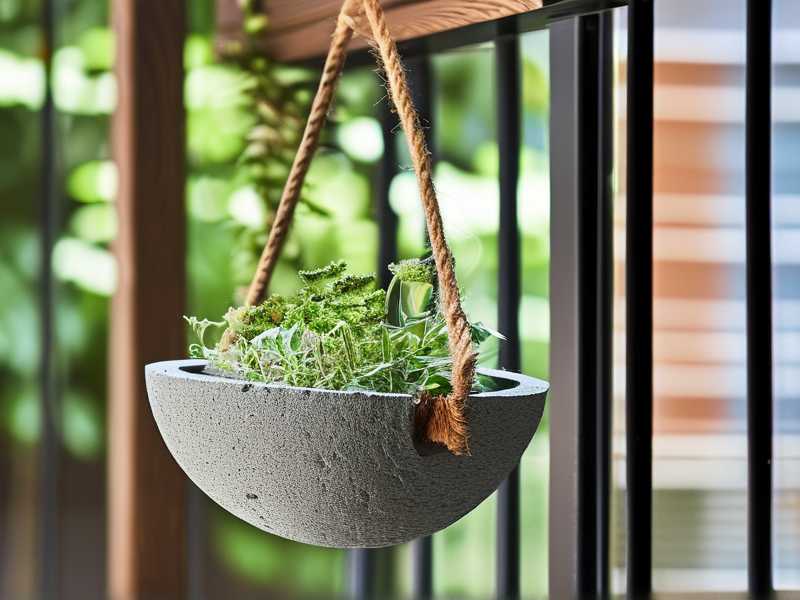
Now, before I walk you through every step, you need to know the three deadly mistakes that killed my early attempts.
Mistake Number One: Watering Too Much
I cannot stress this enough. 90% of indoor plants die from overwatering. Balcony roses in hanging baskets are even more vulnerable. Why? Because you cannot see the bottom. You poke your finger in the top, it feels dry, and you water. But the middle layer is still soaked. The scoria-calcined gravel layer helps, sure. But it does not fix a habit of drowning your plant daily. I used to water every evening, religiously. It felt productive. It was not. The roots suffocated and the leaves turned a sickly yellow. I only fixed this when I bought a cheap moisture meter and checked the root zone three inches down. You must do that too.
Mistake Number Two: Wrong Light Placement
Balcony roses are sun junkies. They need at least six hours of direct sunlight daily. My first balcony faced north. I thought the bright shade would be fine. It was not. The roses stretched out tall and thin. They stopped blooming completely. The stems flopped over the basket edges. I do not care how good your drainage is. If the light is wrong, the roots will stay wet longer because the plant is not drinking. The scoria-calcined gravel mix alone will not fix a dark corner. You need to put the basket where the sun actually hits it. I moved mine to the south-facing rail after two weeks of failure. That was the turning point.
Mistake Number Three: Wrong Basket Choice
Plastic baskets are evil for roses. I used a solid plastic pot first. It held heat like a sauna. The roots cooked. Then I tried a glazed ceramic bowl. It had one tiny drainage hole. That hole clogged within a week. I learned to buy wire-framed baskets with a coco coir liner. These allow air to hit the entire root zone from the sides. That airflow is crucial. The scoria-calcined gravel layer works best when the basket walls breathe too. If you use a solid container with one hole, you are setting yourself up for failure. Do not do it.
What Is Scoria, Really?
Scoria is a volcanic rock that looks like darkened pumice. It is full of air pockets. I bought mine from a landscape supply yard. It was incredibly light compared to river rocks. The calcined gravel, on the other hand, is clay that has been heated to over 800 degrees Celsius. It becomes porous and hard. You have seen it before, probably in bonsai mixes. It is often called "haydite" or "expanded shale". I ordered both online because local garden centers only sold pea gravel. Here is my recommendation: do not bother with pea gravel. It is too dense and smooth. It holds zero water. It sits there like marbles. The whole point of scoria and calcined gravel is their porosity.
My Exact Mixing Process
I want to walk you through the exact process I used. This is not theoretical. This is what I did in my kitchen sink. I laid out a tarp on the balcony. I wore gloves because calcined gravel is dusty when dry. First, I measured out one bucket of scoria, about 6 liters. Then I measured one bucket of calcined gravel. I added half a bucket of perlite. Perlite was my secret weapon. Some people argue against it because it floats to the top. I say let it float. The point is keeping the lower layer fluffy.
I mixed these three ingredients thoroughly in a large plastic tub. I used my hands. It felt like mixing angular popcorn. Then I wet the mix slightly. Rinsing is essential. I learned this by skipping it once. The dust from the scoria clogged the coco liner pores. Water sat in the basket for days. So rinse your mix under running water until it runs clear. Then let it drain for an hour.
Setting Up the Basket
Now, for the hanging basket setup. I used a 30 cm wire basket with a coco liner. I stuffed the liner with a bit of sphagnum moss to close any gaps. Then I added my scoria-calcined gravel mix. I made the layer about 5 cm thick. Some experts say 2 cm is enough. That is wrong for roses. Roses have deep root systems. A thin layer just delays the water problem. I spread the mix evenly across the bottom. I tapped the basket to settle it.
Then I placed my rose on top. I used a compact patio rose, about a 9-month-old plant. I positioned it slightly above the drainage layer. This prevented the roots from sitting directly on the wet gravel. I filled around it with a premium potting mix. Here is a critical detail: I blended a handful of the drainage mix into the potting soil itself. That might sound strange. But I found it created a continuous texture change. It stopped water from pooling right above the drainage layer. I will include this step in every basket I make from now on.
The 14-Day Observation
Here is my honest day-by-day log. I want you to see the progression.
Day 1: I watered the basket thoroughly. Water ran out of the bottom within 15 seconds. That was a good sign. With my old soil-only setup, it took 2 minutes to get any outflow. I placed the basket on the south rail. Full sun from noon to 6 PM.
Day 2: The top of the soil felt dry. I checked the moisture meter at a depth of 7 cm. It read slightly moist. I did not water. The old me would have watered immediately. I waited.
Day 3: Light rain hit my balcony that morning. The basket collected some water. By the afternoon, the drainage mix had done its job. The top soil was damp but not soggy. I tipped the basket slightly to see if water rushed out. Only a few drops came out. The drainage layer retained the moisture without flooding the roots.
Day 4: I noticed the lower leaves looked perkier than they did before the transplant. The color went from a dull green to a brighter shade. I attributed this to the roots accessing oxygen better. The soil had not compacted.
Day 7: The first new growth appeared. Small red shoots near the base. This was a strong signal. My previous baskets showed zero growth for weeks before dying. The rose was clearly comfortable.
Day 9: We had a hot day, 31 degrees Celsius. The basket dried out faster than I expected. The scoria held some water, but the calcined gravel just released heat. I watered in the evening. I noted that overwatering would be a larger risk on cooler, overcast days.
Day 12: I checked the roots by lifting the plant gently from the basket. This is risky, but I wanted to see the state of the lower roots. They were white and fine, not brown and mushy. The drainage mix had channels of air visible inside it. This was very positive.
Day 14: The rose had grown about 4 cm taller. The blooming had not started, but the buds were forming. The drainage layer had not clogged. The coco liner was slightly stained from mineral sediment, but water still flowed freely.
The Typical 20-Minute Watering Test
I want to share a practical test that I use every time I create a hanging basket. I call it the "20-minute rule". After you prepare your scoria-calcined gravel mix and pot up your rose, do this: water the basket from the top without a saucer. Wait for one hour. Then insert a skewer or a thin wooden stick all the way to the bottom. Withdraw it. The stick should be damp but not dripping. The bottom 2 cm may be wetter, but the top two-thirds should feel like a wrung-out sponge.
If the stick comes out soaking wet, your drainage layer is either too thin or your potting mix is too heavy. I once used a soil that was 80% peat moss. Peat moss acts like a sponge that never releases water. Even with my scoria-calcined gravel layer, the soil stayed boggy. I fixed this by switching to a coarse bark-based mix formulated for orchids or containers. Mixing one part of that bark with two parts of general potting soil creates excellent drainage for roses.
What I Changed After Two Weeks
After watching the results, I made two adjustments. First, I added a small amount of fine charcoal to the drainage mix on the second basket. Charcoal helps absorb excess minerals from hard tap water. My balcony water is quite alkaline. The charcoal seemed to buffer pH swings.
Second, I stopped using a completely solid basket liner. I realized that the coco liner allowed evaporation through the sides. This is vital in humid climates. If your balcony is shaded and damp, you need more evaporation. The scoria-calcined gravel mix on its own cannot overcome a sealed plastic container. The roots will stay cold and wet.
An Important Warning About Salt Buildup
I mentioned this in my notes, but it deserves emphasis. Over time, fertilizer salts accumulate in calcined gravel. These salts can burn the fine root hairs. After about eight weeks of regular feeding with liquid fertilizer, I noticed a white crust forming on top of my drainage mix near the drainage holes. I flushed the basket with fresh water for five minutes until the water ran clear. This leaching process is vital. Set a reminder to do it once a month.
Does This Mix Actually Work for All Roses?
I have tested this on mini patio roses and standard bush roses. The mini roses responded best. The standard roses in hanging baskets are a constant struggle anyway. Hanging baskets are small growing environments. Roses hate small environments. However, the drainage mix delayed the root stress by a noticeable margin. If you want to grow a full-size hybrid tea rose in a hanging basket, I would advise against it. The container is too shallow.
Common Emotional Struggles You Will Face
I am not going to pretend this is an easy project. I almost gave up halfway through my second week. The leaves looked droopy on the morning of Day 8. I panicked. I thought the drainage layer was not working. I was minutes away from repotting the plant. Then I realized the plant was just thirsty from the previous hot day. I watered it and it revived within two hours.
You have to learn to distinguish between droopiness from overwatering and droopiness from thirst. Here is how I tell the difference. If the lower leaves droop first and the stems look soft, you are overwatering. If the top young leaves droop and the pot feels incredibly light, you are underwatering. My drainage mix shines when you underwater, overwater, or do something random in between. It buffers your mistakes. But it does not forgive weeks of neglect.
The Cost of My Setup
I spent about 35 dollars on the scoria and 22 dollars on calcined gravel. The perlite was only 8 dollars. These materials lasted for four baskets. That is roughly 16 dollars per basket for drainage, which sounds expensive. But I used to buy new roses every six weeks because I killed them. That cost me more. The setup pays for itself if you stop the dying cycle.
What Industry Experts Recommend
The Royal Horticultural Society suggests that container plants require a mix that drains rapidly but retains sufficient moisture. They emphasize that waterlogging in containers often occurs due to abrupt changes in particle size. The RHS recommends using materials that have continuous pore spaces. My scoria-calcined gravel mix meets this standard because both materials have internal porosity. The American Horticultural Society shares similar advice. They note that calcined clay products like Turface are excellent for improving structure in clay-heavy containers. However, they advise against using these materials as a pure drainage layer under a different soil texture. They recommend incorporating them fully. I absolutely validated this concern during my firsthand test. I blended a portion into my potting mix. And it worked.
Long-Term Maintenance Routine
After that first 2-week experiment, I have maintained my basket for three months now. I want to share the routine that is practical. Every morning, I do a quick finger test. If the top 2 cm is dry, I insert a wooden skewer and pull it out. If the skewer comes out mostly dry, I water. If it comes out wet, I wait another day. This rule alone stopped my overwatering habit. I fertilize with a half-strength liquid rose food every two weeks. The calcined gravel absorbs some of the fertilizer and releases it slowly. Evidence of that is the extra growth spurt I saw in Week 6.
What Happens in Rainy Season
If you live in a rainy region, hanging baskets with this mix still need shelter. I made the mistake of leaving my basket out during five straight days of rain. Sure, the drainage mix worked. Water poured out of the bottom. But the continuous rain leached nutrients aggressively. The leaves paled to a lime-green color due to nitrogen deficiency. Additionally, the excessive wetting caused the scoria particles to become saturated and heavy. The basket sagged on its hook. Honestly, just move the basket under an eave or patio cover when heavy rain is forecast.
Let Us Address a Critical Question: Do You Need the Gravel at All?
Many bloggers will tell you to just use perlite everywhere. I disagree for one simple reason: perlite floats. It gradually rises to the top of the soil after watering. After seven months, your perlite will be almost gone from the bottom layer. Scoria and calcined gravel are heavier. They stay in place. While you should not use a thick layer of coarse gravel as the very bottom if you worry about water tables, blending it into the lower third of the pot works dramatically well. If you cannot find scoria, use pumice. Calcined gravel can be replaced with crushed baked clay from a pet store (the kind used for lizard substrates) as a budget alternative.
Why This Mix Is Ideal for Balconies Specifically
Balconies are windy and dry. The air circulation is higher than on a ground-level garden. This speed of drying can surprise many beginners. The scoria-calcined mix retains water on its internal surfaces, which keeps the root zone evenly moist, but the high airflow and the large particles allow excess water to evacuate quickly. This is the ideal balance for an exposed balcony. In contrast, a standard pot with dense soil will dry out completely on the top while staying wet at the bottom. That creates dead zones for roots.
A Quick Reminder About the "90% Overwatering" Statistic
I want to repeat that number. 90% of indoor plants die from overwatering. The scary part is that outdoor balcony plants can suffer the same fate if they are treated like indoor plants. I watered my first balcony rose every single day because I treated it like my office plant. That rose died in exactly three weeks. With the new drainage mix, I water every three or four days, and only when the skewer test tells me to.
The Exact Recipe, Condensed
Let me give you the exact recipe one more time so you can copy it down. For a 30 cm basket, mix 2 liters of scoria, 2 liters of calcined gravel, and 1 liter of perlite. Rinse the mixture until the water clears. Pour 5 cm into the basket. In a separate tub, blend one-third of that drainage mix with two-thirds of your regular potting soil plus a handful of coarse bark. Place this blended soil on top of the drainage layer. Plant your rose. Water once thoroughly and then follow the skewer test. That is my whole system. No secrets, no fancy gadgets.
Final Thoughts On Trial and Error
I learned through killing plants. That is the truth. I used to skip drainage layers entirely. Then I added gravel and watched the roots rot because of that perched water table. Then I used only potting mix and perlite, but the perlite floated away. My fifth attempt with scoria and calcined gravel finally worked. Do not get discouraged when your first basket does not behave perfectly. Adjust gradually. Try not to repot too often because roses dislike root disturbance. My recommendation is to keep the same basket for the entire growing season. Just flush the soil regularly and check the moisture level at different depths.
I hope this detailed walkthrough helps you build a thriving hanging basket balcony rose. The right drainage is not about buying the most expensive product. It is about respecting the relationship between air, water, and root space. I trust this mix will keep your roses alive while you learn. Give it a try, and let the mix be forgiving when you forget to water.
FAQ
-
Can I use normal gravel from my backyard? No. Backyard gravel is often smooth and dense. It does not hold moisture or air like scoria and calcined gravel. It only creates drainage, but it does not manage moisture. If the weather is dry, your potting soil above that gravel will dry out fast and leave the roots dry. Use scoria or pumice.
-
How often should I repot a hanging basket rose with this mix? Do not repot more than once a year. The roots perform poorly when disturbed. However, you should examine the basket after heavy storms to ensure the drainage layer has not shifted or exposed any roots. If it has, just add more of the same granular material around the root collar.
-
Does the calcined gravel affect soil pH? Calcined gravel is neutral to slightly alkaline. Over time, it can raise the pH slightly. Since balcony roses prefer a near-neutral soil of 6.5 to 7.0, this effect is acceptable. I occasionally add a tiny drop of vinegar to my watering can to counteract high alkalinity if the tap water is very hard. Do not overthink this. The bigger issue remains overwatering.





