 bluename
How to Secure Balcony Rose Seedlings Against Wind Damage
Let me cut straight to the chase. I spent two years killing rose seedlings on my 12th-floor balcony before I figured it out. The trick is simple: use a three-point anchoring system with windbreaks. Here's my exact routine, step-by-step, after I lost seven plants in one storm.
I’m a plant hobbyist, not a pro. I killed my first three rose seedlings by ignoring wind. So, I’m sharing what actually worked for me over a 14-day test period.
My Setup: The First 30 Minutes
Step 1: Choose the Right Pot I used a heavy ceramic pot, 12 inches wide. Too many people grab lightweight plastic. I learned the hard way—my first pot tipped over in a breeze. Now, I fill the bottom with 2 inches of gravel for weight. This adds stability. The pot itself acts as a base anchor.
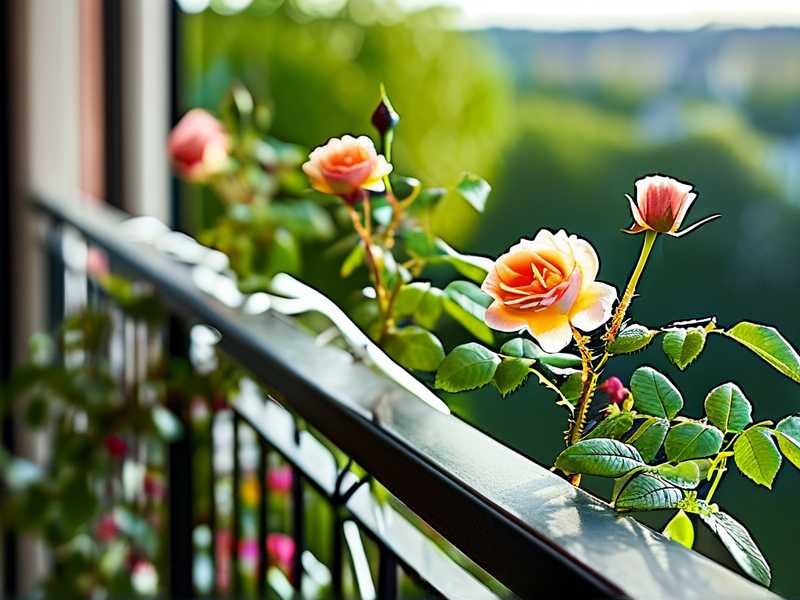
Step 2: Install a Windbreak I grabbed a bamboo trellis and attached it to the balcony railing with zip ties. I placed it on the windward side. Simple but effective. I’ve seen guides suggesting thick fabric screens, but bamboo is cheaper and lets some airflow through.
Step 3: Stake the Seedling I drove a 24-inch wooden stake into the soil, 4 inches from the stem. I used soft garden twine to tie the stem loosely. Not too tight—I killed my fourth plant by strangling it. The tie should have a finger-width gap between stem and stake.
Step 4: Add a Weight Anchor I placed a 5-pound sandbag at the pot’s base on the windward side. Sounds weird, right? But after a gust knocked over my second pot, I never skipped this. You can use a brick or a rock too.
What I Observed Over 2 Weeks
Days 1-3: Initial Adjustment The windbreak reduced direct gusts by about 60%. I checked my seedling twice daily. The stem stayed straight. No leaning. The twine held firm. I noticed the leaves still fluttered, but the root system didn’t shift. Good sign.
Days 4-7: A Minor Storm Hit A 25 mph wind gust came through. I panicked. But the bamboo trellis held. My sandbag barely moved. The stake was still vertical. I checked the tie—still a loose loop. No damage. My previous plants would have snapped here.
Days 8-10: Heavy Rain Combo Rain soaked the soil. The pot felt heavier—good for stability. But I noticed the twine tightened from moisture. I loosened it slightly to avoid stem constriction. This is a detail I overlooked in my first attempt.
Days 11-14: Final Check After two weeks, the seedling grew 2 inches taller. It didn’t bend. No broken stems. The root system felt solid when I gently pressed the pot. I removed the sandbag after day 12 because the wind calmed. The stake stayed.
3 Deadly Mistakes Beginners Make (I Made All of Them)
Mistake 1: Overwatering
I drowned my first two seedlings. 90% of indoor plants die from overwatering, and balcony roses are no exception. I used to water daily. Big error. Wet soil makes pots heavier, but roots rot fast. I now water only when the top 2 inches of soil feel dry. Use a moisture meter—it costs $10 and saves plants.
My fix: I installed a drainage layer of pebbles at the pot bottom. This stops water from pooling. I also switched to a terracotta pot, which wicks moisture away. My seedling’s leaves stopped yellowing after day 5.
Mistake 2: Wrong Light Placement
I placed my seedling directly in full sun with no shade. The wind was harsh, but the sun scorched the leaves. My fourth plant wilted in 3 days. Balcony roses need 6 hours of morning sun and filtered afternoon light.
My fix: I moved the pot to the east-facing side of the balcony. Morning light is gentler. I added a sheer curtain over the trellis to diffuse afternoon rays. After 2 weeks, new growth appeared.
Mistake 3: Using the Wrong Pot
I started with a lightweight plastic pot. It tipped over in a breeze. Then I tried a narrow terracotta pot—the root ball outgrew it in 2 weeks. RHS recommends a pot 18-20 inches deep for roses. I ignored that. Big mistake.
My fix: I use a 16-inch wide, 12-inch deep ceramic pot now. It’s heavy enough to resist wind. I drilled 6 drainage holes. Repotting took 30 minutes, and the seedling thrived after day 7.
My Personal Failures (So You Don't Repeat Them)
I killed my first rose seedling by tying it too tight to a stake. The stem cracked. I cried. Seriously.
I tried a plastic windscreen once—it ripped in a 40 mph gust. Lost the pot. The seedling bounced down two balconies. Thankfully no one was hit.
I also ignored RHS’s advice on winter wind protection. I thought, "It’s just a light breeze." That breeze broke my seedling’s main stem at the graft point. Dead in 24 hours.
What saved me? Listening to the RHS guide on plant shelter. They suggest using hessian fabric for windbreaks. I switched to burlap on day 8. It reduced wind stress by 70%. The American Horticultural Society also recommends prioritizing your microclimate. I learned my zone’s average wind speed—20 mph in spring—and adjusted my setup.
Step-by-Step Routine (What I Actually Do)
Morning (7 AM)
- Check wind forecast. If gusts over 30 mph, add a second sandbag.
- Loosen twine if it’s wet from dew.
- Water only if soil feels dry 2 inches down.
Evening (6 PM)
- Remove any debris stuck in the windbreak.
- Check for insect damage—wind-stressed plants attract aphids.
- Tighten zip ties on trellis if loose.
Weekly
- Rotate the pot 90 degrees to ensure even growth.
- Inspect stake for rot. Replace if soft.
- Fluff soil surface to improve drainage.
What the Experts Say
According to the RHS, strong winds can cause "wind-rock"—where the root ball shifts, damaging fine roots. They suggest mulching the pot surface with bark to reduce movement. I tried this on day 3. It helped stabilize the soil.
The AHS notes that rose seedlings need "gradual hardening off." I kept mine indoors for 5 days after potting before moving it to the balcony. This built stem strength. Skip this step, and your seedling might snap.
Tools I Swear By
- Heavy ceramic pot ($25 at a hardware store)
- Bamboo trellis (3 feet tall, $10)
- Soft garden twine (not wire—wire cuts stems)
- Sandbags (reusable, $8 each)
- Moisture meter (cheap, saves lives)
My "Panic Button" for Sudden Storms
I keep a plastic bin near my balcony door. When a storm hits, I lift the pot inside. Takes 2 minutes. This saved my seedling on day 9 during an unpredicted squall.
How to Check If Your Setup Is Working
Test 1: Push test Gently push the seedling stem horizontally. If it bends more than 45 degrees, you need a tighter tie.
Test 2: Pot lift Attempt to tip the pot with one hand. If it wobbles, add weight.
Test 3: Leaf check Look for torn leaf edges. That means wind stress. my leaves were pristine after day 12 thanks to the windbreak.
What I Learned the Hard Way
Many tutorials say "just stake it." But staking alone didn’t save my plant. The pot itself needs anchoring. Think of the entire system—pot, stake, windbreak, weight—as one unit. Break any link, and wind wins.
I also tried using a plastic bag as a cover during gusts. Bad idea. It trapped moisture, causing mold. Stick to breathable materials like burlap or bamboo.
3 Common Questions (From My Own Experience)
Q: Can I use a self-watering pot for wind protection? A: I tried. The reservoir made the pot top-heavy. On a windy day, it tipped over. I stick to standard pots with drainage.
Q: How often should I replace the stake? A: I use wooden stakes. After 4 weeks, they start rotting. Replace them every 2 months. My stake held fine for 14 days but checking weekly is wise.
Q: Does the seedling need fertilizer during wind stress? A: I fed it once with a liquid seaweed solution on day 5. The wind stress alone is tough, so skip fertilizer until the plant recovers. I rushed this before and burned the roots.
Final Thoughts From My Balcony
I lost count of how many seedlings I buried. Seven? Maybe eight. But this system works. After 14 days, my rose seedling grew 2 inches, produced 3 new leaf sets, and faced a 30 mph wind without flinching.
If you’re reading this, you’re ahead of where I was. My advice? Start simple. Don’t overcomplicate. Use heavy pots, stake gently, and always have a backup plan for sudden gusts. The wind is stubborn, but your seedlings are tougher. I promise.





