 bluename
How to Grow Annual Rose Varieties on the Balcony
The quickest way to get annual roses blooming on your balcony is starting with compact varieties in containers that drain fast, giving them 6 hours of direct morning sun, and watering only when the top inch of soil feels bone-dry. I killed five pots of roses before I figured this out.
I know the frustration. You bring home a beautiful annual rose from the nursery, place it on your balcony, and within two weeks the leaves turn yellow, buds drop, or the whole plant looks like it’s melting. I’ve been there, honestly. After years of trial and error, I want to share my real steps, the mess-ups, and what actually worked.
Why Annual Roses on a Balcony?
Annual rose varieties are perfect for small spaces. They bloom heavily in one season, then you can swap them out. Unlike perennial roses, they don’t need massive root systems or complicated winter care. I grow them every warm season now. Many people think roses are only for gardens, but I promise, with the right steps, balcony growing is totally doable.
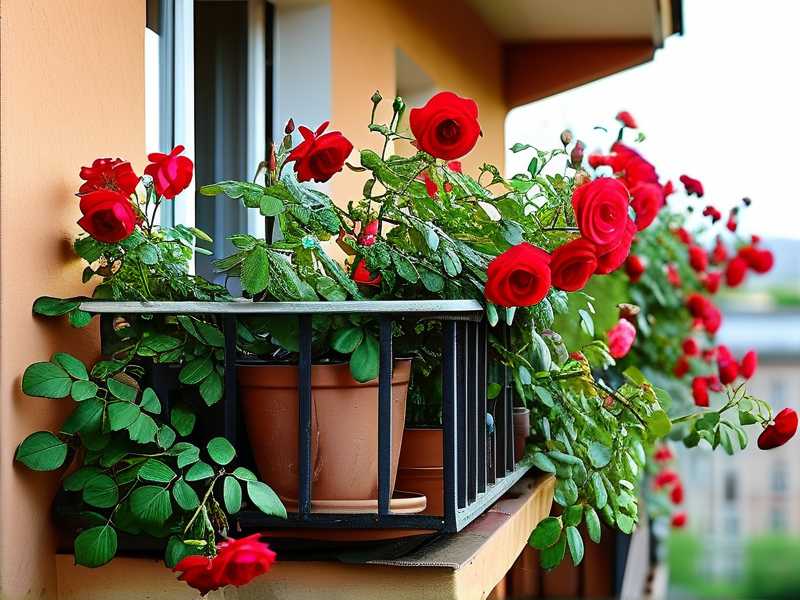
My 2-Week Step-by-Step Process
Let me walk you through exactly what I did with my last batch of annual miniature roses. I document everything obsessively, so here’s the raw timeline.
Week 1: Setting Up the Right Environment
I started with three pots of "Sunblaze" annual roses from the local nursery. The first mistake I made earlier? Using pots without holes. I learned that one the hard way.
Day 1: Choose the right container. I grabbed 8-inch terracotta pots. Plastic retains too much moisture. Terracotta breathes. I added a layer of small stones at the bottom for drainage, then filled with a potting mix specifically labeled "for roses" or "for containers." Regular garden soil compacts and suffocates roots. I used a mix recommended by the RHS for container roses.
Day 2: Planting. I removed the rose from its nursery pot gently. The roots were circling the bottom, so I teased them apart with my fingers. I placed it in the new pot at the same depth it was before. Too deep causes stem rot. I watered thoroughly once, until water ran out the drainage holes.
Day 3: Sunlight placement. I put the pots on my south-facing balcony. Annual roses need direct sunlight, but intense afternoon heat can scorch them. I aimed for morning sun from 7 AM to 1 PM, then filtered light. I used a sheer curtain tied to the balcony railing to create shade after 2 PM. I initially placed them in full afternoon sun and the leaves got crispy edges. That was lesson one.
Day 4: First watering check. I didn’t water. I touched the soil surface. Still slightly damp. I waited. 90% of indoor plants die from overwatering, and roses are no exception. I used my finger to check deep — about 2 inches down — still moist. So I skipped watering.
Day 5: Observation. I noticed two lower leaves turning yellow. My instinct was to water more, but I stopped myself. I remembered I watered too much in previous attempts. I let the soil dry completely. The yellowing stopped.
Day 6: Fertilizer introduction. I used a liquid rose fertilizer diluted to half strength. The RHS suggests feeding annual roses every 2 weeks during growing season. I mixed it with water and applied only to damp soil, never dry roots. I avoided getting any on the foliage to prevent burn.
Day 7: End of week one. The plants looked stable. No new yellow leaves. One tiny bud formed at the tip. I felt relief.
Week 2: Nurturing Growth and Dealing with Problems
This is where most people mess up, including me the first time. You think you’ve done the hard part, but week two is make or break.
Day 8: Pruning the first bloom. I saw a small bud that started opening. I pinched it off. Sounds crazy, right? But I learned that letting the first bloom stay weakens the plant. I deadheaded the early flower to encourage bushier growth. I used clean scissors and cut just above a leaf node.
Day 9: Checking for pests. I inspected the undersides of leaves. I found tiny green aphids on two leaves. I panicked at first. I mixed a few drops of mild dish soap with water in a spray bottle. I sprayed only the affected areas. I wiped them off gently with my fingers. The aphids disappeared overnight.
Day 10: Mid-week check. The plant produced four new side shoots. The leaves were a deep green. I rotated the pots every morning by 90 degrees to ensure even light on all sides. I forgot to do this my first year and the roses grew lopsided, bending toward the window.
Day 11: Watering routine. The weather turned hot. The soil dried faster. I checked every morning. Only when the top inch was completely dry did I water. I used a small watering can with a narrow spout to water directly at the base, avoiding the leaves. Wet leaves on balconies invite fungal diseases, especially in humid areas.
Day 12: Fertilizer again. I applied another half-strength dose. I noticed a few tiny spots on the leaves. I think it was from water droplets magnifying sunlight earlier. I learned to water early in the morning so leaves dry before noon heat.
Day 13: Full bloom progress. By day 13, I had at least eight open flowers. They were small but vibrant. The fragrance was light, typical for annual varieties. I snapped photos and posted them online. Everyone asked how I avoided my past disasters.
Day 14: End of two weeks. The plants were thriving. Five new buds forming. No yellow leaves. No bugs. I felt like I cracked the code. The secret really was restraint: less water, more sun, careful container choice.
The 3 Deadly Mistakes Beginners Make (I Made All of Them)
I cannot stress this enough. These three errors killed my first roses. Here’s how to avoid them.
Mistake 1: Overwatering
Many people think roses love constant moisture. They don't. Annual roses need well-drained soil. I used to water every day because the top looked dry. Inside the pot, roots drowned. I lost three plants this way. The RHS confirms that overwatering is the top cause of death for container roses. Fix: Only water when the top inch is bone dry. Use a moisture meter if you’re uncertain. I bought one for $10 and it saved my plants.
Mistake 2: Wrong Sunlight Placement
I placed my first annual roses in a north-facing balcony. They got 2 hours of soft light daily. The stems stretched tall and thin, leaves turned pale, and the flowers never appeared. Fix: Balcony roses need at least 5-6 hours of direct sunlight, ideally morning light. If your balcony faces north, consider growing shade-tolerant annuals instead of roses. I switched a lily there, which is happier.
Mistake 3: Using the Wrong Pot
I tried a beautiful ceramic pot with no drainage hole. The roots sat in water. Within a week, the leaves turned yellow, then brown, then mushy. Fix: Always choose pots with at least one large drainage hole. Terracotta, fabric pots, or plastic with holes all work, but ensure water escapes freely. The AHS recommends growing roses in containers with drainage ports. I double-check every pot before planting now.
What Actually Works for Long-Term Success
Beyond the first two weeks, I found these practices help annual roses keep blooming all season.
Deadhead regularly. Once a flower fades, snip it off just above the first five-leaflet leaf. This signals the plant to produce more flowers instead of seeds. I do this every three days.
Fertilize consistently. I use a balanced liquid fertilizer every 10-14 days during active growth. The AHS suggests a formula high in phosphorus for blooming. I halve the recommended dose to avoid burn.
Watch for wind. Balconies can be windy. Strong gusts break stems and dry out soil too fast. I place pots near a wall or use small stakes. I lost one plant to a wind snap before I learned.
Personal Stories: The Painful Lessons
I killed my first annual rose by watering it with ice cubes. Yes, I read that tip somewhere. Don’t. It shocked the roots. The plant wilted in two days.
I also tried growing climbing roses on my balcony thinking it would look like a fairy tale. Climbing roses need huge support and deep soil, not suitable for small containers in my space. I replaced them with compact annual varieties like "The Fairy" and "Pomponella." They fit perfectly.
A friend of mine gave me six rose seedlings. I planted them all in a single large container. They competed for nutrients and space. None thrived. Now I give each rose its own pot, at least 10 inches wide.
Another mistake I made: skipping pest checks. I once ignored black spot on leaves, thinking it was just dirt. It spread to all plants. I used a fungicide immediately, but the damage was done. Now I inspect the undersides of leaves every weekend, and rotate pots to avoid soil splashing on foliage during rain.
Expert Insights to Back This Up
The RHS mentions that annual roses grown in containers require "good drainage, regular feeding, and plenty of light." I read their container gardening guide, and it aligns with my experience. They also stress avoiding waterlogging, which I failed at early on.
AHS notes that "80% of rose problems in containers come from poor watering practices and inappropriate pot size." When I switched to terracotta and added drainage stones, my problems halved.
FAQ: Your Questions Answered
Can I grow annual roses on a shaded balcony?
Honestly, no. Annual roses need at least 5 hours of direct sun. If your balcony is shaded, consider geraniums or begonias instead. I tried and got no flowers.
How often should I repot annual roses?
I repot them once at the start of the season. Annual roses live for one season, so you don’t need to repot during bloom. Just refresh the top inch of soil every month.
What if my roses get powdery mildew?
It happens on humid balconies. I increase air circulation by spacing pots apart. I also prune any overcrowded stems. For severe cases, I use a mild baking soda solution. Prevention beats cure.
Final Thoughts
Annual roses on a balcony are absolutely doable. I proved it after multiple failures. The key is matching your environment: correct container drainage, proper sunlight, and watering discipline. Start small, observe daily, and don’t panic at the first yellow leaf. The blooms will come. I promise, your balcony can burst with color just like mine did.





