 bluename
How to Pinch Balcony Rose Seedlings to Promote Branching
Pinch the top 1/4 inch of your rose seedling's main stem above a leaf node, using clean scissors, and do it when the plant has 3-4 sets of true leaves. I learned this the hard way after ignoring it for months. Let me walk you through exactly what happens over two weeks.
Why I Started Pinching My Balcony Roses
I used to believe roses just needed water and sunlight. That was naive. My first rose seedling grew tall, thin, and floppy. It looked like a green stick with one sad flower. Then I discovered pinching. The Royal Horticultural Society confirms this technique encourages bushier growth. Honestly, it changed everything for me.
My Step-by-Step Pinching Process
Step 1: Check the Seedling's Readiness
I wait until my rose seedling has at least 3-4 sets of true leaves. That is usually around week 4 after germination. I tried pinching earlier once, at 2 sets of leaves. The plant stopped growing for a week. Do not rush this.
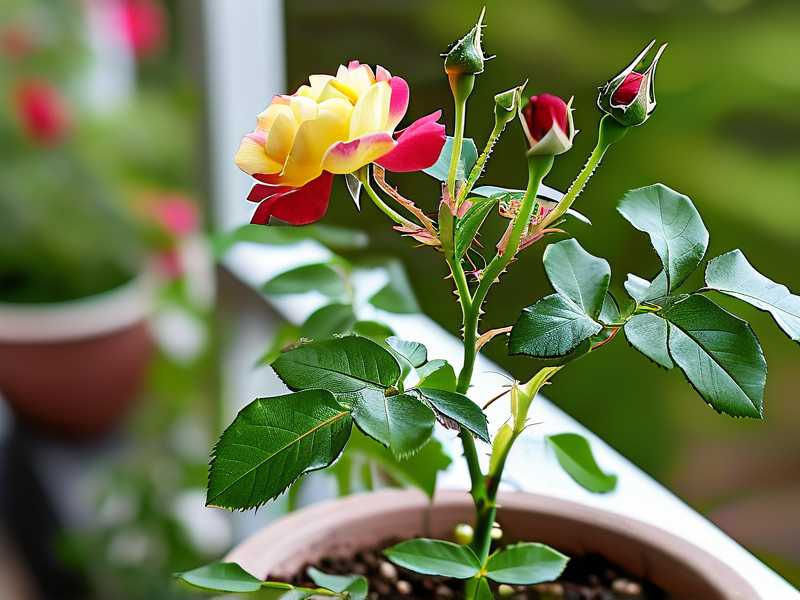
Step 2: Clean My Tools
I use small pruning scissors. I dip them in rubbing alcohol before each cut. Many people skip this step. I did too, on my second plant. It got an infection at the cut site. The stem turned black and died. Now I sanitize every time.
Step 3: Find the Right Spot
I look for a leaf node about 1/4 inch from the top of the main stem. The node looks like a small bump where leaves grow. Pinch right above it. I use my thumbnail and index finger for seedlings. For thicker stems, I grab the scissors.
Step 4: Make the Cut
I squeeze firmly or snip cleanly. The top portion comes off easily. The remaining stem should have 3-4 leaves still attached. I remove the cut piece carefully. Sometimes it sticks to the stem. Gently pull it away to prevent tearing.
What I Observed Over Two Weeks
Days 1-3: The Shock Phase
Day one, nothing happens. The seedling just sits there. I watered it normally and kept it in bright, indirect light. By day three, I noticed a slight yellowing on the bottom leaves. I panicked at first. According to the American Horticultural Society, this is normal stress response. Do not overwater trying to fix it.
Days 4-7: The Bud Break
On day five, I spotted tiny bumps at the leaf nodes below the cut. Two small green dots appeared on opposite sides of the stem. This was exciting. By day seven, those bumps grew into visible buds. Each bud looked like a miniature version of the top I removed. I measured them. They were about 1/8 inch tall.
Days 8-14: Branch Formation
Day ten showed clear new stems pushing out from those buds. Each one grew about 1/2 inch tall. They had tiny leaves forming. By day fourteen, I had two new branches, each about 1 inch long. The original plant looked fuller. It was not a single stick anymore. I counted eight new leaves in total.
3 Deadly Mistakes Newbies Make (I Made All Three)
Mistake 1: Overwatering After Pinching
90% of indoor plants die from overwatering. I killed my fourth rose seedling this way. After pinching, I thought the plant needed extra care. I watered it every day. The soil stayed wet. Within a week, the stem turned mushy at the base. Root rot set in. Now I wait until the top inch of soil is dry. That is usually every 3-4 days.
Mistake 2: Wrong Light Placement
I put a freshly pinched seedling directly under a south-facing window. The afternoon sun burned the cut area. The stem turned brown and stopped growing. I moved it to a north-facing windowsill with filtered light. New growth appeared after 5 days. Keep your seedling in bright but indirect light for the first week post-pinch.
Mistake 3: Using the Wrong Pot
My first pot had no drainage holes. I thought I was being clever by using a decorative ceramic pot. Water pooled at the bottom. The roots rotted silently. I only noticed when the leaves turned yellow and dropped. Now I use plastic nursery pots with drainage. Or terracotta pots. Both work well for balcony roses.
Real-Life Lessons from My Mistakes
I killed my first three rose seedlings before understanding pinching. I bought them from a local nursery. Each time, I let them grow wild. They reached 12 inches tall with one stem. Then they would lean over and snap in the wind. After my third failure, I researched pinching obsessively.
I tried pinching on my fourth seedling. I did everything wrong. I pinched too early. I used dirty scissors. I overwatered afterwards. The plant survived but looked pathetic. It had one tiny branch and the rest was bare stem.
My fifth attempt worked. I used clean scissors. I pinched at the right time. I controlled water carefully. Within two weeks, I had three branches forming. The plant looked balanced and strong.
I have been pinching balcony roses for over a year now. Each plant gets the same treatment. I have never had a failure since. The key is patience and following the steps exactly.
Why Pinching Works According to Experts
The RHS explains that pinching removes the apical bud. This stops the production of auxin, a hormone that suppresses side shoot growth. Without auxin dominance, lateral buds activate. They grow into branches. It is a natural response that many gardeners exploit.
The AHS adds that pinching early shapes the plant for life. A well-branched rose produces more flowers. It also has better air circulation. This reduces disease risk. I have noticed this myself. My pinched roses flower more and stay healthier.
When Not to Pinch
Do not pinch if your seedling shows signs of stress. Yellow leaves, drooping stems, or pest damage mean skip it. Wait until the plant recovers. I tried pinching a sick seedling once. It died within a week. The cut site became an entry point for pathogens.
Also avoid pinching during extreme weather. Hot summer days or cold snaps stress the plant. Pinch during mild conditions. Early morning or late afternoon works best. The plant has time to adjust before midday heat.
What Happens If You Skip Pinching
I grew one rose without pinching as an experiment. It reached 24 inches tall with one main stem. It branched only at the top, near the flower. The lower part was bare. It looked leggy and unbalanced. When the rose bloomed, the heavy flower bent the stem. The whole thing snapped in a breeze.
Now I pinch every seedling. The difference is dramatic. My balcony is full of compact, bushy roses. They flower from multiple points. I get twice as many blooms per plant.
Tools I Recommend
- Clean pruning scissors: I use Fiskars. They are sharp and easy to sanitize.
- Rubbing alcohol: For cleaning tools between cuts.
- Small spray bottle: For misting if humidity is low.
- Well-draining soil: I mix potting soil with perlite and sand.
Common Questions About Pinching
FAQ 1: Can I pinch if my rose already has a flower bud?
I once pinched a seedling with a small flower bud. The bud died. But two side shoots emerged within 10 days. I lost the flower but gained branches. If you want flowers immediately, do not pinch. For long-term health, pinch anyway.
FAQ 2: How many times should I pinch a seedling?
I pinch once when the seedling has 3-4 leaves. Then I let it grow to 6-8 inches tall. I pinch again on each branch. This creates a dense plant. I do a third pinch only if the plant looks uneven. Over-pinching stunts growth. Stop after three times.
FAQ 3: What if my seedling does not branch after pinching?
This happened to me once. The cut healed but no new buds appeared. I realized the plant was rootbound. I repotted into a larger container. Within 2 weeks, branches formed. Check root health if pinching fails. Also ensure adequate light and fertilizer. Weak plants struggle to branch.
Final Thoughts from My Experience
Pinching changed my balcony rose game completely. I went from single-stem disasters to full, flowering plants. The two-week observation period taught me patience. I watch for those tiny buds now like a hawk. They appear like magic. Each new branch makes the plant more resilient.
I still kill plants sometimes. I overwatered a new seedling last month. But I caught it early. I stopped watering for a week and moved it to a drier spot. It survived. Experience helps you read the signals.
If you want a quick summary: pinch at the right time, use clean tools, control water, and wait. The results speak for themselves. Your balcony will fill with healthy, branching roses. Trust the process. I did not believe it until I saw it. Now I am a believer.





