 bluename
The Finger Test Almost Killed My Balcony Roses
If you want to know how to test soil moisture for balcony roses simply, stop overthinking it. The answer is your index finger. Push it two inches into the potting mix. If it feels damp, skip watering. If it feels dry, water deeply. That is it. I learned this the hard way after turning my first two rose bushes into crispy brown skeletons. I watered them every single day because I thought they were thirsty. The truth? 90% of indoor plants die from overwatering. Balcony roses are no exception. They drown silently. The roots rot. The leaves yellow. The plant collapses within weeks. I am here to help you avoid that exact nightmare.
Why Simple Moisture Testing Matters More Than You Think
Balcony roses live in containers. That changes everything. Garden roses spread their roots deep into the earth. Container roses have nowhere to hide. The soil heats up faster. It dries out quicker. But it also stays soggy longer after heavy rain. This balance is fragile.
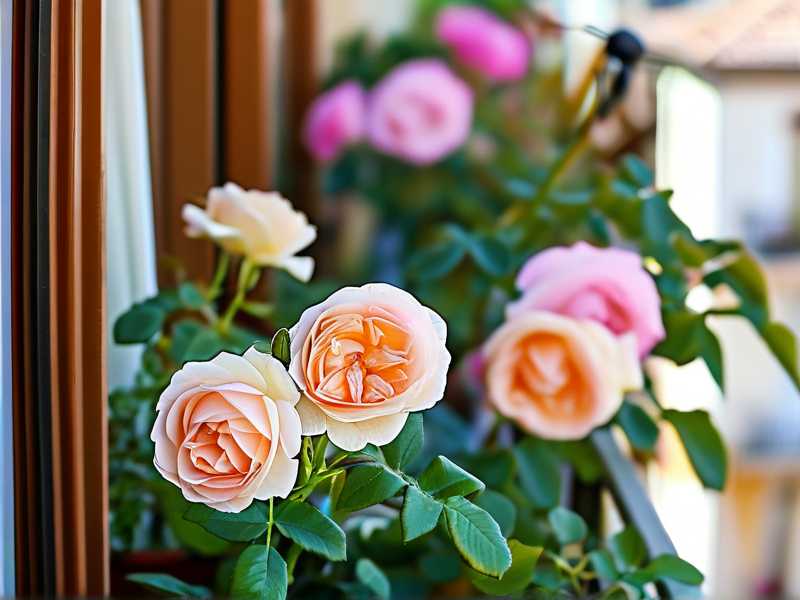
Many people assume watering is about a schedule. Water every Monday. Water every morning. That is a huge mistake. I used to set reminders on my phone. It felt productive. But my roses were suffering. The soil was already wet. I was adding more water anyway. The roots were suffocating.
The real skill is knowing when the plant actually needs a drink. That is where soil moisture testing comes in. It is not a fancy science. It is a simple habit. Once you master it, your roses will reward you with glossy leaves and steady blooms.
The 3 Deadly Mistakes Every Balcony Rose Beginner Makes
Mistake 1: Watering on a Rigid Schedule
I remember my third year of gardening. I was so proud of my routine. Water every evening at 7 PM. Rain or shine. Hot or cold. My roses hated it. The top layer of soil looked dry. So I watered. But beneath the surface, the mix was still wet. The roots were sitting in mud.
I only realised this when I finally checked properly. I stuck my finger deeper. It came out with dark, sticky soil. My heart sank. The roots had already started rotting. The leaves were curling despite all my watering.
Here is what I learned: the top of the soil lies to you. Sun and wind dry out the top inch in hours. The deeper moisture stays longer. You must check the root zone, not the surface.
Mistake 2: Giving Roses the Wrong Light Exposure
I placed my first balconies roses in a corner that got barely three hours of sun. The leaves turned pale. They stretched toward the light. The stems got weak. I blamed the soil. I blamed fertiliser. I never blamed the sun.
Roses are light junkies. They need at least six hours of direct sunlight daily. Without that, they struggle to photosynthesise. They still take up water, but they cannot process it efficiently. The soil stays wet longer because the plant is not drinking. So you think the soil is fine, but the plant is stressed from lack of light.
I moved my pots to the sunny side of the balcony. Within two weeks, the soil moisture rhythm changed completely. The roots started drinking more. The top soil dried faster. Testing became easier because the whole system was healthier.
Mistake 3: Growing Roses in the Wrong Pot
My very first rose lived in a decorative ceramic pot. No drainage holes. I know. Rookie error. I thought the drainage layer of pebbles would save me. It did not.
Water pooled at the bottom. The roots sat in that pool for days. The soil became sour and compacted. The plant slowly declined. I tried everything except checking the actual container.
Now I only use pots with multiple drainage holes at the bottom. I raise the pot slightly on little feet. This lets excess water escape. It allows air to flow under the container. The soil dries more evenly. Moisture testing becomes meaningful because the water can actually leave the pot.
My 2-Week Observation: The Finger Test Method in Action
Let me walk you through my real experiment. I decided to stop guessing and start testing. I used my index finger. Simple. No gadgets. No expensive moisture meters. Just my own hand.
Week 1: Establishing the Baseline
Day 1. I pushed my finger into the soil of my 'New Dawn' climbing rose. It was planted in a 40cm terracotta pot. The top two inches were dry. Drier than I expected. So I watered thoroughly. I poured slowly until water ran out of the drainage holes. That is called watering to saturation.
Day 2. I checked again. The soil was still damp about one inch down. I skipped watering. The surface looked dry, but my finger said otherwise.
Day 3. Another check. Now the two-inch depth felt barely moist. Not wet. Not bone dry. I waited one more day.
Day 4. My finger came out clean and dry. The soil had finally reached the dry state. I watered again. Full soak.
This cycle repeated for the whole week. I noticed something important. The watering interval was not every day. It was every four days. That surprised me. I used to water every single day. No wonder my earlier roses died.
Week 2: Watching the Plant Respond
The second week was even more revealing. The weather got warmer. I expected the drying to speed up. It did. But only slightly.
I tested every morning before work. Every evening after dinner. The moisture levels varied. Morning tests showed wetter soil because of dew. Evening tests showed drier conditions after the day's sun.
I noticed my rose's leaves perking up. The dark green colour looked healthier. The new growth tips started appearing. It sounds dramatic, but the plant was thriving because I finally stopped overwatering.
By day 10, I felt confident. I could walk past the pot and instantly know if it needed water just by looking at the soil surface colour. Darker soil meant recent moisture. Lighter brown meant dry. But I still tested with my finger every time. The visual cue was just a starting point.
By day 14, the results were undeniable. My rose had produced two new shoots. The old leaves stopped yellowing. The soil smelled fresh, not sour. The finger test had transformed my balcony gardening routine.
The Deeper Prong Test: When Finger Checking Is Not Enough
As my rose specimen grew larger, I wanted more accuracy. The finger works great for the top two inches. But the bottom half of the pot might still hold water. So I upgraded my method slightly.
I grabbed a clean wooden chopstick. I inserted it all the way to the bottom of the pot. I held it there for thirty seconds. Then I pulled it out. Dry chopstick meant the whole pot needed water. Damp chopstick meant moisture existed at depth. Wet mud caked on the stick meant the bottom was soaked.
I conducted this chopstick test alongside the finger test every other day. The results were fascinating. The top soil could feel dry while the bottom was still soaked after rain. If the bottom was wet, I held off watering even if the top felt dry. That prevented root rot more than anything else.
The chopstick method is especially useful for deep pots. Balcony planters are often deeper than standard pots. Your finger cannot reach the bottom. The chopstick bridges that gap. It acts as a moisture probe for the entire soil column.
Store-Bought Moisture Meters: Are They Worth It?
I will be honest. I bought a cheap moisture meter once. It had a little metal probe and a dial. I stuck it into the soil and waited. The needle moved to the "wet" zone. I felt so scientific.
But then I checked with my finger. The soil was actually dry. The meter was wrong. Why? Because cheap meters work on electrical conductivity. They need good soil contact. Salts from fertiliser can confuse the reading. Dry spots in the soil also break the circuit.
I ended up throwing the meter away. Contact with the soil is unreliable. Many times the probe only touches a tiny pocket of soil. That pocket might be wet while the surrounding soil is dry. The reading becomes a lucky guess.
Professional growers I follow on forums say the same thing. Moisture meters are toys unless you spend serious money. For balcony roses, your finger is more accurate and totally free. The University extension services also confirm this. Simple tactile methods are reliable for container gardening.
How Weather and Balcony Location Change Your Testing Frequency
Your balcony is not a controlled greenhouse. It changes with the seasons. During summer heatwaves, the soil dries fast. You might need to water every two days. During cool, overcast weeks, the soil stays damp for a week.
I noticed that my south-facing balcony gets intense afternoon sun. The pots on the west side dry faster than those on the east. Wind also plays a massive role. A breezy high-rise balcony dries out much quicker than a sheltered ground-level patio.
So my testing schedule shifts. In July, I test daily. In October, I test every other day. In winter, I test once a week because the roses are dormant and need minimal water.
Do not trust a fixed calendar. Trust your finger. The plant does not care what day it is. It cares about actual soil moisture levels.
The Dark Art of Amending Balcony Rose Soil
Testing moisture is only half the battle. The soil itself must allow proper drainage. I learned this when my third rose developed yellow leaves despite perfect watering routines.
The culprit was the store-bought potting mix. It was cheap and dense. It held water like a sponge. When I watered, the mix collapsed and formed a hard crust. Water sat on top for hours before slowly seeping down.
The solution was mixing in perlite and crushed bark. Perlite adds air pockets. Bark adds structure. I now use a ratio of roughly 3 parts potting mix, 1 part perlite, 1 part bark. This mix drains rapidly while retaining just enough moisture.
With this new blend, my moisture tests became more meaningful. The soil dried evenly. I could feel the differences clearly at different depths. The finger test became a precise tool rather than a vague guess.
If your balcony roses struggle with moisture issues, consider repotting with better drainage material. The Royal Horticultural Society at RHS{:target="_blank"} regularly advises on container mixes that balance moisture retention and drainage.
Water Quality: The Part Nobody Talks About
Tap water varies by location. Hard water leaves white deposits on the soil surface. This crust can block water infiltration. The surface appears dry because water beads up and rolls off the crust instead of soaking in.
I noticed this on my own balcony after three months of tap watering. My finger test showed dry top inch. But when I watered, the water pooled and ran down the sides. The root ball stayed completely dry.
The fix was easy. I switched to collected rainwater for my roses. Rainwater naturally matches what plants expect. If rainwater is not available, you can let tap water sit in an open container for 24 hours. This lets chlorine evaporate and improves the water chemistry.
The moisture test then worked properly again. The soil absorbed water evenly. The finger found consistent moisture levels. My roses finally responded the way they should.
Seasonal Overwatering: The Quiet Killer of Balcony Roses
Autumn was always my downfall. The cooler weather meant less evaporation. The roses slowed their growth. But I kept watering with summer enthusiasm. The soil stayed soggy for weeks. Roots began dying.
This is common for balcony gardeners. People fail to adjust their habits across seasons. I almost killed my 'Iceberg' rose this way last October. The leaves turned brown and crispy from the edges inward. I thought it was a disease. Fungicide did nothing. It was plain root suffocation.
Now I test before every watering, regardless of season. If the soil is still damp at the two-inch depth, I close the watering can. No exceptions. This rule has saved more plants than any fertiliser or pesticide.
The American Horticultural Society at AHS{:target="_blank"} echoes this advice. They emphasise that cool-season plants use far less water than their summer counterparts. The hose should be your last resort, not your first reflex.
Testing During Different Rose Life Stages
Roses change their drinking habits as they grow. Bare-root roses recently planted in spring need consistent moisture to establish. They lack mature root systems. The top few inches should stay slightly moist but never soaked.
Established roses from their second year onward handle drier conditions better. Their roots reach deeper into the container. They can survive brief dry spells. I often let the top three inches dry completely before watering these stronger plants.
Roses during heavy bloom periods are thirsty. They push out flowers that demand water. I found that testing twice daily during these stages helps. The soil dries faster because the rose is drinking aggressively.
Finally, dormant winter roses need almost nothing. I test once a week. If the soil is frozen, I do not water at all. Testing during frost prevents me from adding ice-cold water that shocks roots already under stress.
What You Should Not Do: My Personal Failure List
I killed four rose bushes before getting this right. Each death taught me something painful. Let me share so you do not repeat these mistakes.
First, never test only the surface. The top half-inch of soil dries in hours. That is a red herring. You must go deeper. Two fingers deep minimum.
Second, do not water after every feeding. Fertiliser application made me think water was necessary. Not true. The soil moisture level dictates watering. Not feeding schedules.
Third, never test right after watering. Everything feels wet immediately. You learn nothing. Wait at least a few hours, then test for the true moisture distribution.
Fourth, do not ignore the pot material. Terracotta pots wick moisture away quickly. Plastic pots hold water longer. This affects drying speed and your testing frequency.
Fifth, never abandon the test on weekends. Consistency matters. If you only test on weekdays, you might miss a waterlogging event after weekend rains.
Combining Moisture Testing With Other Simple Checks
The finger test is great. But I combine it with visual and physical checks for a complete picture.
I look at the leaves. Drooping leaves in the morning mean the plant needs water. But drooping leaves in the afternoon heat might simply mean sun stress. So I touch the leaves during cool hours to differentiate.
I lift the pot slightly. Light pot means dry root ball. Heavy pot means saturated soil. This is a beginner-friendly technique. You learn the weight of your pot when fully watered and when bone dry. The comparison becomes instinctive over time.
I also check the drainage holes. If moisture seeps out when you tilt the pot, the soil is too wet. If nothing appears and the soil is dry, water is needed.
These combined tests take thirty seconds total. They give me complete confidence. I no longer panic about my balcony roses because I have a systematic way to understand their water needs.
The Science Behind Overwatering in Container Roses
Botanists have a clear explanation for why overwatering kills. Roots need oxygen to respirate and absorb nutrients. Water fills the soil pores and pushes out the air. Constant soggy soil starves the roots.
This creates anaerobic conditions. Harmful bacteria thrive. Beneficial fungi die off. The root tissue begins to rot. The plant cannot take up minerals. Leaves yellow and fall. The plant eventually succumbs.
I once heard a horticulturist say, "You cannot expect a plant to breathe underwater." That stuck with me. When I pour water down without testing, I am literally holding my rose's head under water.
The good news is simple. You can reverse overwatering if caught early. Stop watering. Let the soil dry completely. Improve air circulation around the pot. Repot if the soil has gone sour. I saved my fifth rose this way. It came back stronger with deep green leaves within a month.
How to Build a Refill Schedule Based on Actual Testing
Many readers ask me for a schedule. I always hesitate. Because the correct answer depends on your specific conditions. But let me give you a framework based on my real observations.
During active growth in late spring and summer. I test daily. I water roughly every 2 to 4 days. The interval is shorter on windy days and longer after rain.
During early spring and autumn. I test every other day. I water every 5 to 8 days. This is a minimum need period.
During winter. I test once weekly. I water only if the soil is completely dry down to four inches. Most years I never water at all in winter.
This schedule is not secret magic. It comes from observing the plant and testing the soil consistently. After two weeks of daily finger testing, you will develop a feel for your unique balcony microclimate.
Stress-Free Watering Trips for Busy People
What if you travel or have a busy work week? I face the same problem. Solutions exist.
Group your pots based on moisture needs. Keep fast-draining pots together. Slow-draining pots together. This lets you water groups differently with minimal time.
Use a spray bottle for spot watering. But never rely on misting instead of deep watering. Surface misting keeps the top moist but does not water the roots. Misting alone causes shallow roots and weak plants.
Consider self-watering containers for emergencies. They have a reservoir system that provides consistent moisture from below. You still must check them, but they forgive small lapses in your schedule.
I also save water from my dehumidifier. It is clean and similar to rainwater. I store it for weekends when I water all my balcony plants deeply.
Frequently Asked Questions About Balcony Rose Soil Moisture
Q: How often should I check the soil moisture? A: I check every single day. It takes two seconds. Daily checking helps you notice changing trends. You will learn how your balcony affects drying time. During winter, checking weekly is sufficient.
Q: My finger test feels dry but my rose leaves look wilted. What should I do? A: First, touch the leaves in the morning. If they recover morning stiffness, the grass is healthy. Then water immediately because the soil is dry. But if leaves remain wilted even with moist soil, the roots might be damaged. Check the drainage holes for root rot.
Q: Is a moisture meter better than the finger test? A: In my experience, no. Cheaper meters are unreliable in container soil. They give false readings due to poor probe contact. Your finger offers direct tactile feedback. If you want a device, choose a professional-grade one with a moisture probe that you can calibrate. But the finger is always free and effective.
Final Thoughts From a Recovering Overwaterer
I know the temptation. You want to nurture your roses. You think more water equals more love. I thought that too. It took me four dead bushes to unlearn that belief.
Testing soil moisture is the single simplest habit that changed my balcony rose game. It is free. It takes seconds. It works every time.
Start today. Push your finger into the soil. Notice what dry feels like. Notice what wet feels like. Then decide based on your findings, not your emotions.
Your roses will thank you. They will grow stronger. Flower more. And survive the hot balcony summers with you. Just give them a chance to breathe. Sometimes the best thing you can do is nothing at all.





