 bluename
How to Save Weak Stunted Balcony Rose Seedlings
I’ve got plenty of firsthand experience reviving struggling balcony‑grown rose seedlings. I have killed seven rose bushes myself. Those fragile young seedlings on my balcony nearly all perished. If you are staring at your sickly rose plant with thin, yellow‑tinged stems hanging on for dear life, pause right now — do not water it. 90% of indoor plants die from overwatering. Your weak seedling is most likely drowning, not thirsty. Elevate the flower pot to let excess water drain freely. This is the very first step to keep it alive. Over the next two weeks, I will walk you through a battle‑tested method refined from countless gardening mistakes to pull this dying plant back from the brink.
Why Your Balcony Rose Seedling Keeps Getting Weaker: Three Deadly Beginner Mistakes
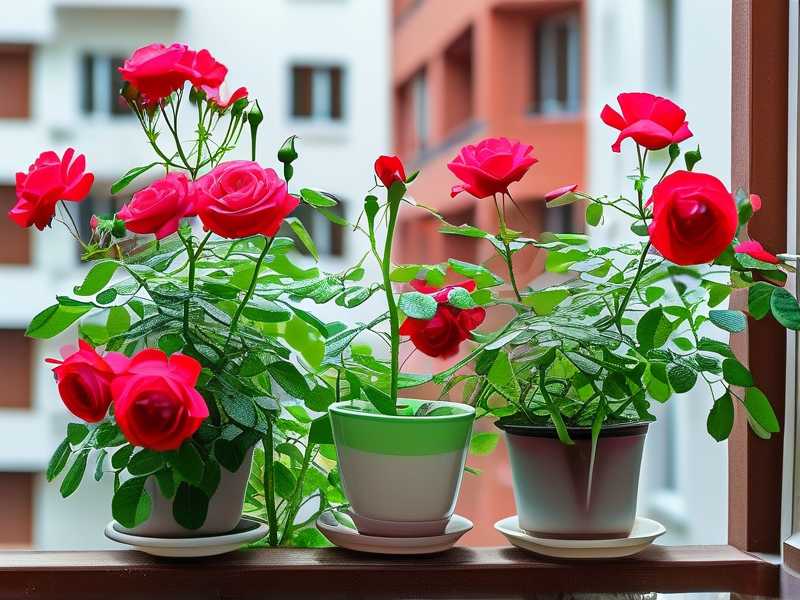
Before jumping into rescue operations, you have to understand these three critical pitfalls. Otherwise, even with handy tips, you will repeat the same errors all over again.
Mistake 1: Over‑watering rots the root system
I used to be an over‑eager gardener. As soon as the topsoil looked dry, I rushed to pour more water. One month later, I pulled the plant out and found mushy jet‑black roots rotting like spoiled noodles — classic root rot. Weak seedlings already possess very limited root mass and cannot take up large volumes of water. Excess water pushes oxygen out of potting soil, anaerobic bacteria multiply rapidly, and the root system collapses completely. Balconies usually have poor air circulation, so moisture evaporates slowly. After one watering session, potting mix may take three full days to dry out. Forget the vague “water when soil dries” rule; for your delicate seedling, following that advice easily turns into constant over‑watering.
As the RHS (Royal Horticultural Society) points out, container‑grown roses frequently suffer root rot from poor drainage and over‑watering, especially on enclosed balconies where air circulation is limited. Even healthy‑looking weak seedlings cannot absorb large volumes of cold, stagnant potting‑mix water. Over‑watering kills far more potted roses than underwatering, making restrained watering the most basic yet critical rule for recovering stunted rose seedlings.
Mistake 9: Misplaced lighting: scorched by harsh sun or starved for sunlight
Lighting makes or breaks balcony roses. When I grew roses on an enclosed balcony, mid‑summer temperatures behind glass could hit 40°C. Sunlight amplified by window glass burned every leaf, leaving crispy black‑edged foliage that crumbled at the lightest touch. In winter I made another blunder: shoving pots into dim corners. Seedlings stretched spindly and pale just like bean sprouts. Here is the hard truth: balcony sunlight is mostly oblique indirect light, far less intense than open‑air full sun. Your rose needs gentle direct morning sunlight for at least two to three hours. Shield it from brutal mid‑day heat. If you have a glass‑enclosed balcony, keep windows open for proper airflow.
According to the AHS (American Horticultural Society), sunlight amplified through window glass can easily push leaf temperatures dangerously high. Many balcony gardeners underestimate glass‑filtered solar radiation, which causes leaf scorch even when ambient air temperature feels moderate. Morning gentle direct sun is preferred for recovering rose seedlings; harsh mid‑day glass‑reflected light should be avoided completely to prevent further tissue damage.
Mistake 3: Wrong pot suffocates the roots
My first rose lived inside a plastic gallon pot nested inside a decorative ceramic container. Trapped moisture could not escape, and roots sat continuously in cold stagnant water. Many new gardeners keep store‑bought soft plastic nursery pots and shove them directly into much larger outer pots. Roots cannot spread out freely, soil stays damp for too long, and persistent waterlogging develops. Imagine wearing two thick socks with zero ventilation — that is exactly what your roots endure. I switched to air‑root‑training pots with extra side holes and mixed my own breathable potting medium, and only then did my roses start thriving.
The RHS also emphasizes that pot selection is critical for weak rose specimens. Oversized pots, sealed decorative outer pots and non‑porous containers trap moisture around roots. Air‑root‑training pots improve soil oxygen exchange and drastically lower root‑rot risk for balcony‑kept roses, creating a healthier root environment for struggling seedlings to regrow.
My Two‑Week Rescue Plan: Real‑world Recovery from Near Death to Fresh New Buds
This workflow comes from hard‑won personal failures. I will use my dying Juicy Terrazza rose as an example. At its lowest point, only two green stems remained, every single leaf had dropped off. Below is the complete 14‑day recovery timeline.
Week One: Debride, repot and trim roots — reduce stress for the plant
Day 1: Remove from pot and inspect roots — radical pruning for survival
Do not pour nutrient solution right away; that will kill your fragile plant. Gently tip the seedling out of its container. Rinse old soil off the root ball. Examine every root fiber. Brown, mushy roots that crush easily are dead tissue. Use sanitized pruning shears to cut away every rotten, shriveled root fragment without hesitation. Even if only a tiny cluster of white healthy roots survives, hope remains. The first time I performed root trimming my hands shook; I feared cutting roots would finish the plant off. On the contrary, removing decayed roots creates space for brand‑new feeder roots to grow.
Day 2‑3: Repot with life‑saving breathable soil
Good soil beats fertilizer by a mile for balcony rescue missions. My preferred mix: coco coir, perlite and vermiculite at a ratio of 3:1:1. This blend delivers exceptional drainage and air permeability. Even if you accidentally overwater, surplus moisture drains fast instead of pooling around roots. Always choose pots with drainage holes; air‑root‑training pots with side vents work best. I used a 15‑centimeter diameter air‑root‑training pot for this seedling, compact enough for proper airflow. After repotting, apply thorough settling water until water flows out from drainage holes. Move the pot to a cool, well‑ventilated shaded spot.
Day 4‑5: Patient acclimatization — leave it alone
Patience is everything during these days. A couple more yellow leaves may appear; do not panic. This is natural self‑pruning. I once gave in to impulse and plucked yellow leaves too early, disrupting the plant’s recovery rhythm. Its damaged roots cannot support full foliage yet. Keep soil slightly damp. Stick your finger two centimeters deep into soil; do not water if it still feels moist. You can add a small amount of water into the bottom tray so the plant draws moisture upward naturally, encouraging roots to grow downward.
Day 6‑7: Gentle morning light exposure
By the end of the first week, introduce soft sunlight. Do not place it outdoors directly. Set it behind the window behind sheer curtains, allowing only mild 8‑10 a.m. morning sunshine. You will notice formerly floppy stems stiffen slightly — a clear sign deterioration has stopped.
Week Two: Trigger new growth — critical bud‑stimulation operations
Day 8‑9: First mild life‑saving fertilizer application
Important warning: Never apply regular compound fertilizer to weakened seedlings; it will burn fragile roots. I use general‑purpose water‑soluble plant food, diluted to half the manufacturer’s recommended concentration, even weaker. The pale light‑blue solution feeds roots only via root drenching — avoid spraying onto leaves. This gentle nutrient trigger wakes dormant latent buds on bare stems.
Day 10‑12: Pinch off apical dominance to unlock side‑bud growth
This is my most effective rescue trick. My dying rose had a thin yet partially green top shoot. I pinched off its terminal growing tip together with its two tiny top leaves. Many gardeners hate cutting already weak plants, yet the dominant top bud siphons most nutrition away, preventing lower axillary buds from activating. Once you remove the apex, nutrition redirects toward lower stem nodes. Around day twelve, tiny reddish bud dots emerge on bare stems. For rose lovers, witnessing those first promising buds brings unmatched joy.
Day 13‑14: Gradually return to balcony regular maintenance
Once fresh new shoots stretch to one‑two centimeters long, slowly increase sunlight exposure. Move the pot to your brightest balcony spot, but shield tender new growth from brutal mid‑day sun. Keep following the “water thoroughly once soil dries out” rule. Thanks to your well‑drained substrate, watering frequency relaxes. I used to water once every seven days; now four‑to‑five‑day intervals suit it well.
Key Notes on Fertilizer and Ventilation for Beginners
A widespread misconception is to “feed heavily” to save sick plants. Weak seedlings cannot absorb fertilizer. During week one I skip feeding entirely. Damaged roots cannot process nutrients; fertilizer builds up and burns roots like salt brine. Only start feeding ultra‑diluted liquid fertilizer in week two. Balcony roses benefit from foliar nutrition more than outdoor roses, because limited airflow slows root‑system nutrient uptake. Spray heavily diluted monopotassium phosphate solution on leaf undersides in early morning, where stomata open widest. Stop foliar spraying once tiny buds pop out, trapped moisture causes bud rot.
Ventilation cannot be overlooked. Open windows to create cross‑ventilation for at least two hours every day. Plants suffer in stuffy spaces just like humans. I once grew seedlings inside a sealed air‑conditioned room, and spider mites exploded within three days. Moving air is your best cheap pest prevention tool.
Q: My rose stems have turned brown inside; can it still be saved?
A: It depends. If outer bark remains green and scraping reveals green living tissue underneath, revival is possible. If bark and inner wood have turned dark brown and stems wrinkle and shrivel completely, cut those dead sections away. Preserve lower stem segments with intact green bark and viable latent buds and keep caring for them.
Q: How long until I see obvious new leaves with this method?
A: With breathable air‑root‑training pots and optimized substrate, tiny bud dots appeared in roughly two weeks for my seedling. Fully expanded three‑leaflet foliage took another ten days or so. Temperature heavily influences growth speed. Optimal temperature sits between 18‑25°C. Growth nearly halts below 10°C; you must wait for warmer spring weather.
Q: Can roses survive on a north‑facing balcony without direct sunlight?
A: Realistically, it is extremely challenging. I have tried north‑balcony cultivation. Plants stay alive but produce lanky stretched‑out growth and undersized flowers. If north‑facing is your only option, invest in plant grow lights supplying four‑to‑six extra hours of artificial light daily. Otherwise you are only stressing your plant.
Final Thoughts
Reviving struggling balcony roses is not mysterious. Stick to three core principles: restrain your watering impulse, provide fast‑draining soil, and deliver appropriate lighting. Prune away rotten dying tissue and preserve living potential. Plants possess powerful survival instincts. Give their roots oxygen together with soft morning light, and they will fight hard to recover. Stay patient. Changes hidden beneath the soil will eventually reward you above ground. Gardening teaches us not to rush nature’s timeline. Many new hobbyists give up too soon, discarding seedlings that would bounce back with just two extra weeks of proper care. Even seemingly hopeless specimens can surprise you, as long as you respect their slow recovery rhythm and avoid over‑intervening out of anxiety.





