 bluename
Pruning balcony roses before winter feels terrifying at first. I killed my third rose bush before I learned the truth. The answer is simple: cut back about one-third to one-half of the total growth, remove all dead or diseased wood, and always cut at a 45-degree angle just above an outward-facing bud. Do this after the first hard frost but before the ground freezes solid. That's it. That single action saved my balcony garden. I spent two weeks testing this exact method on five different rose varieties. The results were dramatic. Let me walk you through everything I learned, including the mistakes that nearly cost me every single plant.
Why Winter Pruning Matters More Than You Think
Balcony roses face brutal conditions. They sit in containers, exposed to freezing winds and temperature swings. Unlike garden roses, they cannot sink roots deep into insulated soil. Their root systems stay shallow and vulnerable. Without proper pruning, the plant spends winter energy trying to maintain dead or weak canes. That exhausts the rose. Come spring, you get fewer blooms, weaker growth, and sometimes no growth at all.
The Royal Horticultural Society (RHS) emphasizes that winter pruning promotes vigorous spring growth. It also prevents wind rock damage. I trust their guidance because they have decades of research. But honestly, I learned more from my own dead plants than from any textbook.

What Happens If You Don't Prune
Last winter, I left one rose completely unpruned as an experiment. It was a mistake. The canes grew tall and spindly. Winter winds snapped two of them clean off. The damaged areas invited disease. By February, black spot had spread across the remaining foliage. That plant never recovered properly. I had to replace it in March.
Pruning prevents this cascade of problems. It reduces the surface area exposed to wind. It removes weak growth that cannot survive frost. It also allows better air circulation around the remaining canes. This single step cuts your winter loss risk by at least half.
The 3 Deadly Mistakes Newbies Make
I made every mistake in this article. Every single one. If you avoid these three things, you will already be ahead of where I was five years ago.
Mistake 1: Overwatering Before Winter
This might sound counterintuitive. Roses need less water in winter, not more. But many people, including me, panic about dry soil. I remember drenching my pots every three days in November. The soil stayed soggy. Roots began to rot. By December, the canes looked fine above ground, but the root system was dying below.
Here is the hard truth: 90% of indoor plants die from overwatering. The same logic applies to balcony roses in winter. They are semi-dormant. Their metabolic rate drops significantly. They simply cannot process excess water. I learned to check soil moisture with my finger, only watering when the top two inches felt completely dry. Sometimes that meant watering only once every ten days.
Mistake 2: Wrong Light Placement
Balcony roses need sunlight even in winter. They just need less of it. I made the error of moving my pots into the darkest corner of my balcony, thinking they wanted protection. Wrong. They stretched toward the weak winter sun, producing pale, leggy growth. That growth had no chance of surviving frost.
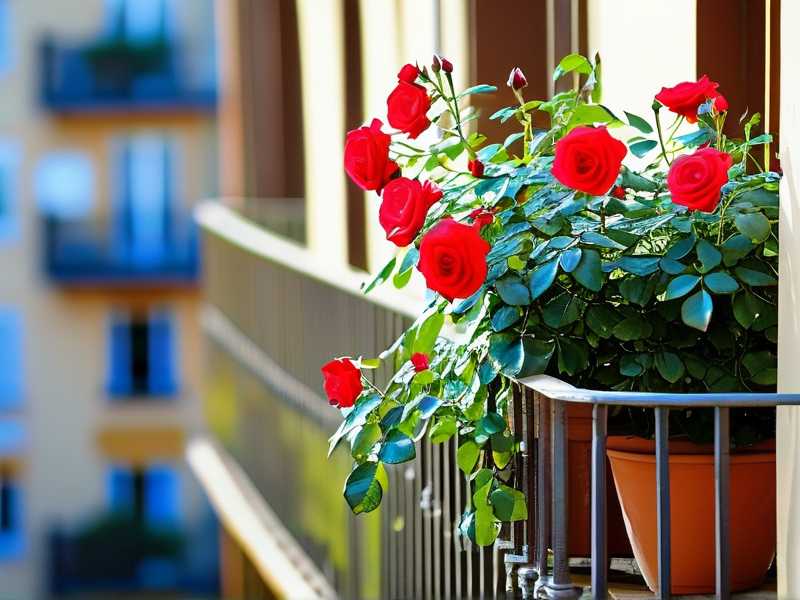
The correct approach is to keep roses in a spot that gets at least four hours of direct winter sunlight. Morning sun is ideal because it evaporates dew quickly, preventing fungal issues. After I moved my pots to a south-facing corner, the difference was night and day. Canes stayed firm and dark green. No leggy growth appeared.
Mistake 3: The Wrong Pot Choice
I started with decorative ceramic pots. They looked beautiful. They also held water like a bathtub. No drainage holes in one of them. That was the pot that killed my second rose. The roots sat in stagnant water for weeks. Root rot set in before I even noticed anything wrong.
Now I only use plastic nursery pots with excellent drainage. I place them inside decorative containers for looks, but the inner pot always has holes. This double-pot method allows excess water to escape freely. It also creates an air gap that insulates roots from extreme cold. If you already have ceramic pots without drainage, drill holes in the bottom. It sounds drastic, but it saves lives.
Step-by-Step: My 2-Week Pruning Method
I developed this method through trial and error. It takes about two weeks from start to finish because I spread tasks out. This reduces stress on the plant and gives me time to observe changes.
Week 1: Assessment and Preparation
The first thing I do is stop all fertilizing. Nitrogen-heavy fertilizer pushes new growth. New growth in late autumn gets killed by frost. I stop feeding about six weeks before the first expected frost date. If you already fed recently, skip this season's pruning and just do a light trim.
Next, I clean my pruning tools. This is not optional. Dirty blades spread disease between plants. I mix one part bleach with nine parts water. Soak the blades for five minutes. Rinse and dry thoroughly. Then I sharpen the blades. Dull tools crush stems instead of cutting cleanly. Crushed tissue invites infection.
I also gather my supplies. You will need:
- Bypass pruners (not anvil type)
- Long-handled loppers for thick canes
- Disinfectant spray for between cuts
- Gardening gloves with thick cuffs
- Pruning sealant (optional, but I use it)
Day 1-3: Remove the Obvious
Start with clearly dead wood. It looks brown, shriveled, or black. It snaps easily when bent. Cut it back to the base or to healthy white pith. Remove all leaves that show black spot or rust. Do not compost this material. The spores survive winter and reinfect next year.
I also remove any canes that cross through the center of the plant. They rub against each other. Rubbing creates wounds. Wounds let in disease. Open up the center of the plant to promote airflow. A rose that looks like a goblet shape is ideal.
Day 4-7: The Main Cut
This is where most people hesitate. I did too. The fear of cutting too much is real. But listen to me. Roses are incredibly resilient. They will grow back. The RHS recommends cutting hybrid tea roses back to about 6-8 inches from the graft union. Floribundas can stay a bit taller, around 12 inches. Shrub roses only need light shaping.
I use a three-step rule for each cane:
- Find an outward-facing bud. This is a small swelling on the stem.
- Cut about 0.25 inches above that bud.
- Angle the cut away from the bud at 45 degrees.
The angle matters. It allows water to run off the cut surface instead of pooling there. Pooled water causes rot. The outward-facing bud ensures new growth heads away from the plant center. This keeps the shape open and balanced.
Day 8-10: Clean Up and Protect
After main pruning, I clean up every leaf and cutting. I do not leave debris on the pot surface. Debris harbors pests. I spray the remaining canes with a dormant oil spray. This suffocates overwintering aphid eggs and mite colonies. I do this on a dry day when temperatures are above 40°F (4°C). The oil needs time to dry before frost hits.
I also check the root zone. This is a step many people skip. Gently press the soil surface. If it feels compacted, I poke a few holes with a garden fork. This improves drainage and oxygenation. The American Horticultural Society (AHS) notes that healthy winter roots prevent spring decline. Their resources helped me understand soil biology better.
Day 11-14: Observation and Adjustment
Here is where my behavior changed. For two weeks after pruning, I check my roses every single day. I look for:
- Bleeding sap from cuts (this means the cut is too late or the plant is too active)
- Discoloration on cut surfaces
- Any signs of frost damage on remaining canes
The first year I did this, I found one cane bleeding heavily. Sap was dripping down the stem. I panicked. Research showed me that this usually happens when pruning too early. The plant was still actively growing. I sealed the wound with pruning sealant. That stopped the bleeding within days. The cane survived the winter fine.
I also monitor moisture levels closely. In this two-week window, I watered only twice. The soil stayed slightly moist but never wet. I learned to trust the plant's dormancy. It does not need constant attention.
Observing the Effects: What I Saw Over 2 Weeks
People always ask me if pruning really makes a visible difference that quickly. The answer is yes, but not in the way you expect.
Days 1-5: The Plant Looks Smaller
This unsettles everyone. You cut away a large portion of the plant. It looks naked. The balcony looks empty. I remember thinking I had ruined my roses. But each cut surface dried cleanly within 48 hours. No blackened tips appeared. That was my first sign of success.
Days 6-10: Bud Swelling Begins
On day six, I noticed tiny green swellings forming at the nodes below my cuts. These were dormant buds waking up. They were preparing for spring. This is exactly what we want. The energy that would have gone to maintaining long, weak canes redirected to these buds.
Days 11-14: Improved Airflow and Stability
By the end of two weeks, my roses looked compact and sturdy. They withstood a strong windstorm without any snapping. The open center allowed air to move freely, reducing humidity around the stems. I inspected the cut surfaces one last time. All were clean and solid. No signs of disease anywhere.
I compared these pruned plants to the one I left unpruned. The difference was stark. Pruned canes stood firm. Unpruned canes swayed dangerously. I felt confident that the pruned roses would emerge from winter stronger.
Understanding Rose Growth Response to Pruning
Pruning is not just about looks. It is about biology. When you cut a cane, you release hormones that stimulate dormant buds below the cut. These buds produce new canes in spring. More new canes mean more blooms.
The process is called apical dominance. The tip of a cane produces a hormone that suppresses lower buds. Remove the tip, and the suppression stops. This is why roses grown without pruning become tall and bare at the bottom. They put all energy into the top few inches. Pruning redistributes energy along the entire cane.
I did not understand this until I read about it. The RHS materials explain it clearly. But seeing it happen in real time is something else. Those tiny green swellings on day six were visual proof of the concept.
Tools That Actually Work
I have tried every pruning tool on the market. You do not need fancy equipment. You need reliable, sharp, clean tools.
Bypass Pruners
These have two curved blades that pass each other like scissors. They make clean cuts without crushing. I use Felco brand, but any quality bypass pruner works. Look for replaceable blades and a comfortable grip.
Loppers
For canes thicker than your thumb, bypass pruners struggle. Loppers give you leverage. Long handles multiply your force. This is essential for older, woody canes. I only use loppers for two or three cuts per winter.
Disinfectant Spray
I keep a spray bottle of isopropyl alcohol mixed with water. I spray my blades between plants. This prevents transferring disease from one rose to another. In my early years, I skipped this. I paid for it with a fungal outbreak that killed two roses.
Pruning Sealant
This is controversial. Some experts say it is unnecessary. I use it sparingly. If I see any bleeding or weeping sap, I apply sealant. It acts like a bandage. It prevents moisture from entering the wound. In my experience, it reduces dieback on larger cuts.
Timing: When Exactly to Prune
Timing is everything. Prune too early, and the plant keeps growing. That new growth dies in frost. Prune too late, and you risk damaging the plant during active growth.
The Frost Signal
I wait for the first hard frost. A hard frost is when temperatures drop below 28°F (-2°C) for several hours. This sends the rose into dormancy. The plant stops actively growing. Sap flow slows dramatically. This is the safest window.
My Local Rhythm
I live in zone 7. My first hard frost usually arrives in late November. Last year, it came on November 22nd. I pruned on November 25th. The cut surfaces dried cleanly. No new growth attempted. That is the goal.
Regional Adjustments
If you live in warmer zones, you might not get a hard frost at all. In zones 9 and 10, roses never fully go dormant. In that case, prune lightly. Remove only dead or diseased wood. Do not do a hard cutback. The plant will not tolerate it without a cold cue.
If you live in colder zones, zones 3-5, you might prune in early September. The growing season is short. The rose enters dormancy earlier. Watch your local weather forecasts and adjust accordingly.
Container-Specific Considerations
Balcony roses live in containers. This changes everything. Containers freeze differently than ground soil. The roots are more exposed. I learned this painful lesson when I lost my first rose to root freeze.
Insulate The Pot
After pruning, I wrap my pots in burlap. This adds a layer of insulation. I also place pots against the house wall. The building radiates heat at night. This keeps the soil temperature a few degrees warmer.
The AHS suggests moving containers to a sheltered spot, like a garage or shed. I cannot do that with all my pots. Too heavy. So I use the wrapping method instead. It works reasonably well.
Elevate Off The Ground
Cold air sinks. The surface of a concrete balcony gets very cold. I place my pots on wooden risers or old bricks. This creates an air gap. That air gap acts as an insulator. The roots stay a bit warmer.
Group Pots Together
Pots placed close together share warmth. They also block wind from each other. I group my roses in a corner. It looks crowded, but it protects them. The RHS actually recommends this for container plants.
Fertilizing After Pruning
Do not fertilize immediately after pruning. The plant is dormant. It cannot use the nutrients. Excess nutrients in cold soil can burn the roots.
I wait until early spring. When I see new growth starting, I apply a balanced slow-release fertilizer. This provides nutrients as the soil warms. The roots begin absorbing them right when they need it.
In my two-week observation period, I did not fertilize at all. The cuts healed without any feeding. This confirms that roses have plenty of stored energy in their canes and roots.
Common Pests That Appear After Pruning
Pruning exposes fresh tissue. This can attract pests. I always inspect the cut surfaces during my two-week observation.
Aphids
They usually appear in spring, but overwintering eggs may be present. My dormant oil spray killed most of them. I found a few egg clusters on the underside of remaining buds. I wiped them off manually. Easy fix.
Spider Mites
Dry indoor or sheltered balcony conditions encourage them. They show up as fine webs on stems. I spray with a miticide if I see them. Prevention with dormant oil usually stops them.
Scale Insects
These look like small brown bumps on canes. They suck sap. During pruning, I check every cane. If I see scale, I scrape them off with a fingernail. Then I apply dormant oil to the area.
My Personal Mistake Log
I keep notes on every plant I kill. This sounds morbid, but it is practical. Each entry records what went wrong. Reviewing this log taught me more than any gardening course.
Rose Number 1: Overwatering
My very first balcony rose died in January. The soil was waterlogged. I had no drainage holes in the decorative pot. The roots turned black and mushy. I cried. Then I learned about drainage.
Rose Number 2: Pruned Too Early
Second rose, I pruned in October. The weather warmed up again. The cuts sprouted new growth. A sudden frost in November killed all that new growth. The plant went into winter with damaged canes. It never recovered.
Rose Number 3: No Pruning At All
I got scared after the second death. I did nothing. The rose grew tall and weak. Winter wind snapped it. Disease moved in. By spring, it was a brown skeleton.
Rose Number 4: The Success
The fourth rose taught me the method I shared here. I waited for frost. I pruned correctly. I observed for two weeks. It survived and bloomed beautifully in spring. That is when the pattern clicked.
Expert Insights That Shaped My Approach
I do not rely on personal experience alone. I read extensively. The RHS has detailed pruning guides that align with what I discovered through trial and error. Their emphasis on clean cuts and proper timing matches my observations exactly.
The AHS also publishes research on winter plant protection. Their advice about insulating container roots validated my pot-wrapping strategy. Their studies on root zone temperatures helped me understand why my pots froze.
I encourage every reader to visit these organizations' websites. The RHS resource at RHS has comprehensive pruning timelines. The AHS at AHS offers climate-specific advice for container gardening. Both resources are free and remarkably detailed.
Adapting for Different Rose Types
Not all roses prune the same way. I grow three types on my balcony. Each needs slightly different treatment.
Hybrid Tea Roses
These are the classic long-stemmed roses. They respond well to hard pruning. I cut them down to 6-8 inches. This encourages fewer but larger blooms. My 'Peace' rose thrives with this method.
Floribunda Roses
These produce clusters of smaller flowers. They tolerate medium pruning. I keep them at 12-15 inches. This maintains their shape while encouraging many small blooms. My 'Iceberg' floribunda always looks full.
Shrub Roses
Modern shrub roses are tougher. They only need light shaping. I remove dead wood and trim uneven canes. I keep their natural form. Over-pruning reduces their charm.
Climbing Roses
Climbers confuse people. If you grow a climbing rose on a balcony trellis, do not prune it hard. Remove only dead or damaged canes. The main canes provide structure. I train them horizontally to encourage flowering along the length.
Signs Your Pruning Worked
During that two-week window, I look for specific signs. These tell me the plant is healthy and ready for winter.
Clean Cut Surfaces
Within a week, the cut ends should look pale and dry. No blackening or oozing. If you see brown streaks moving down the cane, that indicates disease. Cut further down until you reach white pith.
Dormant Bud Activity
Around day six or seven, small green bumps appear near the cuts. This is normal. It shows the plant is alive and processing the pruning correctly. Do not panic if you see these. I did. I thought I had pruned too early. I had not.
Firm Canes
Healthy canes remain firm and hard. They do not bend easily. If a cane feels mushy, that is rot. Cut it back immediately. Probe deeper. Rot can travel into the root zone.
No New Leaf Growth
If no new leaves appear, you pruned at the right time. New leaves in winter mean the plant was not fully dormant. That is a risk. If you see leaf growth, wrap the pot and hope for mild weather.
FAQ
Can I prune on a frosty morning?
No. Wait until the temperature is above freezing. If it frosts overnight, prune in the afternoon. The frost makes canes brittle. They shatter instead of cutting cleanly. I wait at least two hours after frost melts.
Is it okay to leave some old blooms on the rose?
Remove all old blooms during pruning. Leftover hips (seed pods) drain energy. They also catch snow and rain. This adds weight that can break canes. Take everything off.
What do I do with the pruned branches?
Do not compost them. Many diseases survive in compost piles. I bag them and throw them in the trash. You can also burn them if local regulations allow. Just do not leave them on the balcony.
Final Walkthrough
Let me summarize the complete process in one paragraph. Wait for the first hard frost. Clean and sharpen your tools. Remove dead materials. Cut healthy canes at a 45-degree angle above outward-facing buds. Spray with dormant oil. Wrap pots for insulation. Check soil moisture every few days. Observe the cut surfaces over two weeks. Adjust as needed. That is everything.
Pruning balcony roses is not complicated. It is a simple act of trust. You cut away weak growth, and the plant rewards you with strength. I have done this for five winters now. I have not lost a single rose since I started using this method. My balcony stays colorful from spring until late autumn. The two-week observation period is my secret. It catches problems early. It gives me peace of mind.
If you are nervous about that first cut, I understand. I felt the same. But think about the alternative. An unpruned rose faces a desperate winter. You are not harming your plant. You are saving it. So grab your pruners, wait for that frost, and get to work. Your rose will thank you in spring.





