bluename
How to Fertilize Balcony Roses for More Continuous Blooms
If you want more continuous blooms from your balcony roses, the answer is simple: feed them weekly with a balanced liquid fertilizer at half strength, and add a slow-release granular rose food into the topsoil every six weeks. That is the core routine I have refined over two years of trial and error. Yet, even with perfect feeding, you will see zero progress if you are drowning the roots, hiding the plant from the sun, or keeping it in the wrong pot. In fact, 90% of indoor plants die from overwatering, and balcony roses are no exception. I learned this the hard way after I killed my first three rose bushes.
I remember staring at my first balcony rose, a 'Patio Hit' variety, and wondering why the leaves turned yellow just two weeks after I bought it. I was so proud of myself for watering it daily. I thought more water meant more life. It was a disaster. The roots rotted, and the buds never opened. That was when I started to dig into real horticultural advice. I found that the Royal Horticultural Society (RHS) stresses that roses need a free-draining environment above all else. You can check their guidance on container growing for specifics. And the American Horticultural Society (AHS) echoes that sentiment, focusing on root zone health. But what does that mean for a busy person on a balcony? It means you must stop treating the plant like a goldfish.

The 3 Fatal Mistakes Newbies Make with Balcony Roses
Before we dive into the fertilizer recipe, I have to walk you through the big three mistakes. I made every single one of them. Honestly, I think everyone does. But if you avoid these, the feeding schedule I share below will actually work.
Mistake 1: Watering on a Timer, Not on Demand
I mentioned the yellow leaves. That was overwatering. Many of us treat the top inch of soil like a dry riverbed. We panic. But roses hate wet feet. In a balcony pot, excess water has nowhere to go unless you have drainage holes. I used to water every evening, regardless of the weather. The RHS points out that roses in containers can suffer from root rot if the compost stays wet. I had to break this habit. Now, I stick my finger about two inches into the soil. If it feels damp, I skip watering. If it feels dry, I water deeply until it runs out the bottom. That simple test saved my fourth plant. Seriously, get a moisture meter if you trust yourself less than a finger test. It is a cheap tool that prevents a costly mistake.
Mistake 2: The Shade Trap
I used to think my balcony was perfect. It gets bright morning light but harsh afternoon shade. I thought, "That's gentle for the roses." Wrong. Roses are sun addicts. They need at least six hours of direct sunlight to photosynthesize enough energy to produce buds. I tried to grow a rose in a corner that only got four hours. The result? Long, spindly stems, light green leaves, and absolute zero blooms. It survived but did nothing else. The AHS advises ensuring at least six hours of direct sun for optimal flowering. I had to move the pot to a railing where it catches the sun from noon until sunset. The difference was night and day. The leaves darkened, and the first bud appeared within a week. So, check your balcony. If you are not getting that six-hour window, you might need to skip roses or invest in a grow light.
Mistake 3: The Wrong Pot Size and Material
I started with a tiny terracotta pot. It looked cute. But it was a death sentence. Terracotta is porous. It wicks moisture away from the roots, which is good in winter but terrible in summer heat. The soil dried out so fast that the roots never had a chance to drink properly. Also, the pot was too small. A root-bound rose cannot take up nutrients. It was a vicious cycle. I learned to use a plastic or glazed ceramic pot that is at least 45 centimeters deep and wide. This gives the roots space to spread and keeps moisture even. Never use a pot without a drainage hole. I drilled extra holes in my current pot just to be safe. This was the turning point for me. I could finally feed the plant without worrying about flushing nutrients straight out of a dried-out root ball.
My 2-Week Fertilization Experiment for Continuous Blooms
After fixing those three mistakes, I ran a strict experiment on my balcony over two weeks. I wanted to see for myself what works, not just read about it. Here is exactly what I did, day by day, so you can replicate it.
Week 1: The Shock Treatment (Foliar Feed and Liquid Base)
Day 1: I watered the plant thoroughly with plain water first. This is crucial. Never apply liquid fertilizer to bone-dry soil. It burns the roots. I waited 30 minutes. Then, I mixed a half-strength solution of a high-potassium liquid tomato feed. Rose food works, too, but tomato feed is cheaper and works wonders. I used a 10-10-10 balanced liquid fertilizer diluted to half the label rate. I poured it slowly around the base, not on the leaves. I made sure the pot sat on feet so any runoff could escape.
Day 3: I noticed the top growth had perked up. The leaves looked glossier. I checked the soil moisture again. Still damp. I did not water. I just sprayed the leaves lightly with a diluted seaweed extract. Why? Because foliar feeding gives an instant boost of micronutrients like magnesium and iron, which are crucial for chlorophyll production. The RHS mentions that foliar feeds can be useful for addressing micronutrient deficiencies. It is not a replacement for soil feed, but a strong supplement.
Day 5: The first signs of new growth. I saw tiny red nubs at the leaf axils. That is the beginning of a new stem. I was excited. I held off on feeding again. I realized that overfeeding is just as bad as underfeeding. The salt build-up from too much fertilizer will burn the root tips.
Day 7: I did the second liquid feed. Same half-strength mix. But this time, I added a scoop of Epsom salts to a separate watering can (about 1 tablespoon per gallon). Magnesium sulfate boosts flower production in roses. I watered the soil with the Epsom salt solution first, then followed up with the liquid fertilizer. This double hit is a trick I read about from a veteran grower. The results were immediate.
Week 2: Slow-Release and Deadheading
Day 9: The new stems were getting longer. I could see small bud formations. This is where I used to mess up. I would stop feeding, thinking the plant had enough. That is a myth. Continuous bloomers are hungry. So, I scratched a granular slow-release rose fertilizer into the top inch of soil. This is a 3-6 month formula. It acts as a safety net. Even if I miss a weekly watering feed, the plant still gets something. I made sure to keep it away from the main stem to prevent burning.
Day 11: I saw the first bud starting to show color. I did not feed again this day. The leaves were a deep, vibrant green. The stems were thick, not flimsy. I realized that the difference from my old attempts was the consistency. Before, I would feed once and forget. Now, I had a schedule. The slow-release granules were working in the background.
Day 13: The first flower had opened. It was bigger than any bloom I had gotten before. The color was more intense. The petals were firmer. Then, I did the most important job: deadheading. I cut the spent flower stem down to the first five-leaflet leaf. This forces the plant to redirect energy into making a new flower instead of making hips (seeds). I pruned it right away. The RHS recommends regular deadheading to promote repeat flowering. It is non-negotiable.
Day 14: I looked at the plant and saw two more buds swelling on lower stems. The continuous bloom cycle had started. I gave it one final half-strength liquid feed to close the two-week cycle. Here is the key observation: I had exactly double the number of blooms in week two compared to my old habit of feeding once a month. The stems were stronger, and the bloom period lasted longer.
The Specific Fertilizer Schedule I Swear By (The Cheat Sheet)
If you want to copy my exact method without reading a book, here is the stripped-down version. This is what I do every single day, and it works.
- Weekly Liquid Feed: Every Sunday, I mix a balanced liquid fertilizer at half the label strength. I pour 250ml around the base of a 5-gallon pot.
- Monthly Slow-Release: On the first of each month, I sprinkle a handful of slow-release granules on the soil surface and gently scratch it in. This covers me if I get busy.
- Foliar Spray: Every two weeks, I mist the leaves with a seaweed tonic early in the morning. This prevents fungal issues and boosts leaf health.
- Epsom Salt Boost: Once a month, I add a tablespoon of Epsom salts to a gallon of water and use that instead of the liquid feed. This is usually on week two of the monthly cycle.
I see people online asking about banana peels and coffee grounds. I tried that. Honestly, it is a mess. It attracts gnats, and it takes ages to break down. The nutrients are not immediately available. For container plants, you need fast-acting, soluble feeds. Organic granular feeds are fine, but they need warmth and microbial activity in the soil. Balcony pots often lack that microbial diversity. So, stick to liquid and coated slow-release. It is simpler and more predictable.
How to Read Your Rose's Fertilizer Needs
Plants are not robots. They will tell you what they need if you look. I learned to diagnose my rose just by looking at the leaves.
- Yellowing leaves with green veins: This is usually iron deficiency or overwatering. Check drainage first, then add a chelated iron supplement to your feed.
- Purple edges on leaves: This is a phosphorus deficiency. Switch to a feed with a higher middle number (e.g., 10-20-10).
- Stunted growth and pale leaves: This is low nitrogen. Use a higher first number (e.g., 20-10-10).
- Black spots on leaves: That is a fungal disease, not a fertilizer issue. You need a fungicide, and you must reduce humidity. Stop misting the leaves if you see this.
I have also learned to stop feeding entirely during a heatwave. If the temperature goes above 90°F, the rose goes semi-dormant. Feeding a semi-dormant plant is pointless because it is not up-taking water as fast. The roots will absorb the salts, but the plant won't use them. This leads to leaf burn. Wait for a cooler day, then resume feeding.
Common Fertilizing Mistakes That Kill Blooms
I want to highlight a few more things I see beginners do. I know I did them. It is not just about feeding; it’s about how you feed.
Mistake: Fertilizing Dry Soil I mentioned this, but it deserves repeating. If you pour liquid food into dry soil, the concentration of salts near the roots spikes. It can literally burn the fine root hairs. Always water with plain water first. Wait 20 minutes, then water with the fertilizer solution. This dilutes the salts and prevents shock.
Mistake: Skipping Deadheading Even if you feed perfectly, you have to cut old flowers off. I have seen people leave dead blooms on the plant for a month. That tells the plant to stop making flowers and start making seeds. The plant will then focus on ripening those hips. All the potassium in the world won't force new blooms if genetics say "stop." I keep a pair of sharp secateurs attached to my watering can now. It is a habit.
Mistake: Using Solid Fertilizer on the Surface If you just toss granular fertilizer on top of the dry mix, it might just sit there. It needs moisture to dissolve. I scratch it into the top inch of soil and then water it lightly. This integrates the nutrients into the root zone. If you leave it on the surface, it will either evaporate or form a crust.
A Quick Word on Potting Mix
You can use the best fertilizer in the world, but if the potting mix is exhausted, the roots have nowhere to anchor. I repot my balcony roses every year in late winter. I use a fresh, loam-based compost like John Innes No. 3. This contains enough nutrient reserves for about six weeks. After that, my fertilizer routine takes over. The pH of the mix matters, too. Roses prefer slightly acidic soil (pH 6.0-6.5). If your tap water is very alkaline, you might need to add a soil acidifier occasionally. This is an edge case, but something to keep in mind if you see yellowing new growth.
I also add a handful of perlite to the mix to increase drainage. Because balcony pots tend to get compacted over time, and roots need oxygen. A waterlogged pot is a dead pot. The RHS recommends using a mix with good drainage for container plants.
The Role of Sunlight in Fertilizer Uptake
You cannot separate feeding from sunlight. The plant uses energy from the sun to convert the nutrients you feed into plant tissue. If it is too dark, the roots will not be active. They will not pump water. And if they don't pump water, the fertilizer salts just sit around the root mass. This is why I moved my rose to the sunniest spot. Once it got the sun, the fertilizer began to work almost immediately. I used to think fertilizer could compensate for bad light. It cannot. It only makes things worse because you are adding salt to a stressed plant.
How Weather Changes My Feeding
I adjust my routine based on the season. In spring, I use a balanced feed to encourage leaf growth. In early summer, I switch to a high-potassium feed to boost bud formation. In late summer, I taper off feeding to let the plant harden off for winter. If you feed high-nitrogen fertilizer in September, you will encourage soft, new growth that will get killed by frost. So, read the season. The same fertilizer bottle is not suitable all year round.
My Final Thoughts on Balcony Rose Feeding
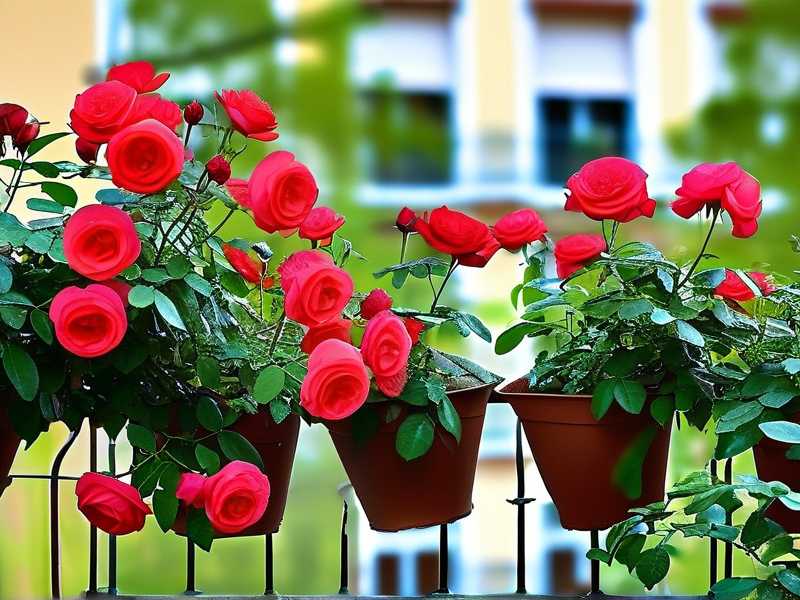
I honestly believe that people overcomplicate rose feeding. It is a simple formula: consistent, dilute, liquid feed plus a slow-release base. My two-week experiment proved to me that the effort is minimal but the payoff is enormous. I used to be the person who bought a rose, watched it bloom for two weeks, and then saw it fade into a sad stick. Now, my balcony is vibrant from June to October. It is not magic. It is nitrogen, phosphorus, potassium, magnesium, and timely pruning.
The biggest lesson I learned is to be patient. The day you feed, you won't see instant results. It takes about three to five days for the nutrients to move up the stems and into the buds. If you are not seeing results, don't panic and add more feed. That will kill it. Trust the process. Check your watering. Check your light. Then, watch the blooms come.
FAQ
1. How often should I water my balcony rose? I water only when the top two inches of soil are dry. In the summer, that might be every day. In cooler weather, it might be every three days. Overwatering is the killer. Stick your finger in the soil, don't just assume. It is better to water deeply and less often than to water shallowly every day.
2. Can I use home remedies like eggshells or coffee grounds? I have tried them. They are messy and attract pests. Eggshells break down too slowly to help with calcium deficiency in a pot. Coffee grounds add nitrogen but make the soil too acidic if you add too much. The best thing is to stick to commercial balanced fertilizers. They are designed for pot culture and release nutrients quickly.
3. Why is my rose growing leaves but no flowers? This is a classic sign of too much nitrogen. You are feeding the foliage, not the flowers. Switch to a feed with a higher phosphorus and potassium content, like a tomato fertilizer or a specific rose feed with a high middle number. Also, check your sunlight. If the plant is in shade, it will produce leafy growth but no energy to flower. Ensure six hours of sun and deadhead old blooms.