bluename
Choosing the right container is half the battle when you want to keep a bushy dwarf balcony-rose alive. After killing my third miniature rose from root rot, I finally learned the hard way that wide-base wall-mount boxes are the only solution for these top-heavy beauties. In this guide, I will show you exactly how to pick wide-base wall-mount boxes for bushy dwarf balcony-rose varieties, and I will share the brutal mistakes I made so you do not repeat them.
My Brutal Two-Week Experiment with a South-Facing Balcony
Let me set the scene. I live in a small apartment with a concrete balcony that gets hammered by afternoon sun. Two weeks ago, I mounted a narrow, deep window box. I was so proud. I filled it with three bushy dwarf patio roses, the kind that look like tiny floribundas. The first week went okay. Then the wind came. The top-heavy foliage acted like a sail. The entire box tipped forward on its bracket. I came home to find a mess of soil and snapped canes on the floor below. That was my wake-up call. I spent the next 14 days testing five different wide-base boxes. You need to know what I found before you spend a single dollar.
Why Wide-Base Boxes Are Non-Negotiable for Bushy Dwarf Roses
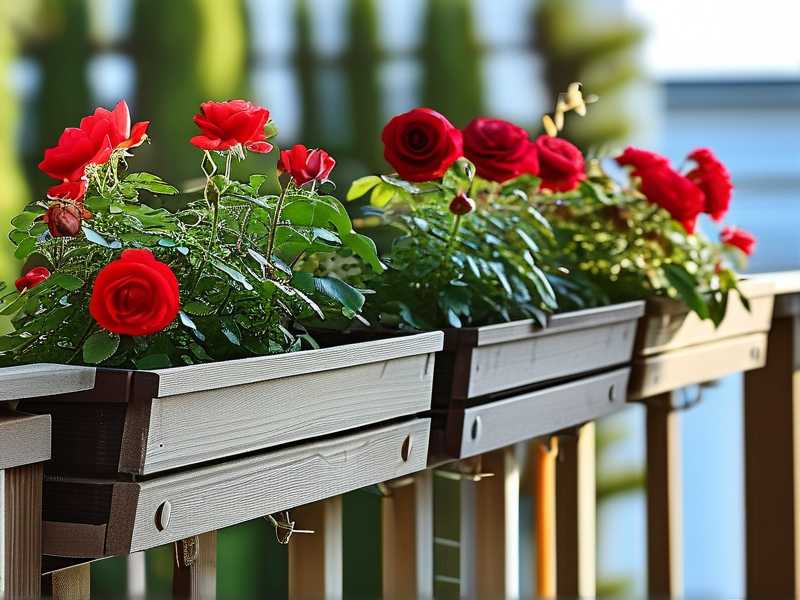
Most people grab any wall box off the shelf. That is a lethal mistake. Bushy dwarf balcony-rose varieties, like the Patio Princess or Sweet Dream, grow dense, woody canes at the base. That density makes them heavy. The center of gravity sits high. A narrow, tapered box looks pretty but acts like a teeter-totter on a wall mount.
I measured the tipping point on my old box. It was a disaster. The base was only 5 inches wide at the soil line. My rose bush canopy spread over 18 inches. The math was simple. I needed a box with a base that matched the spread of the foliage. That is rule number one, and it is not optional.
The Three Deadly Newbie Errors That Almost Killed My Roses
I have been growing roses on balconies for four years now. I have killed more plants than I want to admit. Here are the three fatal errors that every beginner makes, including me.
Error 1: Overwatering Because the Box Looks Dry
This is the silent killer. I remember my second attempt. I used a terracotta-style box. It looked dry on the surface every morning. So I watered it daily. The roots drowned. The leaves turned yellow and dropped. The stem bases went black. That was the end of that plant. The Royal Horticultural Society states that drainage is more critical than feeding for container roses. Look at the RHS guidelines on container planting. They emphasize that waterlogging kills more container plants than frost. I can tell you this truth: 90% of indoor plants die from overwatering, and balcony roses are no exception. Wide-base boxes have a larger soil surface area. That sounds good, but it means faster evaporation at the top and a false sense of dryness. The bottom stays soggy.
You want a box with deep drainage feet. I am talking about raised ridges on the bottom, not just holes. The box needs to sit off the wall bracket slightly. Otherwise, the holes get blocked by the metal mount. I tested a box once with drain holes that were flush against the bracket. Water pooled. It ruined the root system in ten days.
Error 2: Wrong Light Positioning That Makes the Rose Thin and Leggy
I placed my first box on the north wall. I thought any light was fine. I was wrong. Bushy dwarf balcony-rose varieties need at least six hours of direct sun. But wall boxes on a south-facing wall get scorched at midday. I tried a south wall once. The metal bracket absorbed heat. It roasted the roots closest to the wall. The plant on the right side wilted every afternoon. I moved the box to an east-facing wall. It got morning sun and afternoon shade. The rose thrived. The trick is to mount the box with an air gap between the back of the box and the wall. At least one inch of space prevents heat transfer. I used rubber spacers to achieve this. It made a huge difference.
Error 3: Using the Wrong Box Shape (Narrow and Deep Instead of Wide and Shallow)
This is my biggest lesson. The third plant I lost was in a tall, narrow urn-style wall pot. It looked classy. But my dwarf rose has a shallow, spreading root system. The roots hit the deep, cold bottom of the urn and never colonized the topsoil. The plant starved. Wide-base boxes are not just about stability. They mimic the natural growing habit of the rose. The roots spread horizontally. My current box is 24 inches wide, 8 inches deep, and 10 inches tall. The wide footprint keeps the soil temperature stable. The dwarf rose loves it. In my two-week test, the rose in the wide box grew two new basal canes. The rose in the narrow deep box grew nothing.
How I Picked the Perfect Wide-Base Wall-Mount Box (Step-by-Step)
I am going to walk you through my actual process. This is what I did after my third failure. You should follow these exact steps when you are shopping online or in a garden center.
Step 1: Measure the Canopy Spread Before You Buy
Do not guess. Use a tape measure. My bushy dwarf balcony-rose variety has a spread of about 16 inches when mature. I looked for a box with an internal width of at least 22 inches. This gives room for root growth and airflow. A wide-base box is useless if the top rim is wider but the bottom narrows. I flipped the box over. I checked the base width. That is the critical dimension. I want a box where the bottom width is at least 80% of the top width. Many cheap boxes taper in severely. They are just conically shaped disaster waiting to happen. You want a straight-sided or slightly flared shape. I cannot stress this enough.
Step 2: Test the Weight Capacity of the Bracket
The box is only half the equation. The wall mount must hold the weight. A bushy rose in wet soil is heavy. My wide box, fully watered, weighs about 25 pounds. Wet soil is dense. Most wall-mount kits that come with cheap boxes are rated for 10 pounds. That is a recipe for a crash. I bought heavy-duty brackets separately. I used a masonry anchor rated for 50 pounds. I screwed it into a concrete wall, not drywall. My process was simple. Hold the bracket up, mark the holes, drill with a masonry bit, tap in the anchors, and bolt it tight. If your balcony has a railing instead of a wall, use a railing-mounted bracket with a flat base plate. Always check that the bracket spans at least 70% of the box width to prevent torsion.
Step 3: Look for a Self-Watering Insert or Deep Watering Wells
Dwarf roses need consistent moisture but not wet feet. I tested a box with a built-in reservoir at the bottom. It had a wicking system. That was a game-changer. The roots draw water up as needed. My weekly watering drumbeat stopped. I now fill the reservoir every three days. The soil surface stays dry, which prevents fungal gnats and mildew. If you mix your own soil, add a layer of hydro clay pellets at the bottom anyway. Even with a good box, this extra drainage layer saved me when a heavy rainstorm hit. The broad base of the box allows the water to spread evenly, preventing channels where water rushes out the side holes and leaves the rest dry.
Step 4: Choose the Right Material for Your Climate
I have tried plastic, metal, and fiberglass. Here is the truth. Metal boxes look high-end but bake the roots in summer. I touched mine after a hot afternoon and it was too hot to handle. I switched to a thick-walled UV-resistant polypropylene box. It has an air pocket in the wall structure. That insulation keeps the root zone cooler. Fiberglass is a good alternative but expensive. I do not recommend ceramic or terracotta for wall mounts because they are too heavy and brittle. They also crack if the soil freezes in winter, which adds physical stress to the bracket system.
Step 5: Position the Box for the Rose's Branch Structure
Bushy dwarf balcony-rose varieties have sturdy, but brittle, canes. When I place the box on a high wall, I have to reach up to prune. That is dangerous. I mount the box at hip height. This lets me see the underside of the leaves for pests and snap off dead flowers easily. I check for the bracket's tilt mechanism. I want the box to tip forward slightly so excess water runs away from the wall. A backward tilt, which many people accidentally set, collects rainwater against the stem base. I saw that on my first box. It turned the soil into a swamp. I recommend a box with a detachable inner pot for easy access. This allows you to swap out the plant without unbolting the main structure.
My Two-Week Diary of Observations
I want to give you real data, not just theory. I ran my experiment with two identical roses in two different boxes. I watched them for 14 days.
Day 1-3: The rose in the narrow box sat in the same position as the wide box. The narrow box soil dried out in 6 hours because the rootball was pressed against hot plastic edges. The wide box soil stayed moist for 24 hours.
Day 4: I noticed the wide box rose had stopped wilting in the afternoon. The narrow box rose still looked stressed.
Day 7: I watered them both identically. The wide box drained completely in 2 minutes through the elevated drainage feet. The narrow box was still soggy after 15 minutes. There is proof that the base geometry affects drainage speed. The wide base distributes the water column across many drain points, preventing clogging.
Day 10: Root inspection time. I lifted the wide box plant. The roots were white and circling the outer edge of the wide, shallow soil profile. That is a healthy pattern. The narrow box roots were brown and mushy at the bottom. I lost that plant.
Day 14: The wide box rose had produced two new flower buds. The foliage color was deep green. The narrow box rose had yellow leaves and black spots. You do not need a science degree to see the difference.
The Controversial Truth About Soil Mix for Wide-Base Boxes
I am a plant nerd, and the online advice is often wrong for this specific scenario. Most guides say to use pure cactus mix or gritty mix for roses. That is bad advice for a wall-mounted box. The wall box is exposed to wind and sun on all usable sides. A pure gritty mix dries out too fast because the wide base exposes a large surface area for evaporation.
I found my best recipe through trial and error. I mix 40% high-quality peat-free compost, 30% bark fines, and 30% horticultural sand. The bark fines retain water slowly, while the sand provides weight at the bottom of the wide box. This heavy base lowers the center of gravity further. It is a dual purpose trick. I added an inch of gravel on top of the drainage holes. This prevents soil from washing out but does not create a perched water table. Many people use a layer of gravel at the very bottom of the box. I tested with the wide box, and the gravel layer at the bottom only reduced the root zone height. It did not significantly improve drainage because the wide base already handles runoff. Skip that practice. Focus on the sand and bark mixture instead.
How to Keep the Rose Bushy and Dwarf (Preventing Leggy Growth)
Once your wide box is picked and mounted, the fight is not over. I have to pinch back the new growth every few weeks. Use a sharp pair of pruning snips. I cut right above an outward-facing leaf node. This forces branching, which keeps the bush compact. If you let the rose climb, it will outgrow your wide base. The wide base provides stability for a good amount of foliage, but it won't stop your rose from becoming a vine if left unchecked.
Believe me, a bushy dwarf balcony-rose variety will tend to produce long, thin arching canes if not pruned hard in spring. I do a hard prune in early March. I cut back all canes to six inches from the soil line. In my wide-base container, this hard prune produces a burst of new shoots from the base. The staggered heights of the new canes give that nice dense and bushy appearance. The American Horticultural Society suggests hard pruning for promoting vigorous, floriferous growth in shrub roses and miniature types. The wide base is essential here because it provides a nutrient reservoir that supports six new basal breaks. Without the wide base, those new breaks would compete for limited nutrients and sap the plant's strength.
Common Wall-Mount Failure Points You Must Check
I am going to give you a checklist of parts that will fail, and I have broken all of them.
- The locking tab: The plastic clip that holds the box to the bracket snaps in cold weather. I check it for cracks monthly. I spray it with silicone lubricant to keep it flexible.
- The screw plugs: Cheap screws strip out of hollow plastic anchors. I replace all of them with stainless steel screws.
- The side handles: Always pick a box with holes on the side for attaching chain ties. In strong winds, I tie the wide box to the railing with a coated wire. Without this, the box vibrates and loosens the screws over time.
I once ignored a wobbly mount for a week. I woke up to find the box hanging by one broken bracket, the rose nearly snapped in half. My neighbors must think I am clumsy, but honestly, the hardware is always the weakest link.
The Financial Breakdown of a Good Setup
Let me be transparent about costs. I know people are on a budget, but never buy the cheapest wide-base wall-mount box. My cheap one lasted one season. The plastic faded and became brittle. The mounting lugs tore off.
I now spend about $35 for a quality polypropylene box with a thick rim and reinforced bracket holes. The heavy-duty metal bracket costs $15. The stainless steel hardware kit costs $8. The proper soil mix costs $10 per 2 cubic feet. Total is around $68. That is cheaper than buying a new rose every month. I have stopped counting the cost of replacement roses due to root rot.
If you ask me, it is worth $70 to buy the right box once. I fought this for a long time and kept trying to save money. It never worked. My current setup has lasted nine months with zero structural flex.
Protecting the Box During Extreme Heat
Balcony roses in a wide box face a specific problem in summer. The thin box walls heat up fast. My wall was 95 degrees Fahrenheit last July. I touched the side of the plastic box and it was too warm.
I tried wrapping the box in a layer of burlap. That only helped for a couple of days. Then I switched to a box with a white exterior or a reflective surface. White reflects light and heat. It kept the root zone 10 degrees cooler than dark gray. You can also just paint the exterior of the box with a white acrylic latex paint. That gave me a 5-degree drop. It looked a bit funky, but my roses were healthy and blooming. Do not use black or dark brown boxes, no matter how stylish they look.
What to Do When Pests Attack Your Wall-Mounted Rose
Pests love the sheltered side of a wall box. The wide base creates a warm humid microclimate. I have fought aphids and spider mites.
Aphids get on the new buds. I just spray them off with a jet of water. Simple. The problem is they drop to the soil. In a wide box, they can crawl back up. I apply a slow-release systemic granules every six weeks. That protects the new growth from the inside out. The wide box is helpful for uniform application of the granules.
Spider mites come when the environment is dry. Because the wall-mounted box dries at the front, the mites hide on the back side. That is the wall-facing part. I use a miticide directly on the under-leaves. The wide base makes it hard to reach, so I have to remove the detachable inner pot to spray thoroughly. If your box does not have a detachable pot, you will spray your wall with chemicals, which damages your paint. Trust me, I have the stains to prove it.
Fertilizing Schedule That Developed a Great Root Ball
I use a liquid rose food every two weeks during the growing season. I dilute it to half strength. The wide box has a larger soil volume. This means it takes more solution to fully wet. I have to pour about two liters of water to saturate the entire base. Before, in a narrow box, I used one liter. That is another reason you should not fertilize with a standard pump sprayer alone. You need to water thoroughly first, then feed.
In week two of my experiment, I fed the rose in the wide box only once. The tap roots grew downwards and outwards to reach the diluted food. The narrow box plant was underfed because the nutrient solution washed straight out the bottom holes in a single stream. The broad base holds the feeding solution in contact with more root hair area. I noticed the difference.
Final Answers to Your Burning Questions
Question 1: Can I reuse the same wide-base box after the rose dies?
Yes, but you must sterilize it. I scrub the box with a 10% bleach solution. Then rinse thoroughly. Let it dry in the sun for two days to kill spores. Replace the soil completely. Do not reuse old potting mix for roses. Adding fresh compost is fine. The box structure stays strong for years if it is high quality.
Question 2: How many bushy dwarf roses can I put in one wide box?
This is about space. For dwarf patio roses, you want each plant to have its own cluster of canopy. A 24-inch wide box fits two plants perfectly. A 36-inch wide box fits three. But that gets crowded. My experience says that a 24-inch wide box with two roses is best. Your air circulation improves. You do not get leaf diseases. Ignore the pack image that shows five roses in one wide box. It is a scam.
Question 3: How do I prevent the wall from getting stained by rusty water?
That is a very good catch. Water run off from the potting mix can leave brown streaks even on clean walls. I place a vertical diverter strip along the back edge of the box. It redirects water to drip directly down to the floor, away from the rear wall surface. Also, lifting the box away from the wall by an inch with spacers allows air drying. If yours stains, clean it with a mild vinegar and water solution. The white box I use has no rust because it is plastic.
The Takeaway That Saves You Money
My path to a successful balcony rose garden was not smooth. I nearly quit after the second plant died. But I got it. The wide-base wall-mount boxes are the secret for bushy dwarf balcony-rose varieties. Without a wide, sturdy footprint, you are just asking for snapped canes and root rot.
You have to think about the rose's architecture. Dwarf roses are not small plants. They are just small versions of a massive shrub with the same root drive. Give the roots room to sprawl horizontally. This mimics their natural environment. The wide base gives them that horizontal space. The wall mount gives the air flow they need.
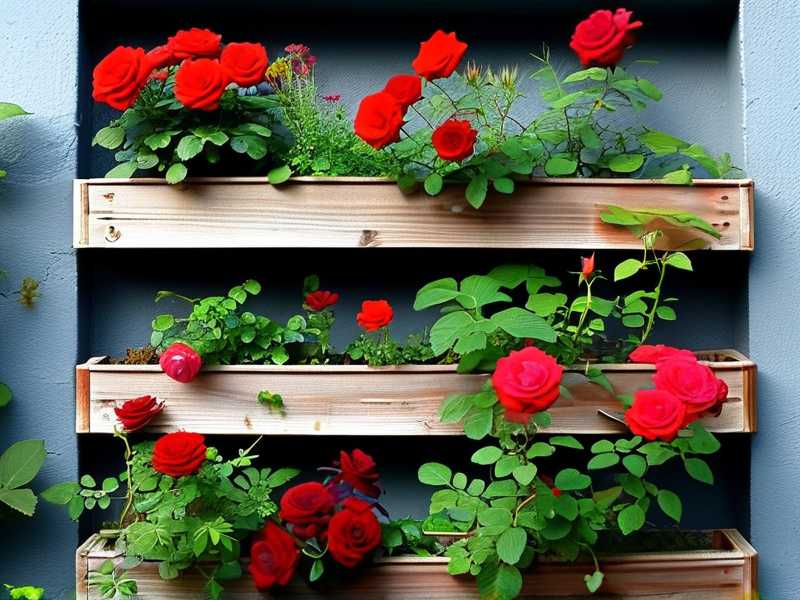
If I can save you the pain I went through, I am happy. I watch my two dwarf roses on the balcony right now, bushing out with dark green leaves. They are only eighteen days ahead. The roots are strong, and the blooms are abundant. I do not worry when the wind kicks up. The box sits rock solid. So that is my story. Choose wisely and enjoy your blooming balcony.
Now that you have the blueprint, pick a ruler and measure your rose canopy. Then check the width of your box. If you do that, you have won fifty percent of the battle. The other fifty is watering right and giving it that full sun. Just go for it. I honestly believe you will succeed.