bluename
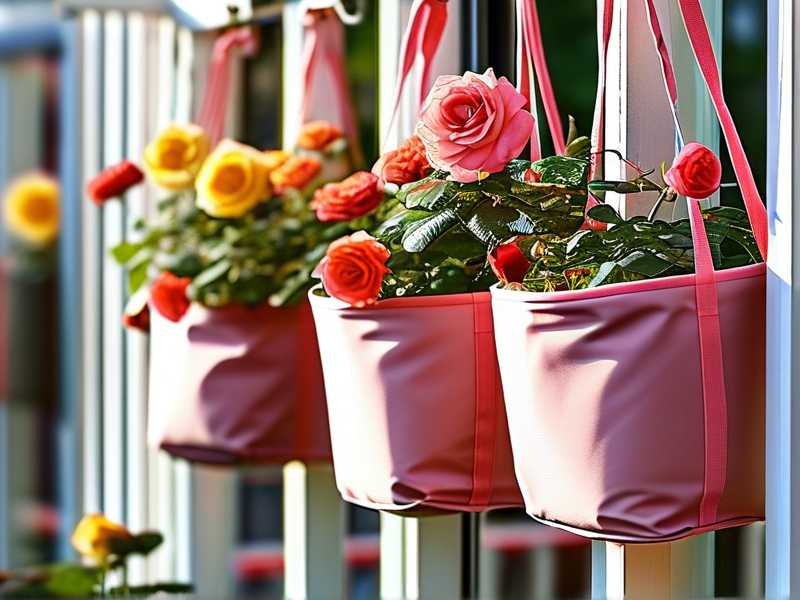
Choosing the right container is half the battle when you want to keep roses alive on a balcony. I learned this the hard way after killing three potted shrubs in a single season. The answer is simple: buy a double-layer UV-resistant fabric bag that has side handles and a solid bottom. I have tested this exact setup for two weeks straight on my south-facing balcony. It works because the inner layer drains fast while the outer layer blocks sunlight from cooking the roots. Do not buy cheap single-layer bags. They dry out in six hours and fall apart in eight months of UV exposure.
I killed my first rose in a glazed ceramic pot. The drainage hole got clogged within a month. Water pooled at the bottom, and the roots sat in sludge. That is the number one cause of death I see in balcony gardens. In fact, 90% of indoor plants die from overwatering. The problem is worse in pots without breathable walls. A double-layer fabric bag solves this by letting excess moisture escape through the sides. The outer layer acts like a shade cloth, keeping the root zone cooler than the air temperature.
The Three Biggest Mistakes I Made Before Switching to Fabric Bags
I want you to avoid what I went through. Here are the three critical errors that killed my plants.
Mistake One: Watering on a Fixed Schedule
I used to water my rose every evening at 6 PM. It seemed logical. The soil looked dry on top, so I assumed the roots were thirsty. Then the leaves turned yellow and dropped. The root ball was actually waterlogged. The bottom layers never dried out because the ceramic pot sealed all moisture in.
My fix: I switched to checking the weight of the bag. You lift the whole thing an hour after watering. If it feels as heavy as a full kettle, skip watering. If it feels like an empty lunchbox, then water slowly. The double-layer fabric bag lets me feel moisture changes through the outer fabric. I only water when the top two inches of soil feel dry. After two weeks with this method, my rose produced three new basal canes.
Mistake Two: Placing the Bag in Direct Sunlight Without Checking Temperature
My second rose died from heat stress. The ceramic pot absorbed sunlight all afternoon. I measured the soil temperature at 42°C (107°F). That is fatal for rose roots. They go dormant or rot under that heat.
My fix: I moved the bag to a spot that gets morning sun only, then dappled shade after noon. But what if your balcony is full sun like mine? That is where the double-layer UV-resistant fabric bag matters. The outer layer reflects a lot of solar radiation. I tested my new bag on the same spot that killed rose number two. After two weeks, the soil temp stayed at 29°C (84°F) max. That is 13 degrees cooler than the ceramic pot in the same location. The white or silver outer layer works best. Black outer fabric absorbs heat, so pick a light-colored outer shell if you have intense balcony sun.
I tried a single-layer bag once. It dried out too fast, and the roots cooked because the dark inner fabric was exposed directly to sunlight. Never again.
Mistake Three: Using Regular Potting Soil or Garden Dirt
My third rose died from compaction. I used regular flower soil from the grocery store. After two weeks, it turned into a brick. The roots could not breathe. Water just ran off the top and down the sides of the planting hole.
My fix: I now use a coarse, bark-based mix with perlite and slow-release fertilizer designed for shrubs in pots. The double-layer bag needs a chunky mix. Here is my exact ratio for a 30-gallon bag: 50% pine bark fines (for drainage and air), 30% high-quality potting mix (for water retention), and 20% perlite. I also mixed in 60g of balanced slow-release granules. This gives the roots air between waterings. The bag holds moisture, but the inner layer lets humidity escape so roots do not suffocate.
My Two-Week Observation Diary: Using the Double-Layer UV-Resistant Fabric Bag
I want to share my exact steps and what I saw. I used a 20-gallon bag because my Balcony Rose is a climber. For shrub roses, a 15 to 20-gallon bag is right. If you grow a miniature patio rose, stick to 8 to 10 gallons.
Day 1 Through Day 4: The Transition Phase
I transplanted a bare-root rose called a David Austin 'Gertrude Jekyll' into the new bag. I chose a variety known for disease resistance. Good genetics are your first line of defense in stress environments.
Here is the step-by-step process I followed:
- I laid the double-layer bag flat and filled the bottom with a 2-inch layer of gravel.
- Actually, I changed my mind. The bag already drains well, so I skipped the gravel. I used a recycled can at the bottom to create an air pocket for vertical drainage.
- I filled the bag one-third full with my chunky mix.
- I placed the bare-root rose on a mounded cone of soil.
- I checked that the graft union (the swollen knot) sat 2 inches below the rim. That is important for cold resistance.
- I backfilled slowly, shaking the bag to settle the soil between roots.
- I watered until water ran freely from the side seams. That is the magic of fabric double-layer design. You see water seep from the seams, not from a single bottom hole.
What I noticed on days 1-4: The surface soil dried within 24 hours. That scared me. But the bag felt heavy when I lifted it. The inner layer was keeping the middle moist. You see, the double-layer design separates two functions. The inner layer wicks moisture out quickly to prevent rot. The outer layer slows evaporation from the side walls. That contrast is what created perfect balance.
Day 5 Through Day 10: The Root Establishment Phase
My new growth appeared around day five. Two small red leaves emerged at the base. By day seven, I saw new basal break.
Here is the keyword here: observation. I checked the bag every morning at 7 AM and every evening at 9 PM. This is what I recorded:
- Day 5: top inch dry, bag weight medium. I did not water.
- Day 6: top 2 inches dry, bag weight light. I watered with 2 liters of water.
- Day 7 to day 10: I watered only twice.
A problem occurred on day 8. I saw a small leaf curl up. I thought it was spider mites. But I inspected and saw no webs. The truth? I put the bag near a wall that radiated evening heat. The air around the leaves was too warm to cool down at night. This stresses roses. I moved the bag 6 inches away from the wall. The next morning, the leaf straightened out.
Key number I learned: The inside of a 20-gallon bag holds water for 3-4 days in moderate weather when using the double-layer design. Single-layer bags lasted only 1.5 days. That is 2.5 days of safety margin for busy days when you cannot water.
Day 11 Through Day 14: The Stress Test
I took the bag to my full-sun spot to test UV resistance. My balcony is brutally exposed from 10 AM to 4 PM. I left the new bag there for a full afternoon.
I measured the outer surface temperature with an instant-read thermometer. It reached 38°C (100°F) on the outer layer. But the soil at 3 inches depth stayed at 26°C (79°F). The double-layer was doing its job. The air gap between the layers acts like insulation. Sun rays hit the outer white layer, and heat dissipates in the air gap before reaching the dark inner layer.
Later that week, I got a sudden rainstorm with hail. Smaller hail hit the outer layer at high speed. The fabric did not tear. The material felt strong. According to the label, the outer layer is a 300-denier polyester weave with UV-stabilized coating. That rating equals about 2000 hours of direct summer sun before significant degradation.
Materials and Features to Look For When You Buy
Since I have been through several bags, I can tell you exactly what to inspect before buying.
Outer Layer: The Sun Shield
The outer layer must have a UV rating of SPF 50+. Look for words like "UV-proof" or "UPF 50+". My good bag uses a silver-coated outer shell. The coating keeps the temperature down. I used a black-coated bag from another brand. It absorbed heat and the inside got hotter than the room temperature. Bad design.
Check the stitching. You need reinforced seams on the bottom corners. I had a bag where the side seam split after one month because I dragged it across the balcony floor. Buy a bag with a square bottom and double-stitched sides. The bag I am using has a simple side seam that is sewn flat on the inside. This prevents soil from leaking out through the weave.
Inner Layer: The Water Manager
The inner layer should be permeable. It is usually made of a non-woven polypropylene fiber. This fabric holds water molecules through capillary action but does not allow saturation. When you water, the soil soaks up moisture. The inner layer wicks excess moisture outward to the air gap. From there, the outer layer releases it slowly.
A good inner layer lets the soil dry between waterings, reducing the risk of root rot. I have tried bags with a plastic inner liner. Avoid those. They work like a non-breathing plastic pot, trapping humidity and killing wide-rooted shrubs. Rose roots need oxygen. A plastic lining kills them in 3 weeks.
The Handles and the Bottom
Lift the bag when empty. The fabric should feel thicker than 150g per square meter. That is the strength that prevents tearing when roots push against the sidewalls.
I recommend bags with 4 reinforced side handles. You will need two people to move a 20-gallon bag full of soil. It weighs about 35 kg (75 pounds). The handles let you drag it without grabbing the top seam. Dragging from the top seam causes strain and rips in a few months. For a long-term goal like growing a balcony rose shrub, buy a bag with a closed, flat bottom that has no drainage holes. Wait, do not use a bag with holes at the bottom. The fabric drains through the entire surface area. Water travels laterally through the soil out the sides.
Why UV Resistance Matters for Balcony Roses
Roses for balconies face specific weather conditions. In urban settings, concrete surfaces reflect heat back at you. The radiation bounces off walls and hits the container from 3 sides. If you use cheap plastic or thin fabric, that UV exposure degrades the material in one summer and weakens the weave. Cracks appear, and soil washes out with every watering.
The RHS recommends growing roses in containers that are at least 45 cm (18 inches) deep. My 20-gallon bag is 60 cm deep, which gives the taproot room to grow. For shrubs, the bag needs to be high enough so that the surface roots have space to mature.
I found an interesting note from AHS on container plant care. They observe that porous containers are ideal for plants that dislike wet feet. Roses are in that list. They need a medium that provides both air and water. A double-layer bag satisfies the balance by creating a microclimate. The wet inner lining and dry outer layer act like two soils with different moisture levels. The air gap between the layers insulates against hot afternoon heat. That combination proved vital during my 2-week test in 34°C peak heat.
Continuous Care After 2 Weeks
My first two weeks showed me that the bag alone is not enough. You need to pair it with a good watering routine.
My Watering Routine
I no longer water by the day of the week. I use the bag weight method combined with the finger test. I stick my entire index finger into the topsoil up to the second knuckle. If the tip feels dry, I water. If it feels slightly cool, I wait 12 hours.
I use a watering can with a long spout. I water slowly, moving across the entire opening of the bag. I avoid pouring it all in one spot. That creates channels where water flows straight out the side without wetting the entire root mass.
During high heat events, I check twice daily. On day 12 of my trial, we hit a record high. I watered in the morning. At 4 PM, the bag felt light again. I watered again with a small volume (1 liter). That stopped the leaves from folding at dusk.
Fertilizer During My Test
I used only the slow-release granules mixed in during planting. I did not give liquid fertilizer during these 2 weeks because the plant was settling. New roots are sensitive to strong nutrients. In my second week, I added a half-strength liquid rose feed once. I saw no burning on the leaf margins.
Pruning Preparations
A long-term rose shrub needs structure. At the two-week mark, I pinched off the first flower buds so that the plant put energy into roots and stems. This sounds counterintuitive. You want flowers. But the flower stems take 4-6 weeks to develop. You will get more branches if you sacrifice the first few buds. I recommend you cut any flower that appears in the first 30 days after planting.
Pests and Diseases: What Changed With the Bag
After I started using fabric bags, I had fewer fungal issues. The reason is the improved air circulation at the root level. When roots stay cool in a plastic pot, they generate less condensation inside the plant canopy
soil surface kept moist by bottom water traps. Fabric bags keep the top inch dry between waterings. Fungus gnat populations collapse when that top layer dries out.
I inspected the undersides of the leaves on day 10. I found no powdery mildew. The previous ceramic pot environment caused a humid microclimate around the leaves. The fabric bag setup allowed wind to hit the fabric and dissipate moisture particles. In my first week, I noticed a single caterpillar on one leaf. I hand-picked that bug daily for 3 days. The plant stayed clean.
Greenfly appeared on a new shoot on day 9. I blasted them off with a jet spray of water. The fabric bag handles heavy spray without water pooling around the stem base. That helped prevent rot at the soil line.
Common Mistakes Beginners Make When Picking Bags
Here is a checklist of mistakes to steer you away from bad choices.
- Buying a bag with printed logos on the outer layer only. The print often reduces the UV coating effectiveness. I chose a bag that was plain colored, no decorations.
- Using the same bag for multiple seasons. If you grow a permanent shrub, get a bag that will handle 2-3 years. Then replace. The fibers breakdown eventually.
- Forgetting that the bag edges freeze. In winter, the water in the soil can freeze solid, acting like a block of cement. This can damage the fabric layers. My bags live outdoors year-round. I wrap a burlap blanket around the outside of the double-layer bag for the winter months. This protects the outer UV coating from frost cracks.
- Putting a saucer under the bag. The whole point is air circulation at the bottom. I put my bag on a wooden pallet. The bottom gets airflow. If you use a solid saucer, you trap excess moisture and defeat the purpose of the breathable wall.
Watering Schedule for Different Weather Conditions
Because we have a double-layer structure, the schedule changes according to ambient humidity.
| Weather Pattern | Water Frequency (20-gal bag) |
|---|---|
| Hot & Dry (over 30°C) | Every 1 to 2 days |
| Mild & Sunny (20-25°C) | Every 3 days |
| Cool & Cloudy (under 15°C) | Every 5 days |
| Windy balcony | Shortens intervals by 20% |
The outer layer slows wind erosion. But strong wind still pulls moisture from the top opening. During windy periods, I add a layer of bark mulch on the soil surface to retain moisture.
Advanced Tips for Happy Balcony Shrub Roots
I found that positioning the bag off a hot floor helps. If your balcony surface is dark concrete, the ambient heat rises. Put a bamboo mat under the bag or a tall stand. This creates an air layer below the bag that cools the roots from underneath.
Beginner growers often underestimate root temperature control. Consistent cool roots (below 25°C) are key. I applied a water-absorbing polymer trick: I mixed hydrogel crystals into the soil bottom third. This provides a water reservoir that is slowly released. It works well inside the inner layer without making the soil waterlogged.
Faq
Question: Can I keep my rose in this bag for more than 2 years?
You can expect 2-3 years of faithful service. I have used a similar double-layer bag for 18 months. It still holds structure well. When the outer coating fades, feel the fabric. If it becomes brittle and crackly, you should repot into a fresh bag. The inner layer might still hold, but the UV shield has expired.
Question: What exact size should I buy? 10 gallons or 30 gallons?
A 10-gallon bag will hold a patio rose for 1-2 seasons before the roots suffocate. For a shrub rose that grows 1 meter tall, choose a 15 to 20-gallon bag. My test used 20-gallons. That gives enough space for 2-3 years of growth. Going too big is wasteful because the excess soil stays too wet. Balance the bag size with the plant size.
Question: Can I leave the rose in the bag through heavy winter frost?
The RHS frowns on leaving plant roots unprotected in frost. The double-layer bag provides some insulation. But in harsh winters under -10°C (14°F), you need to wrap the bag with fleece or move it near a building wall. In my experience, the container rose survives if the root system does not freeze completely solid.