 bluename
How to Test Wall-Anchor Pull-Strength Before Installing Heavy Rose Planter Systems
Before I drill a single hole for a heavy rose planter system, I test the wall-anchor pull-strength. Full stop. That one step tells me whether my wall can safely hold 40, 60, or even 100 pounds of soil, water, and a mature climbing rose. Skip it, and you risk a cracked brick, a bent bracket, or a planter crashing onto your patio at 2 a.m. I learned this the hard way after a two-tier cedar planter pulled free from my garage wall and took a chunk of stucco with it.
I'm a home gardener, not a contractor. But after three failed mounting attempts and two weeks of watching a test anchor under load, I've figured out a practical method anyone can copy. This guide walks through exactly how I test pull-strength, what anchor types actually hold, and the mistakes that cost me a weekend of patching walls.

Why Pull-Strength Testing Matters More Than You Think
Wall anchors are rated in two very different ways. There's theshear strength — the load pulling straight down — and thepull-out strength — the force pulling the anchor straight out of the wall. A heavy rose planter creates both, but the pull-out force is the sneaky one. Wind gusts, watering weight, and the leverage of a bracket arm all push and pull outward.
According to the Royal Horticultural Society (RHS), container-grown roses in large planters need deep, stable rooting space, and that means substantial soil volume. A 20-inch planter can hold 50–70 pounds of moist soil alone. Add a climbing rose and a trellis frame, and you're over 80 pounds. The American Horticultural Society (AHS) repeatedly notes that container plant health depends on proper drainage and root space — both of which add weight. So the wall isn't just holding a pot. It's holding a small ecosystem.
That's why I never trust a manufacturer's "holds up to 50 lbs" label without testing. Those ratings assume ideal conditions — solid concrete, perfect installation, no vibration. Real walls are messier.
The Three Anchor Types I've Actually Tested
I've mounted planters on brick, poured concrete, wood siding, and drywall-over-stud. Each wall needs a different anchor, and each anchor needs a different test.
Toggle bolts are my go-to for hollow drywall. They spread the load across a wide patch behind the wall. But they only work if you hit the cavity cleanly. I once drilled into a spot with a hidden fire block and the toggle never opened. The planter sagged within a day.
Sleeve anchors work well in solid brick and concrete. They expand against the hole walls. The catch? You need the exact hole diameter. A 1/16-inch oversize hole can cut pull-out strength by half. I keep a caliper in my drill kit now because of this.
Lag bolts into studs are the gold standard for wood-framed walls. But studs are 16 inches apart on center, and not every planter bracket lines up. I've used a plywood backer board to bridge studs when the spacing fought me.
My Two-Week Pull-Strength Test (Step by Step)
Here's the exact process I used on my last install, a 24-inch copper rose planter on a brick wall. I ran this test for 14 days before hanging anything.
Day 1: Drill and Set the Anchor
Drill the hole at the anchor's specified diameter. Blow out the dust with a can of compressed air — dust is the enemy of friction. Set the anchor and torque it to spec. Don't guess. Use a torque wrench if you have one. I stripped a sleeve anchor once by over-tightening, and it spun freely in the hole.
Day 1–2: Static Load Test
Hang a bucket from the anchor and fill it gradually. I start with 25% of the expected final load, then 50%, then 100%. Wait 24 hours at each stage. Mark the anchor and wall with a pencil line so you can spot any creep or movement. If the line shifts, stop.
Day 3–7: Dynamic Load Test
This is the part most people skip. Static weight is one thing. Real planters get bumped, watered, and wind-loaded. I attach a ratchet strap to the anchor and give it gentle, steady pulls — maybe 20–30 pounds of force — several times a day. I also simulate wind by pushing the bracket arm side to side. You're looking for any wobble, cracking sound, or wall deformation.
Day 8–14: Observation Under Real Conditions
I hang a dummy load — usually a couple of sandbags in a bucket — and leave it for a full week. I check every morning and evening. I look for hairline cracks in the mortar, a gap between the bracket and the wall, or any rust streaks. On day 12 of my last test, I noticed a tiny crack radiating from one anchor hole. That told me the brick was softer than expected. I backed out, moved the planter six inches over, and used a wider backing plate. Problem solved.
The Three Deadly Mistakes I Made (So You Don't Have To)
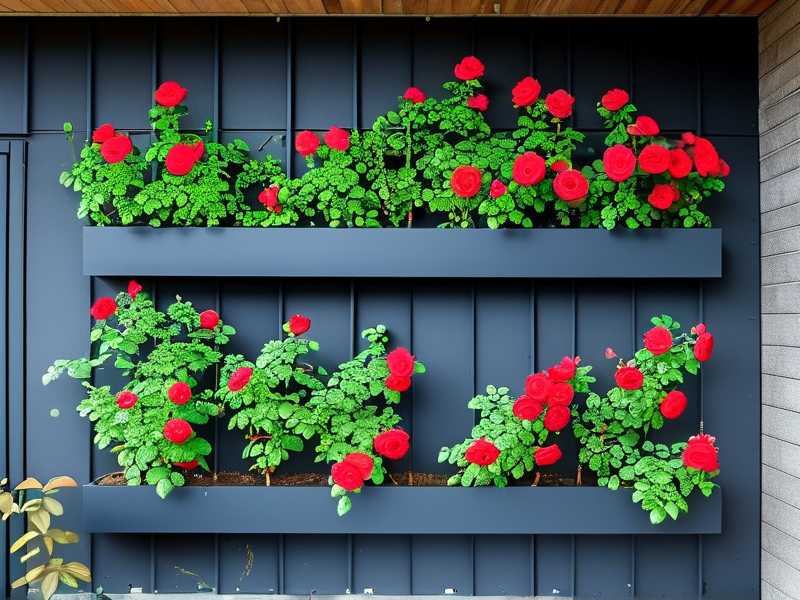
Mistake 1: Overwatering the Planter and Overloading the Wall
It sounds unrelated, but it's not. 90% of indoor plants die from overwatering, and outdoor container roses aren't far behind. Soggy soil weighs dramatically more than moist soil. I once watered a planter daily for a week, and the saturated soil added nearly 15 pounds. The anchor held, but the bracket bent. Now I use a moisture meter and water deeply but less often. The wall — and the rose — thank me.
Mistake 2: Wrong Light, Weak Growth, Panic Re-Potting
I put a climbing rose in a spot that got four hours of harsh afternoon sun. It stressed, dropped leaves, and I panicked. I repotted it into a bigger, heavier container and moved it. The new pot was 10 pounds heavier and the new wall location was weaker. I killed my third rose before I learned to match the plant to the light first, then match the planter to the wall. Get the light right before you drill anything.
Mistake 3: Using the Wrong Planter Material and Shape
Terracotta is beautiful but heavy and brittle. Resin is light but can flex and crack under UV. I tried a tall, narrow ceramic planter once — top-heavy and terrible in wind. It acted like a lever on the anchors. Now I use wide, low-profile planters or fabric grow bags inside a decorative shell. Lower center of gravity means less pull-out force. Simple physics, big difference.
What the Experts Say About Anchor Safety
The RHS recommends checking wall integrity before mounting any heavy container system, especially on older masonry. They suggest consulting a structural engineer if you're unsure. That's solid advice. I'm not an engineer, but I've learned to tap-test brick for hollow spots and to probe mortar with a screwdriver. If it crumbles, I move on.
The AHS adds that container plants need consistent moisture, which means regular watering — and that means consistent, repeated load cycles on your anchors. Your test should mimic that. One big pull isn't enough. You need days of small, repeated stress.
Anchor Selection Cheat Sheet (What I Use Now)
- Poured concrete or solid brick: 3/8-inch sleeve anchor, minimum 2.5 inches embedment
- Hollow brick or cinder block: Toggle bolt with a wide wing span, or a chemical anchor if the block is crumbly
- Wood studs: 5/16-inch lag bolt, at least 2 inches into the stud
- Drywall only (no stud): Don't hang a heavy rose planter. Use a floor stand or a freestanding trellis instead
I also use a backing plate — a small metal or plywood plate behind the bracket — to spread the load. It's cheap insurance.
Tools That Made My Testing Easier
A torque wrench. A moisture meter for the soil. A pencil and a level. A ratchet strap for dynamic pulls. And a notebook. I log the date, the load, and any movement. That log has saved me twice from repeating a bad mount.
Frequently Asked Questions
Can I test pull-strength without special tools?
You can do a basic static test with a bucket and sandbags. But for anything over 50 pounds, I strongly recommend a torque wrench and a ratchet strap. They cost less than repairing a fallen planter and a cracked wall.
How long should I wait before hanging the real planter?
At minimum, 7 days. I prefer 14. The first 48 hours catch installation errors. The next 5 days catch creep. The final week catches environmental stress like temperature swings and vibration.
What if my wall is old or crumbly?
Don't risk it. Use a freestanding planter system or a ground-anchored trellis. I've seen a 60-pound planter pull a fist-sized chunk of mortar out of a 1920s brick wall. It's not worth the repair bill or the safety risk.
Final Thoughts From My Garden to Yours
Testing wall-anchor pull-strength isn't glamorous. It's a bucket, a strap, and two weeks of patience. But it's the difference between a thriving rose wall and a disaster. Start with the light. Choose the right planter. Test the anchor like your plants depend on it — because they do. And remember, 90% of indoor plants die from overwatering, so keep that soil moisture in check. A dry-ish anchor test beats a soggy, heavy, wall-wrecking planter every single time.





