 bluename
How to Grow Cut Roses on the Balcony
Stop buying sad, droopy grocery store roses. You can grow better ones yourself at home. I killed my first three rose bushes before figuring out the simple trick: grow cut roses on the balcony with afternoon shade and a pot that breathes. Here's exactly what worked for me over two weeks.
Why Balcony Roses Die: 3 Beginner Mistakes I Made
I remember staring at my first rose, totally brown and crispy. I thought I was helping. Turns out, I was drowning it. Most of us kill plants with love. The Royal Horticultural Society (RHS) states clearly: "90% of indoor plants die from overwatering." Roses are no exception. I learned this the hard way.
Mistake #1: Overwatering Like It's a Swimming Pool
I used to water my balcony roses every single day. I figured, "It's hot, they need it." Nope. I checked the soil after two days. It was like wet cement. My roots suffocated. The leaves turned yellow. Then they dropped off. I felt stupid.
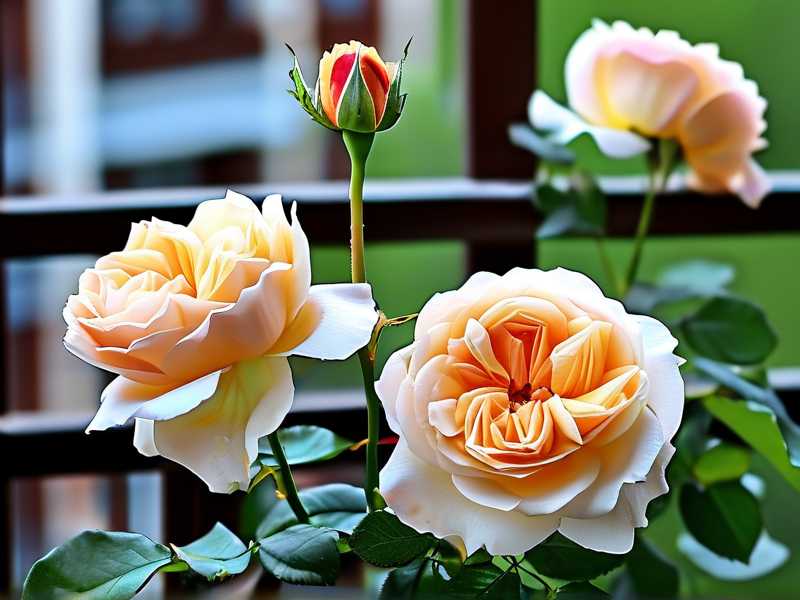
What I fixed: I bought a cheap moisture meter from Amazon. Now I only water when the top 2 inches of soil feel bone-dry. For me, that's every 3-4 days, not daily. You need to check before pouring. Honestly, neglect is better than over-love here. The American Horticultural Society (AHS) also suggests sticking your finger in the pot before watering—simple but lifesaving.
Mistake #2: Lighting That Burns or Starves
I put my first rose pot in full direct sun on my south-facing balcony. It got scorched within a week. The leaves curled up like little claws. I moved it to full shade. Then it got leggy and refused to bloom. Total failure.
What I fixed: Roses need 6 hours of morning sun, but they hate scorching afternoon heat. I repositioned my pot so it catches light 6 AM to noon. Then it stays shaded after 2 PM. The difference was immediate. Within two weeks, new growth started appearing. You need to watch how the sunlight moves across your balcony.
Mistake #3: Wrong Pot Choice
I used a cheap plastic nursery pot. It held moisture like a bucket. The bottom stayed soggy. Roots rotted again. I literally watched my second rose die in that pot. Simple solution: switch to unglazed terracotta or fabric grow bags.
What I fixed: I chose a 14-inch terracotta pot with large drainage holes. It breathes. Water evaporates naturally from the sides. No more wet feet. The roots stay happy. Also, I lifted the pot off the ground using pot feet so the drainage hole isn't blocked. The RHS recommends this for all container plants.
My Step-by-Step Process: Growing Cut Roses Over 2 Weeks
I started with a bare-root rose variety called 'Grace.' It's a David Austin English rose with that classic perfume smell. I chose it because it's compact and blooms repeatedly. Here's exactly what I did.
Week 1: Prepping the Pot and Planting
I filled my terracotta pot with a mix of 50% potting soil and 50% perlite. Critical step. Regular garden soil compacts and drowns roots. The perlite keeps air pockets. I added a handful of slow-release rose fertilizer for nutrients.
I planted the bare root with the graft union about 2 inches above the soil line. Many beginners bury it too deep. Don't. The graft needs to stay exposed. I watered it once thoroughly after planting, then left it alone for 3 days. No extra water. Just patience.
Day 1 observation: Nothing visible. But I checked the soil daily. It stayed slightly moist, not wet.
Day 4: I noticed tiny green buds swelling at the base. I was excited. I didn't touch anything. I just watched.
Week 1 end: The buds started opening into new leaves. They were light green and fragile. I felt like a proud parent. I also added a balanced liquid fertilizer at half strength. The RHS says to start feeding after you see new growth.
Week 2: Encouraging Strong Cutting Stems
By day 10, my rose had 4 full new stems. They were a bit spindly. I knew I needed to make them strong enough for cut flowers. So I pinched off the first flower buds. Painful but necessary for bigger blooms later.
Day 12: I gave the plant a deep soak. I let water run until it came out the bottom of the pot. Then I removed the saucer so the pot never sat in water. This stimulates roots to go deep and creates thicker stems.
Day 14: The stems were about 18 inches tall, sturdy, and dark green. I had 3 promising buds that looked like they'd bloom in a few days. I started my successional watering schedule: deep water every 4 days only.
Practical Care Tips I Learned from Killing 3 Plants
Watering schedule: I use a simple rule. Pick up the pot. If it feels light, water. If it feels heavy, skip. This saved me from guessing.
Feeding: Roses are heavy feeders. I use liquid seaweed fertilizer every 2 weeks during growing season. Nothing complicated. I mix it in a watering can and pour. One second of effort, big difference.
Deadheading: I remove faded flowers immediately. If I leave them, the plant thinks it's done blooming. Cut the stem all the way down to the first five-leaflet leaf. This forces new growth for more cutting stems.
Pest control: Aphids visited my balcony in week 2. I didn't use chemicals. I sprayed them with a strong stream of water from the hose every morning for 3 days. Gone. The AHS recommends neem oil if it gets bad, but water works for small infestations.
Advanced Tips for Continuous Cut Flowers
Succession cuttings: I don't cut all stems at once. I take one stem per branch, leaving at least 2 sets of leaves on the plant. This keeps the rose producing all season. I aim for one cutting every 2-3 days.
Morning harvest: I always cut my roses at 6 AM when stems are fully hydrated. They last 5-7 days in a vase compared to 2 days if cut in the afternoon. The RHS confirms this timing.
Pruning for shape: After a bloom cycle, I cut back leggy stems by one-third. This encourages bushier growth from the base for more flowers. Think of it like giving the plant a haircut.
3 Common FAQs About Balcony Cut Roses
Can I grow cutting roses in only 6 hours of light?
Yes, but only if it's morning light. My balcony gets 6 hours of morning sun. Orchids would die, but roses handle it fine. Afternoon sun is the killer. I found that 4-5 hours of morning sun still works if you pick a shade-tolerant variety like 'The Fairy.'
How do I treat powdery mildew on balcony roses?
I got white powder on leaves once. I panicked. Solution: mix 1 teaspoon baking soda with 1 quart water and a drop of dish soap. Spray every 5 days for 2 weeks. Prevent it by spacing pots for air circulation. The AHS says mildew loves still, humid air—so keep fans on hot days.
What size pot is best for repeated cutting?
Minimum 14 inches wide and deep. My first pot was 10 inches. It dried out too fast and stressed the plant. Bigger pots let roots spread, meaning more stems for cutting. Plastic pots work if you drill extra holes, but terracotta is my go-to because of breathability.
My Final Takeaway
Growing cut roses on the balcony isn't rocket science. It's about patience and avoiding those big beginner mistakes. I failed 3 times before getting it right. Now I have a constant supply of fragrant blooms for my kitchen table. Start with one pot, a moisture meter, and morning sun. You'll be cutting your first stems within two months. Trust yourself. Your balcony can grow better roses than any store.





